This model takes a back seat to the 33 inch TOS Enterprise, but any time I find myself some free time (I'm waiting for materials to be shipped to me to make molds and cast the first major parts of that model), I'll throw some effort in this projects direction.
I printed out templates and started cutting out parts. This is a few of those set in place...
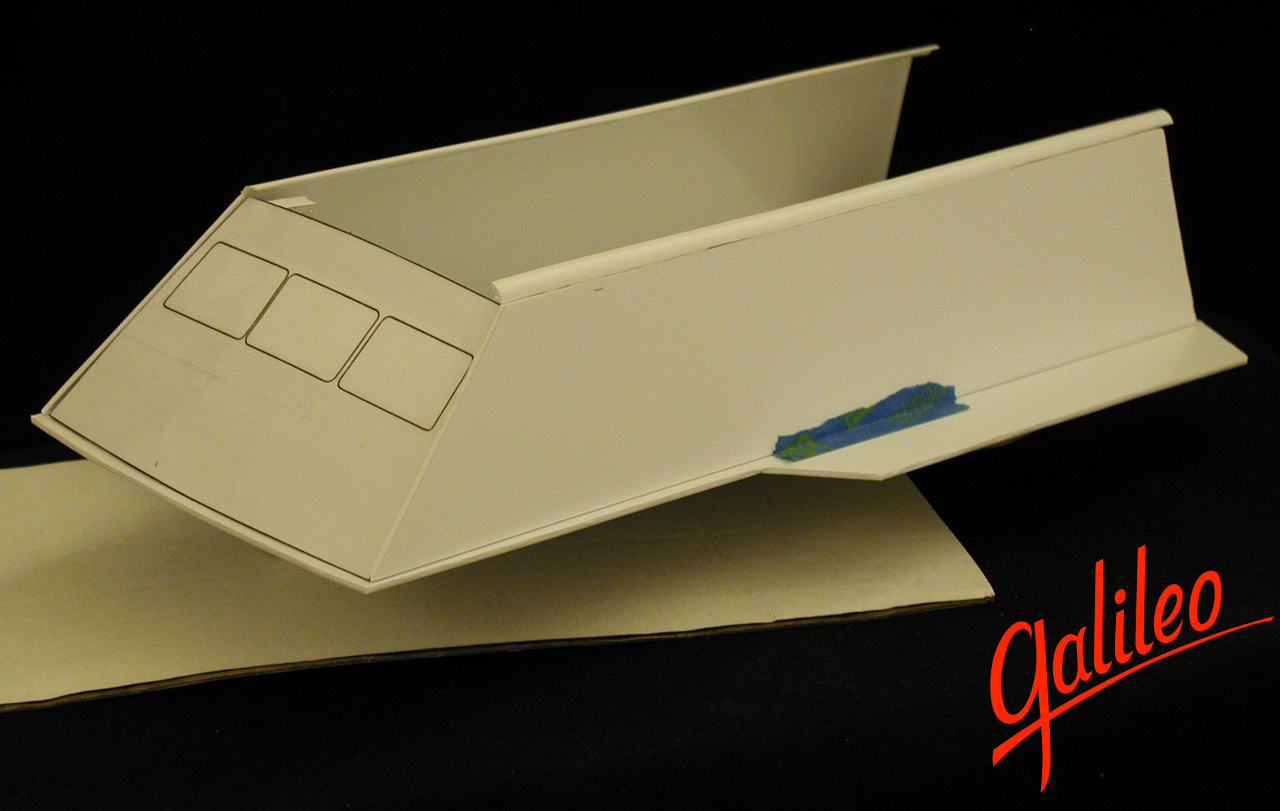
Click to enlarge
With the rear landing pad it'll be slightly over 11 inches. And like a lot of my research, this is a study of the model as a model, so because the original didn't have an interior, neither will this one. I did an interior set study for Starship Exeter about 10 years ago and there is tons of info about the large scale mockup, so I felt like this filming model should get some attention.
I've decided not to make the face plate removable. This isn't going to be a lit model, so there isn't a good reason to include this feature on this build. I might just include a panel line representing where the seem would have been and hold off on replicating the functionality of the studio model for a studio scale build (if I ever get around to it).
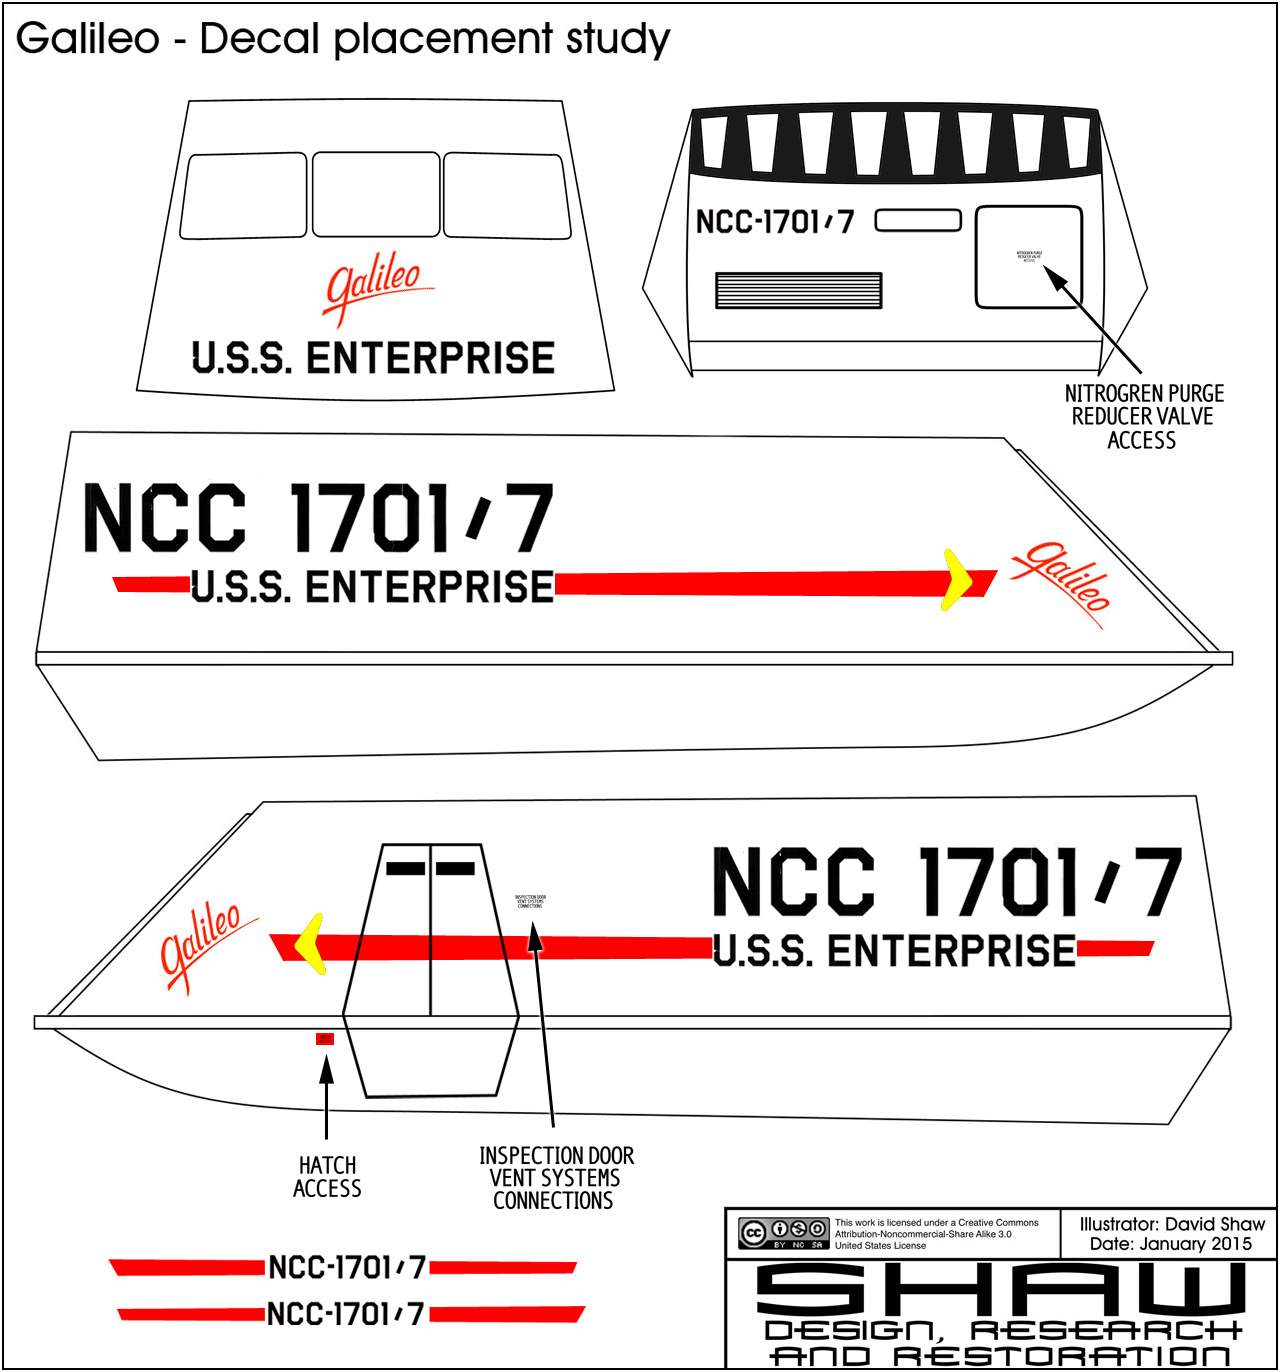
I've also been studying the decal placement on the original model, noting differences from other decals used in the series. One thing I noticed is that Galileo seems more italicized than on the larger mockup.
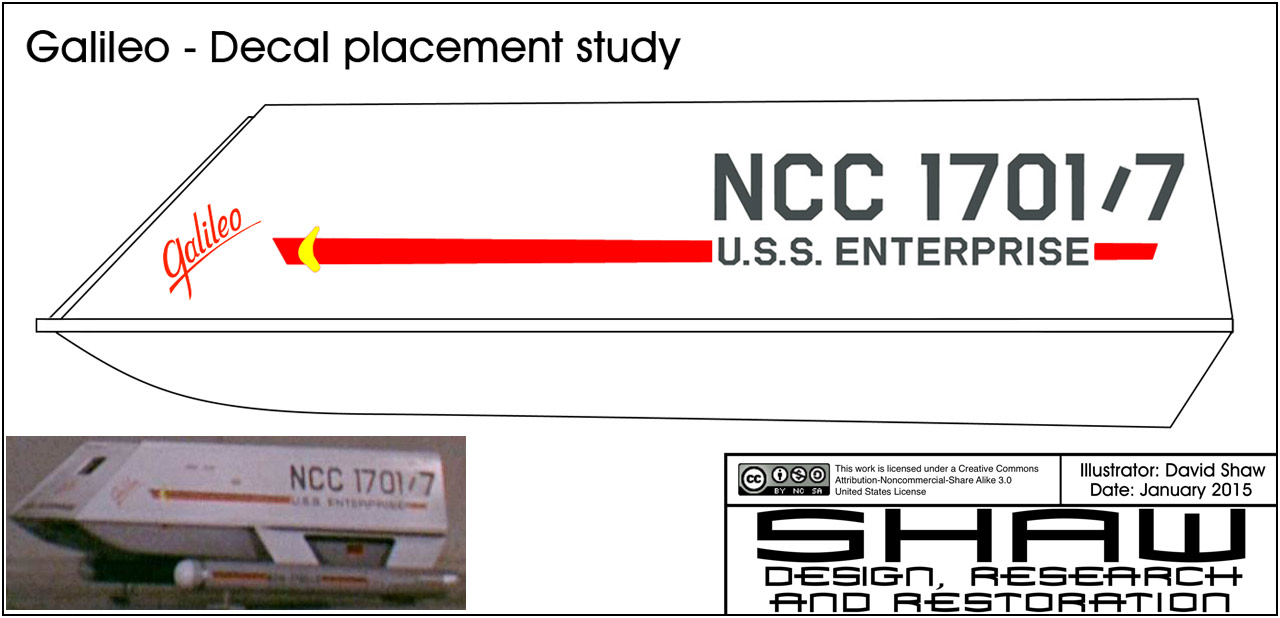
Click to enlarge
I'll keep working at it until I feel it's right.
Some more progress shots...
Most everything in those images is either taped together or set in place... there is still a long ways to go.
Here are a few more progress shots...
I've started on the nacelles and the supports. Right now I'm mainly making sure that a slot fit attachment system on them works correctly before worrying too much about the final contours and details of the parts. The idea is that the nacelles will be the last thing attached after all the painting is done. That way I won't have to fight the model to make sure things are getting even coverage or making sure areas are correctly masked.
The rear landing strut is, at this point, a work in progress... maybe even a first try. It didn't take that long to make, so I might take another stab at it.
A little more progress...
... mostly on the underside of the model. The top looks like it'll come together without much work, so I'm putting off gluing those parts in place until I finish dealing with the bottom.
A little more progress...
... again, mostly on the underside of the model.
A little more progress... this time testing the arrangement of some of the aft elements and a look at the underside of the model.
[center]
The pin on the underside is held there by a super strong magnet, which is going to be the mounting point for the model to attach to the display base.
I threw together a quick comparison of an early drawing of the studio model compared to Phil Broad's drawings of the large scale mockup that I figured you guys might find interesting (keeping in mind that mine is still a work in progress)...
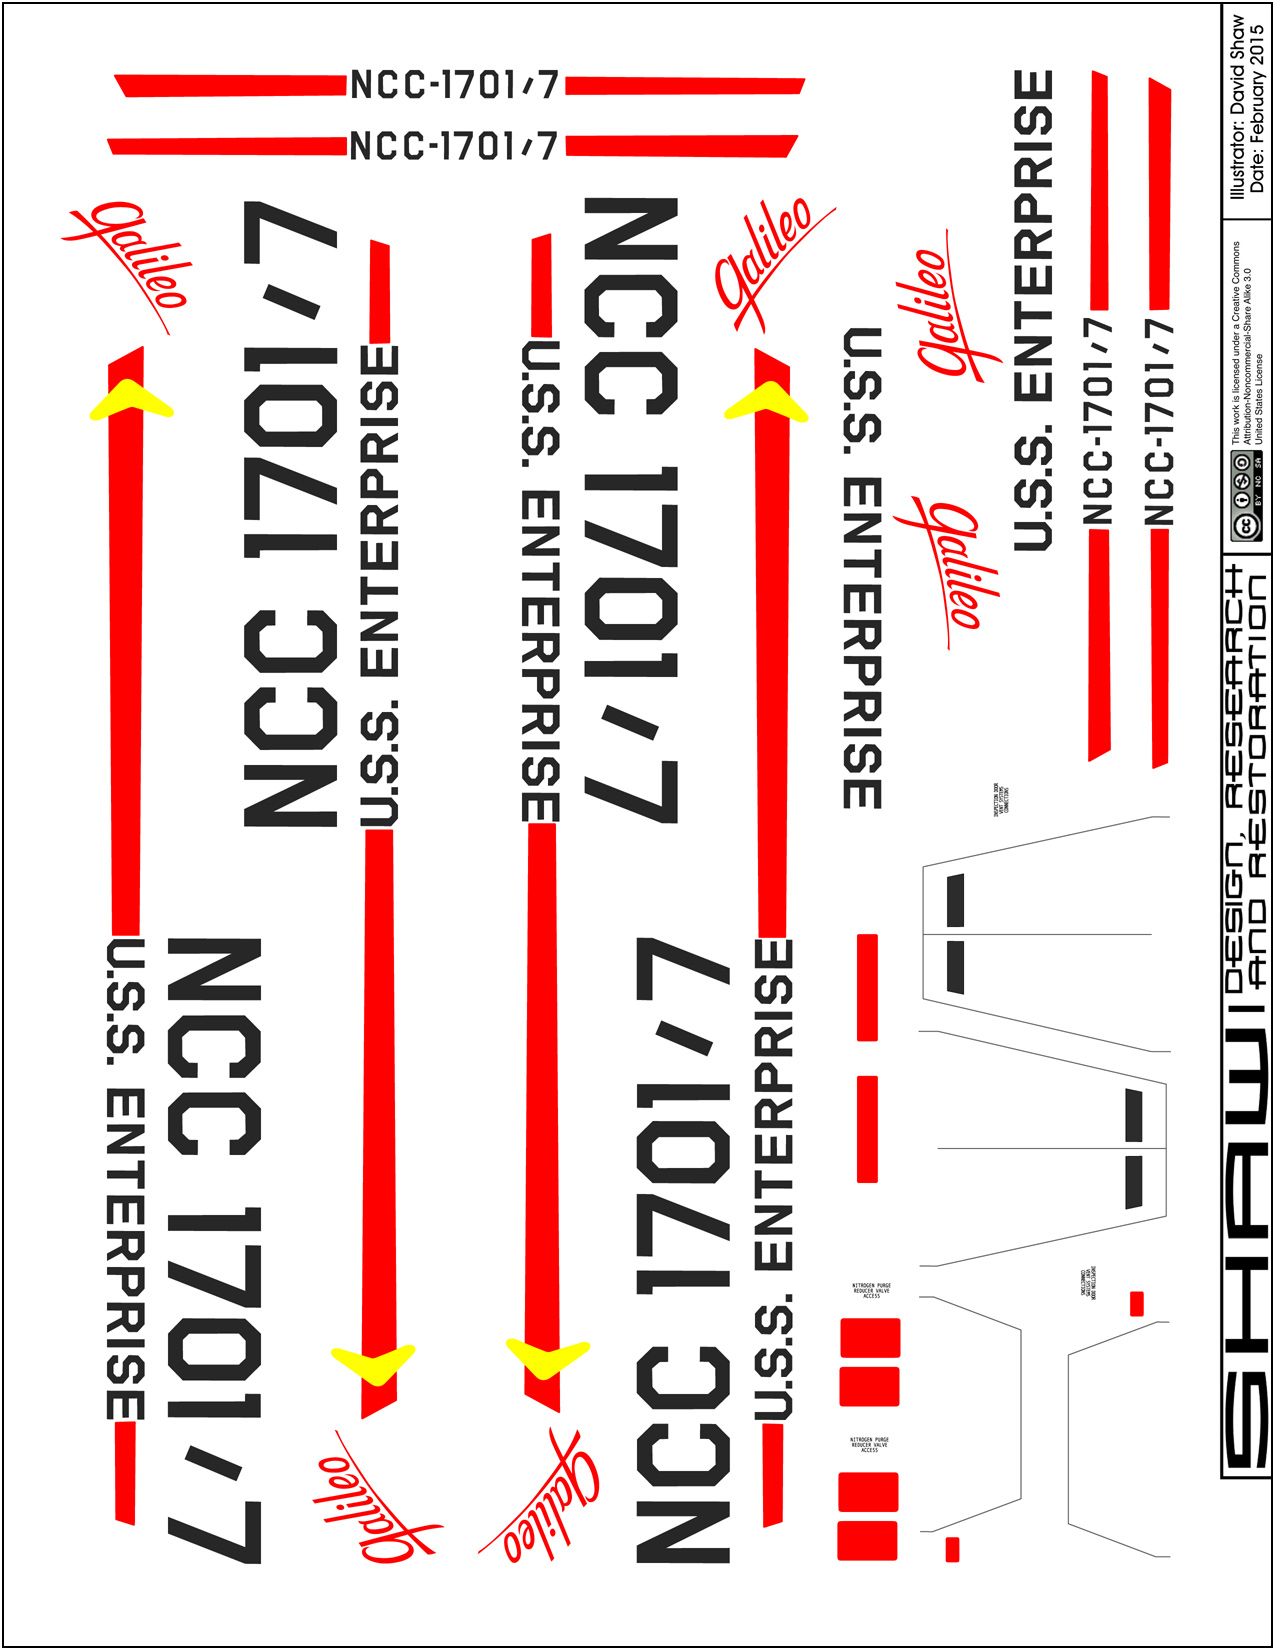
Because I'll be drawing all this stuff out by hand in an EPS file to make the decals (I don't like using pre-existing fonts for this type of thing) I want to make sure I'm happy with the placement of all the elements first.
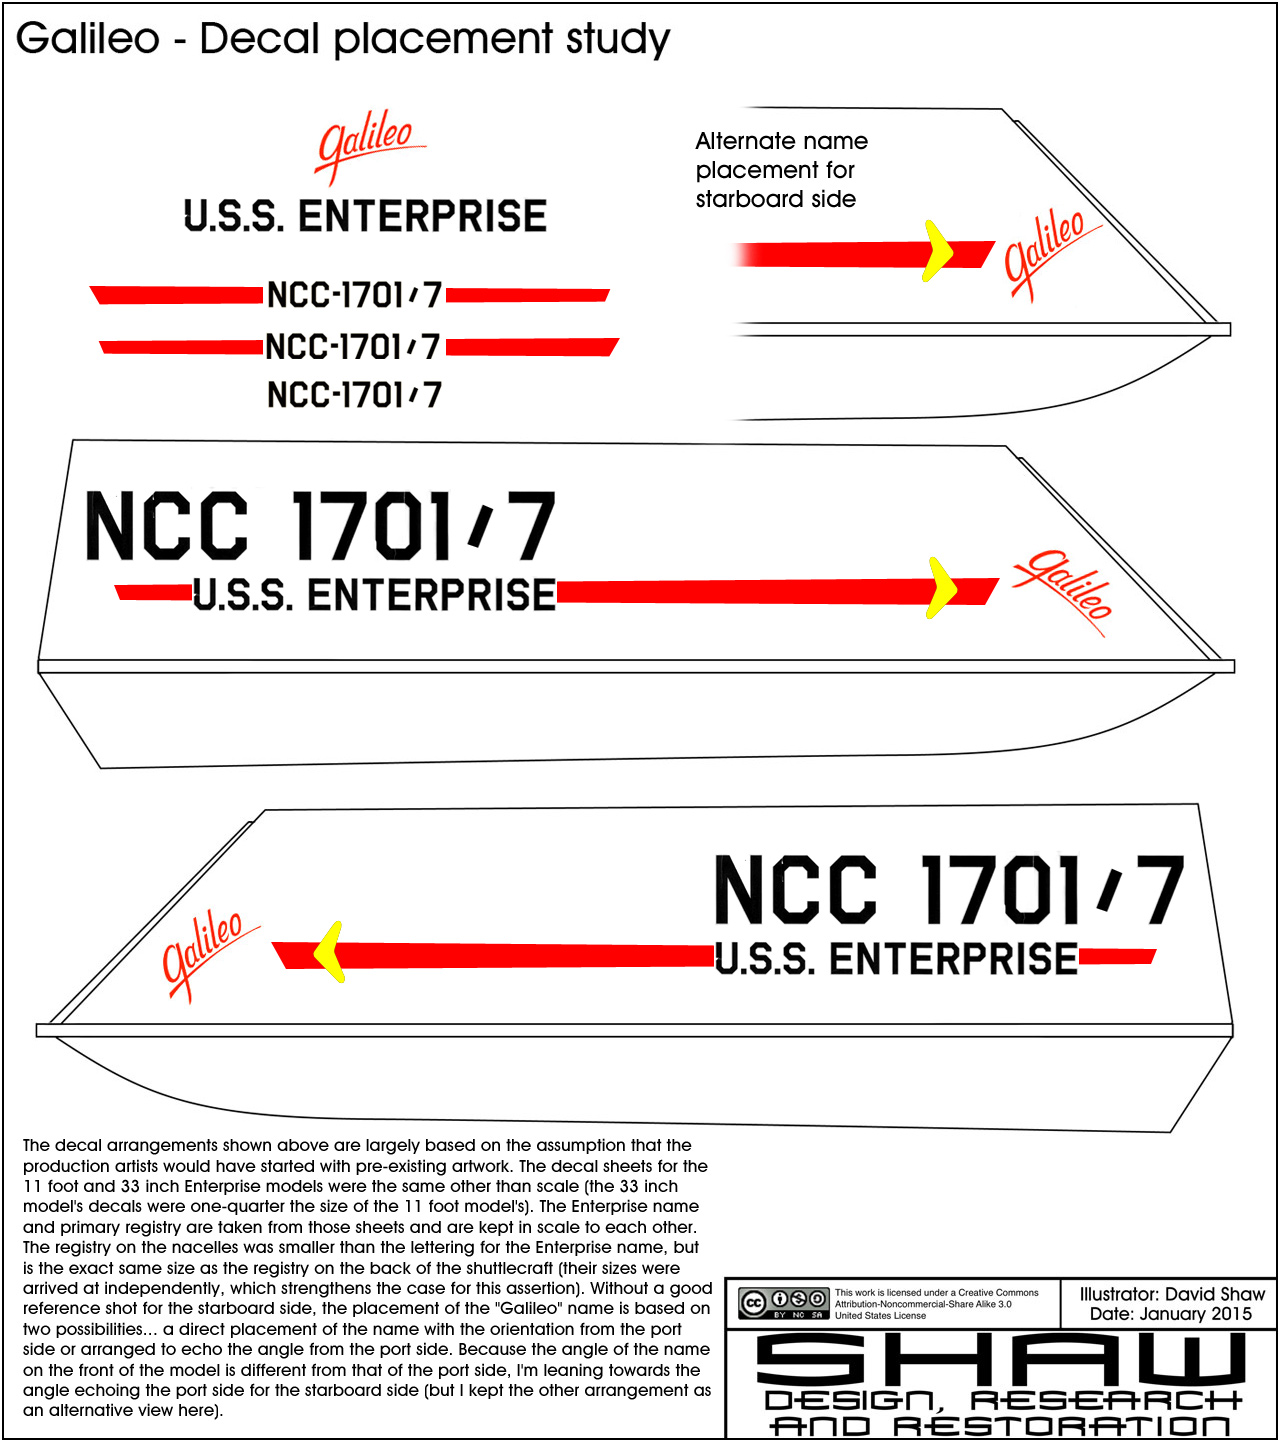
Click to enlarge
I'm actually pretty happy with what I have right now and will most likely commit to it by starting the actual decal sheet soon.
I glued together some of the upper hull elements. Haven't worried about puttying or sanding yet, I want to let the glue fully cure for a while. It is being held up in these images by the magnet inside that will eventually hold it to the display stand.
Someone on another forum has asked about the lines on the top of my model. These represent seam lines that were visible on the studio model because they weren't fully filled in. They were hardly visible on the original and (after painting) should be hardly visible on my model.
Here is what has been added in the way of panel lines on my model...
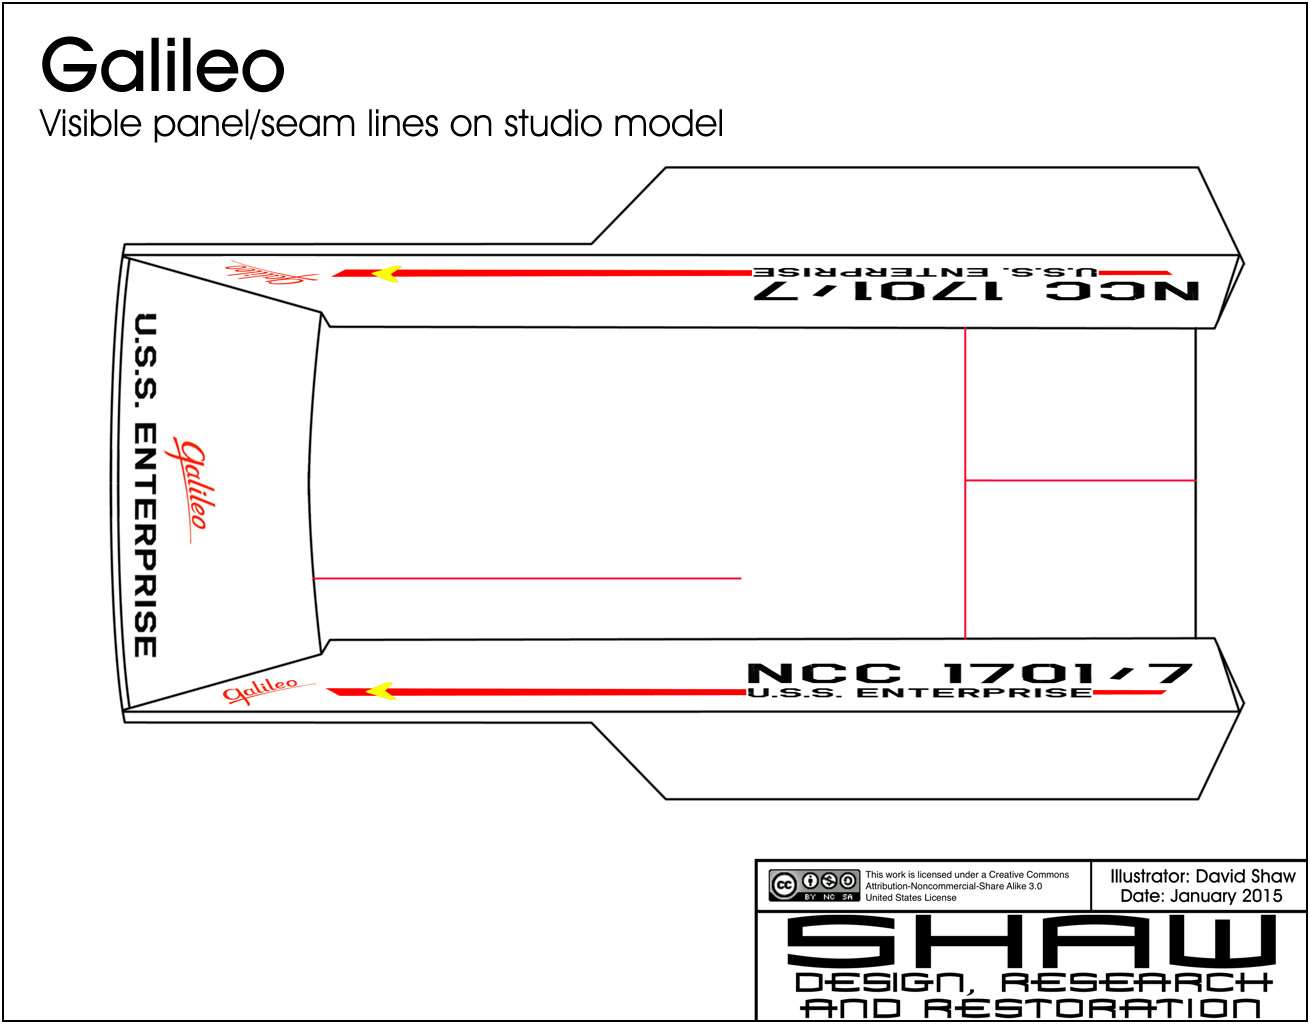
Click to enlarge
Back to the putty-sand-prime routine... mostly getting the aft elements together. I had improvised some aspects while cutting parts, which got some of the angles off when they came together... but not off by enough that I wanted to attempt to pull everything apart.
Some more progress shots...
I decided to test some of the rear detail parts to see how they looked in their approximate final positions...
Looking at the best shots I have of the studio model, it looks like the production team used existing signage decals from the decals sheets of the two Enterprise models. So this is most likely what I'll have in those spots on my study model...
Click to enlarge
Once I have a chance to print out the decal sketches and do a test arrangement of them on the model (to make sure I didn't miss anything in my measurements), I'll start in on redrawing them for the final sheet.
Some more progress shots...
I wanted to see how the model looked with the nacelles in place, but not sitting. I taped the supports to the underside of the wings and they are just slot fitted to the nacelles (the actual gluing won't happen until after the painting is done), and then positioned the model on a bar. Here is how she looks so far...
There is still a long ways to go, but it feels like I'm heading in the right direction with most of it.
So rather than print the test sheet of decals (because I'm out of ink), I figured I'd try photoshopping them onto one of the recent shots of my model I took to see how it looked...
It seems like a good starting point, but I'll still wait for the printed test to make sure before I invest a ton of time in redrawing all that stuff for the final sheet.
And I was wondering what the old AMT box might have looked like with my models...
Of course it'd look better with a finished shuttlecraft (and actual decals and paint), but I was curious to see how it might have looked.
So that's about where this project currently stands and I figured I'd share this with you guys .