


A 1/1000 Detroyat Class Heavy Destroyer, conversion/scratchbuild.
Parts used:
A 1/1000 T.O.S. Enterprise kit from Polar Lights.
A pair of Federation Models- Colored inner bussard scoops.
1- JT Resin Bridge and B/C deck.
And a Shapeways printed secondary hull. One that I 'designed' converted and had printed out. The schematics were taken from:
https://www.shipschematics.net/startrek/ ... at_upg.jpg
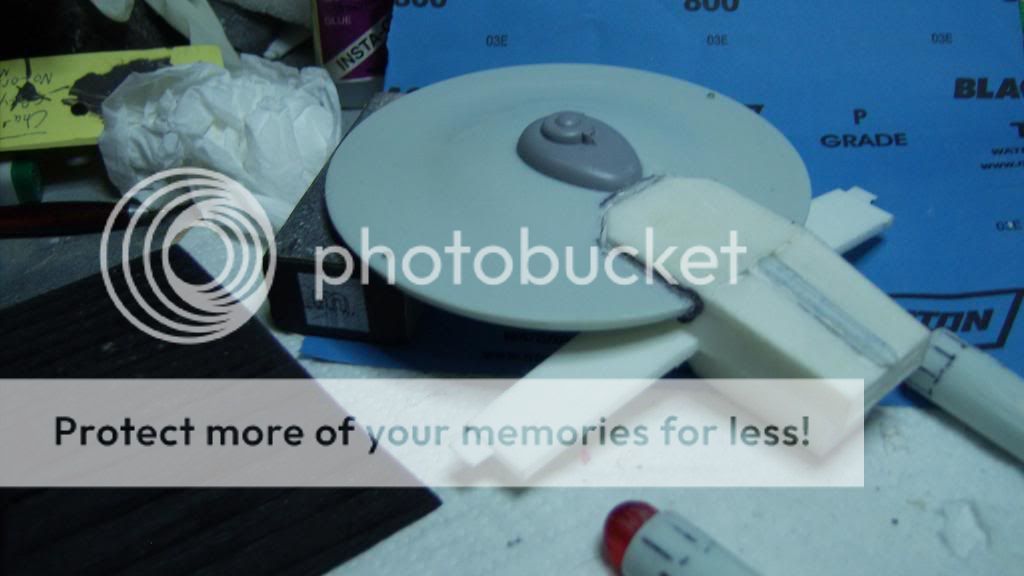
First Photo- Started out, a short while ago. My shapeways print is the item sitting on the red handled band saw.

Second Photo- Some work completed- my shapeways print, turned out to be slightly hollow. This error apparently occurred during the conversion process from my computer to theirs. The result being that I needed to fill in this gap on the notion that it would've been a potential future problem. I removed the Impulse spinal mount and mixed a fairly sizable portion of Apoxie Sculpt.
Next was determining how much of the primary hull was to be taken out to allow my print to fit. Measure once, cut twice- and still too short. Seems to be my motto.

Third Photo:
The primary hull has been sectioned and cut out using some flat snips and plenty of filing. At this point I lined it up with the rest to get a notion of the final product. I've reattached the impulse spinal mount to the secondary and after much labor sanded down the print. The plastic that Shapeways uses to print their products is most resistant to abrasion. Large grit, and plenty of sweat.

Fourth Photo:
This is a few days ago. At this point I decided to reinforce the secondary to the primary using some hand bent brass rod. After getting a drill bit gummed up drilling holes in the secondary I was able to superglue it in. The point being that I wanted there to be more than just the attachment between the two hulls to reinforce their bond. JT Resin bridge kit is attached, along with the lower sensor dome to the lower of the primary. And preps for the navigational lights.
The two warp nacelles have had a bit more work done to them. Prior to the inner bussard scoops, I had to drill appropriate holes to insert the pylon slots into. I never did like the position of the Starship Modeler version of the kit which had the nacelles at unusual positions (https://www.starshipmodeler.com/trek/ss_det.htm) So I decided to redo the nacelles into a much more logical positioning.

Fifth Photo. The primary has been glued together using the standard styrene glue. Which necessitates the many clips to close out gaps as much as possible. At this point, the secondary is still not attached to the primary. This is to prevent the very likely possibility of an uneven join.


 [/URL]


