Spindrift from Land of the Giants by Polar Lights

Discuss all non Star Trek related topics here.
Post Reply
User avatar
trekriffic
Admiral of the Fleet
Posts: 2746
Joined: Mon Oct 01, 2012 4:16 pm

Re: Spindrift from Land of the Giants by Polar Lights

Post by trekriffic »

Here we go... on to the passenger comm stations....

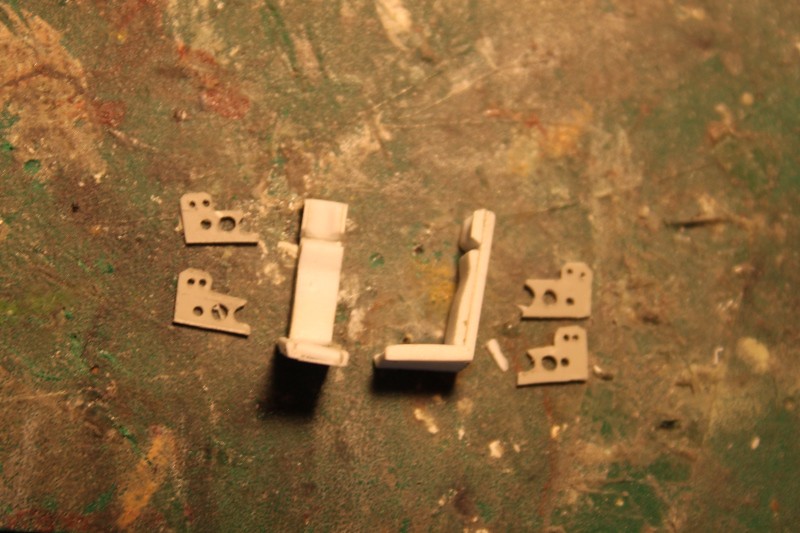
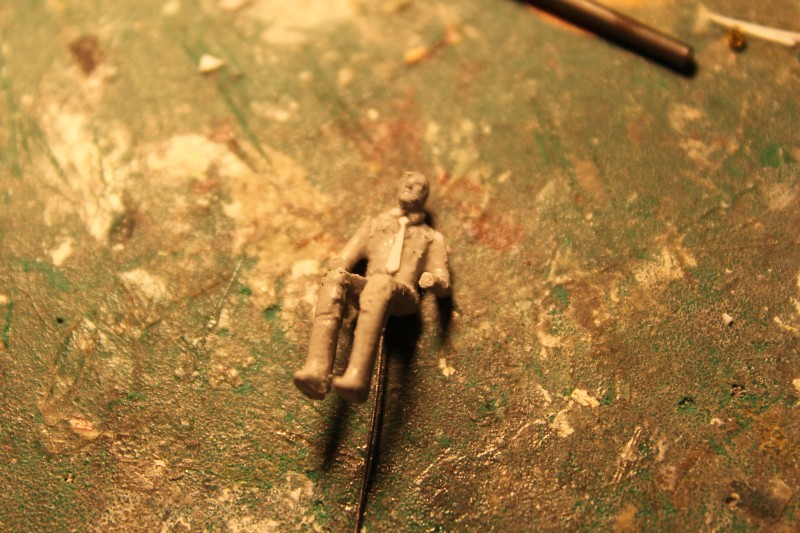
I used styrene sheet and round tubing to scratch build the passenger communication stations. The discs are slightly oversized which was fine since I planned to sand them down to match the circumference of the little shrouds:

ImageMaking the Comm Stations by trekriffic, on Flickr

All finished...

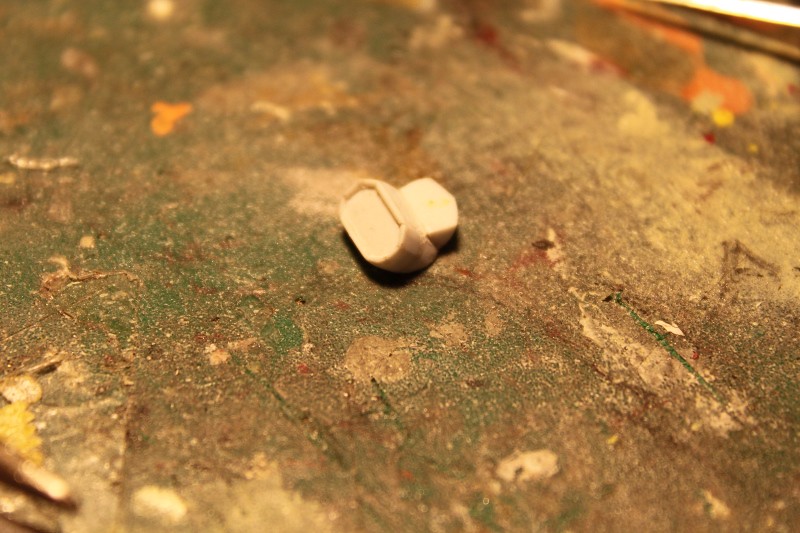
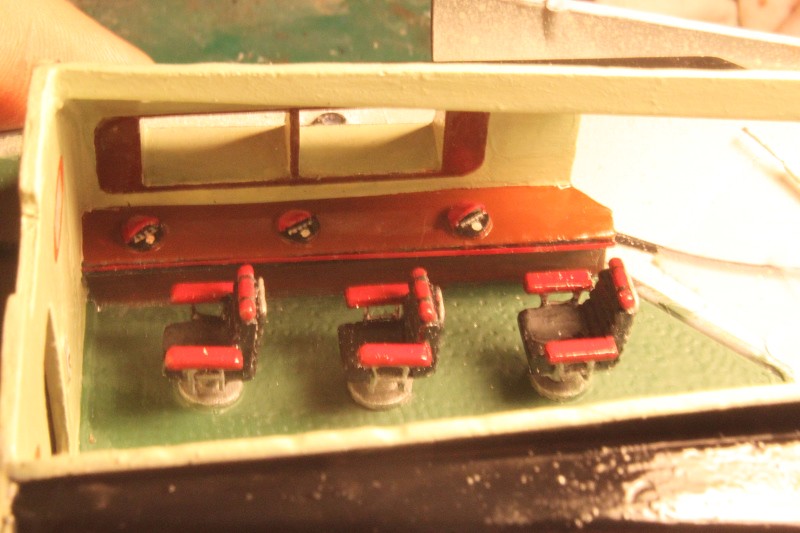
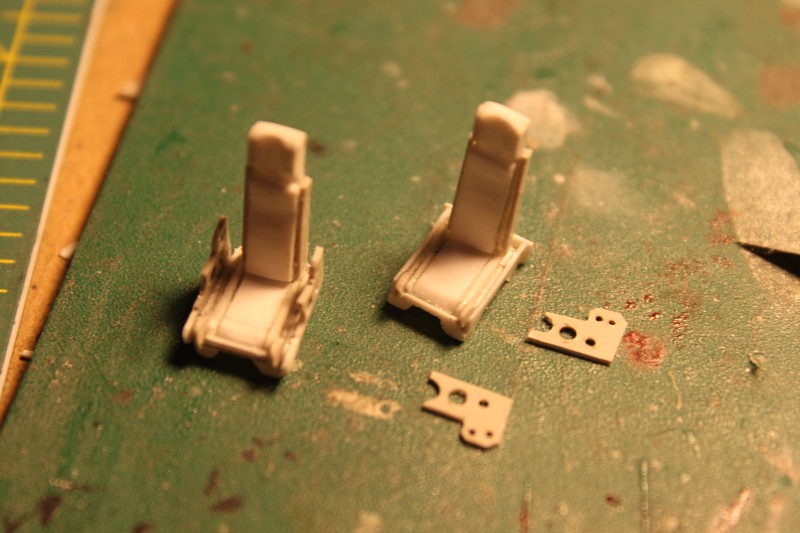
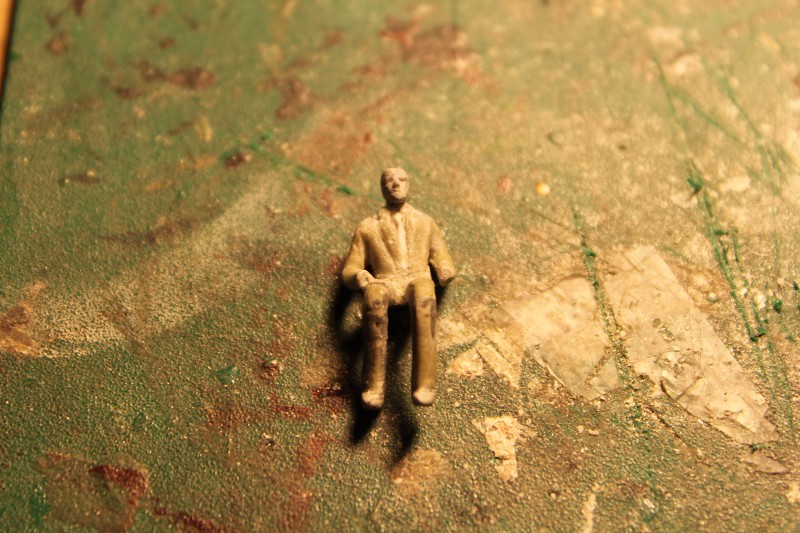
I used black and reddish-orange enamels to brush paint these tiny comm stations. The white buttons were dotted onto some leftover clear decal material using a pointed toothpick. Once the paint dried the decals were sealed with Future before being soaked in warm water and floated into place on the consoles:

Image
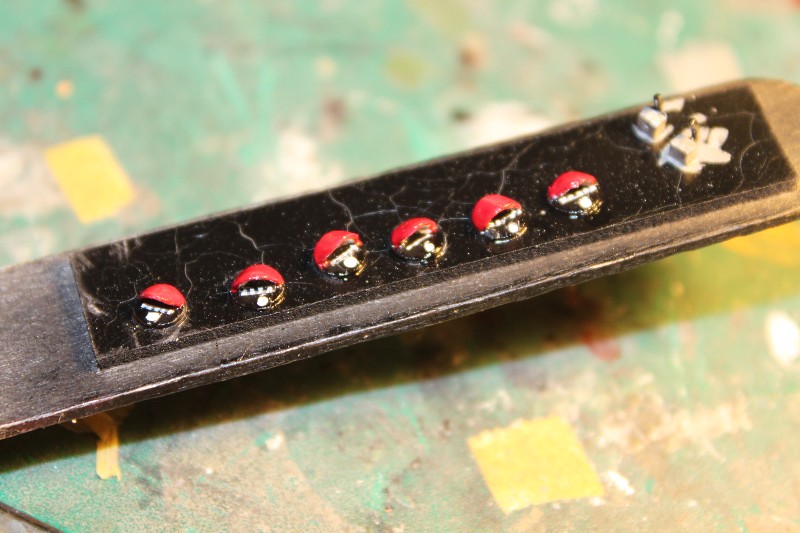
Finished Comm Stations by trekriffic, on Flickr

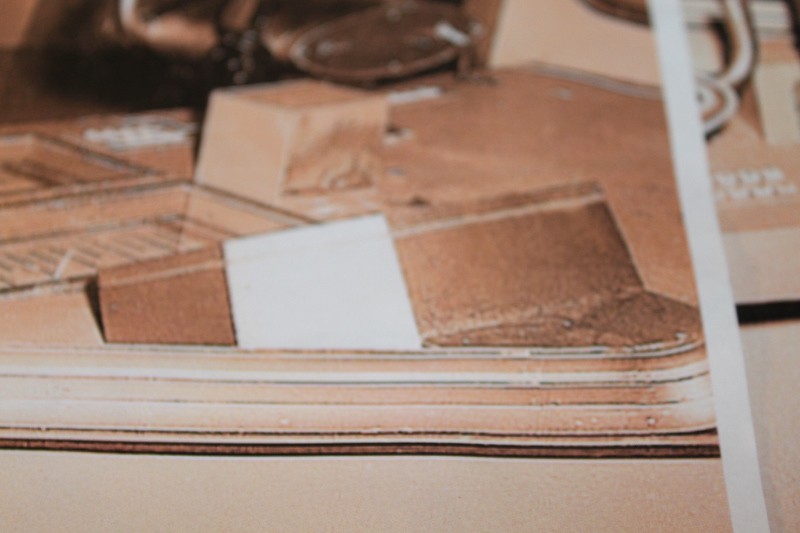
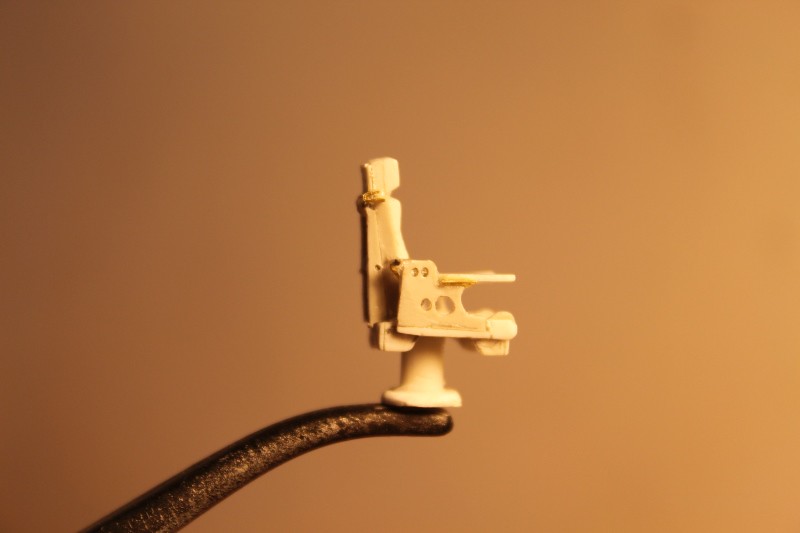
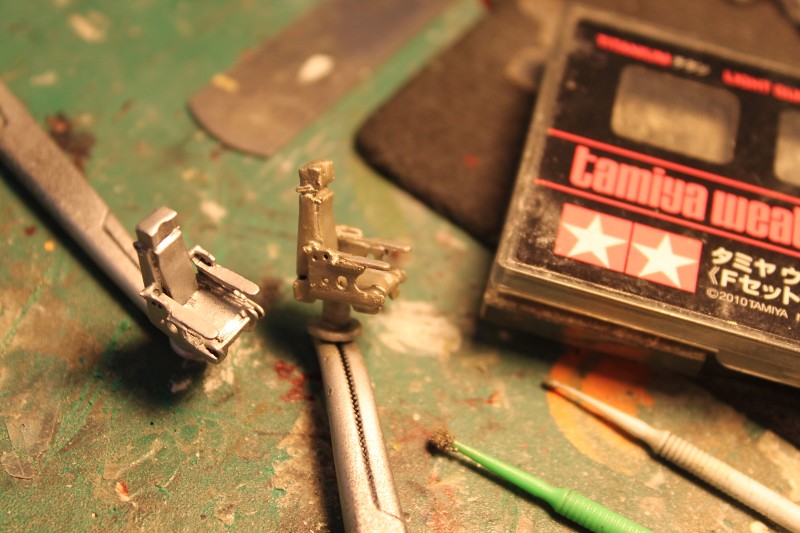
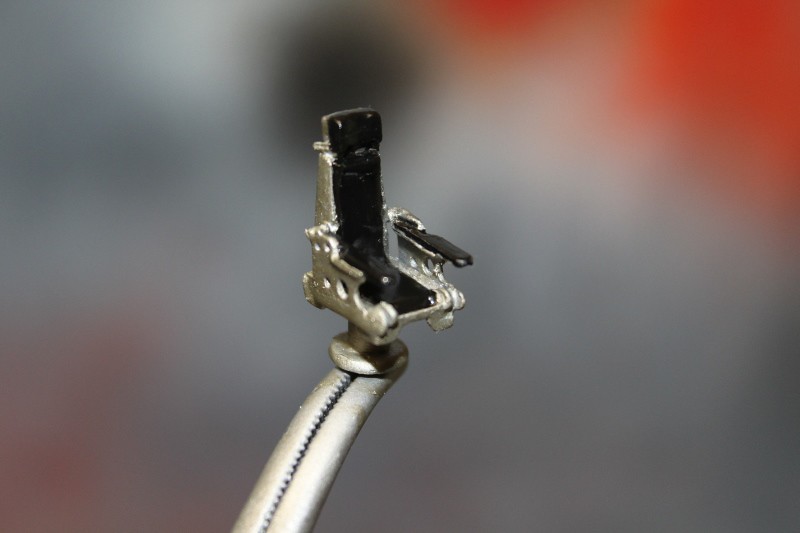
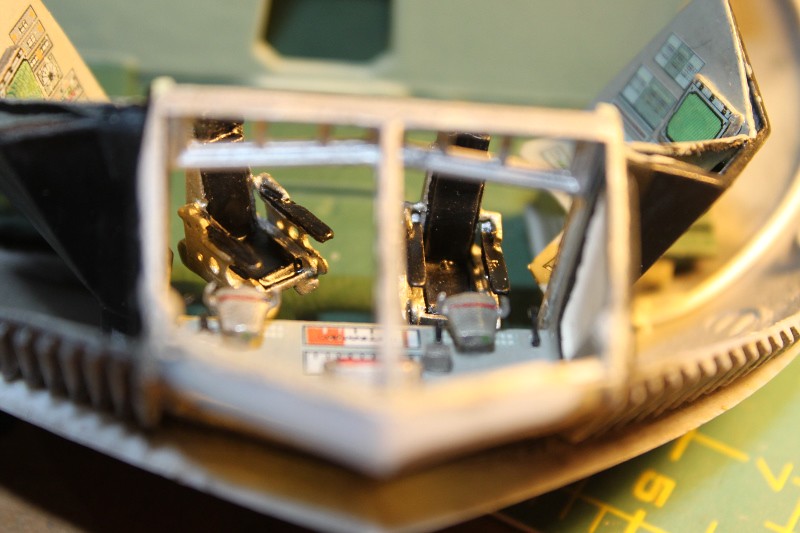
To the right in the above photo you can see the throttle joysticks for the pilot and copilot. These are made from brass rod and a teeny, tiny brick of polystrene. The brass rod is bent at an L angle and brushed with black Tulip fabric paint so they look more like handles.

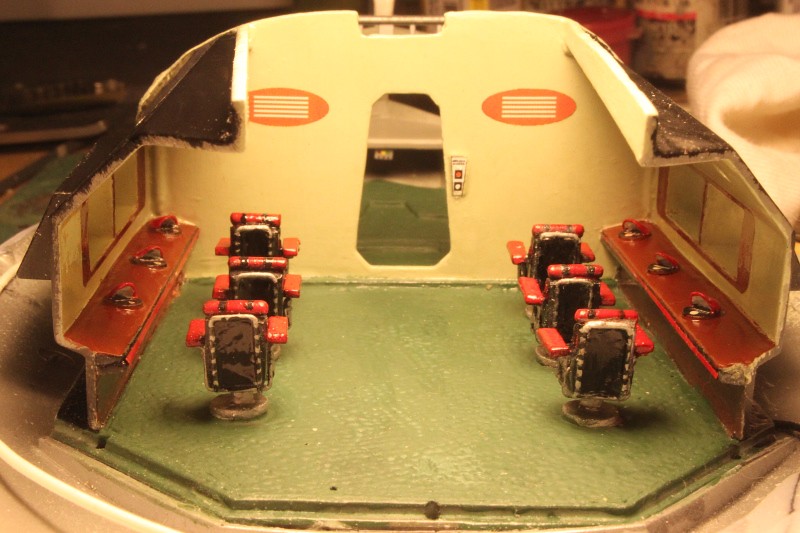
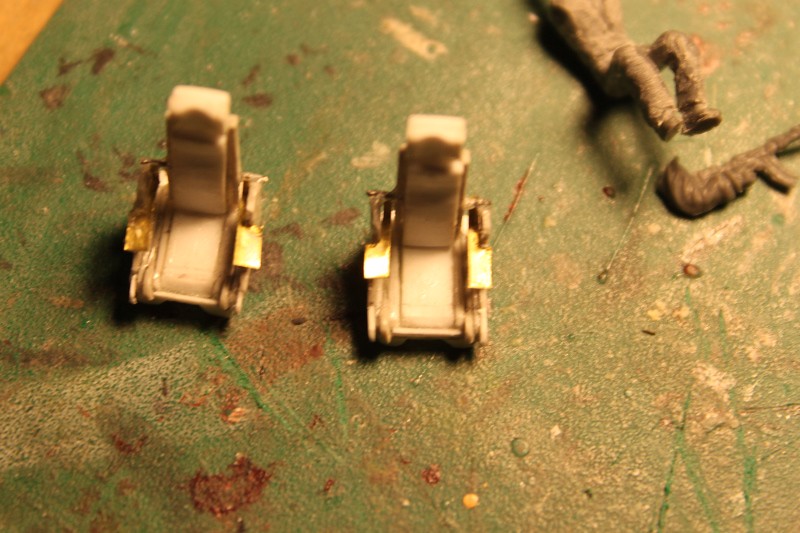
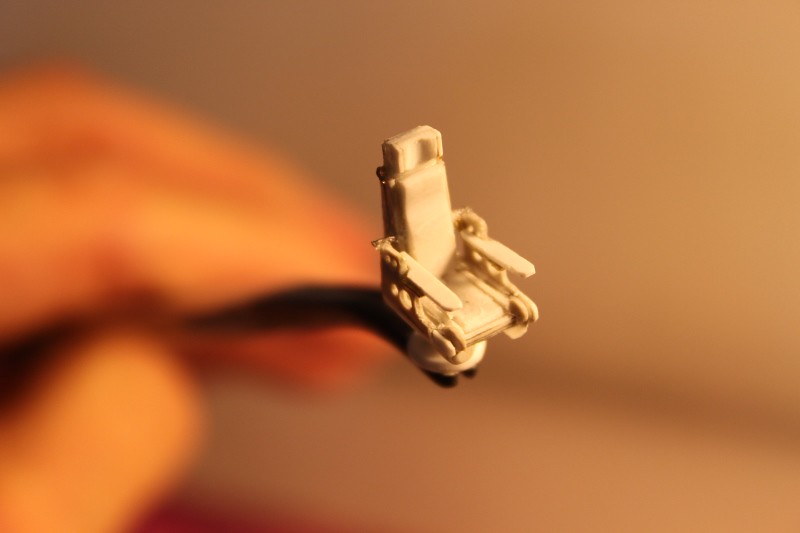
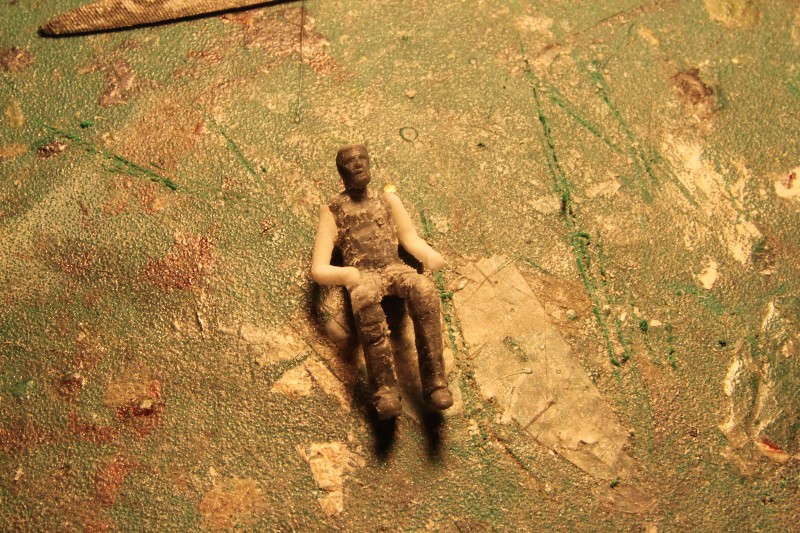
The comm sttaions after gluing in place with epoxy. Overall I'm pretty happy with how these turned out. Funny, they remind me of ladybugs, the size is about right:

Image
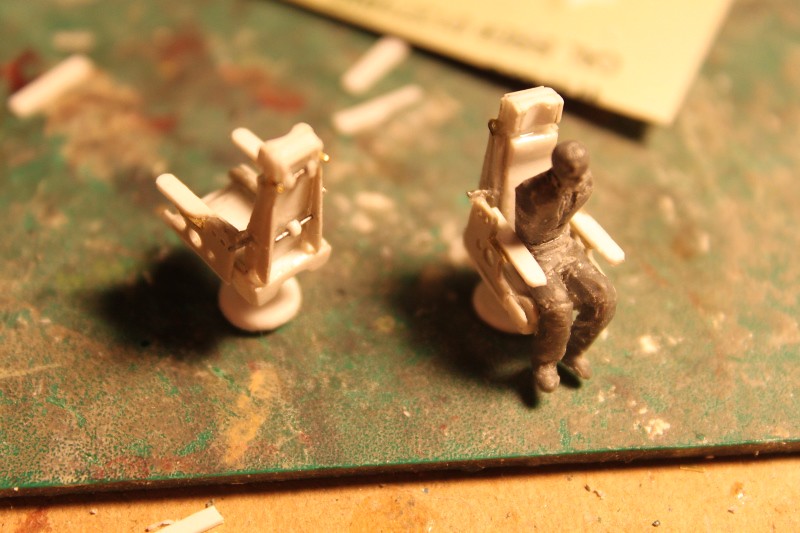
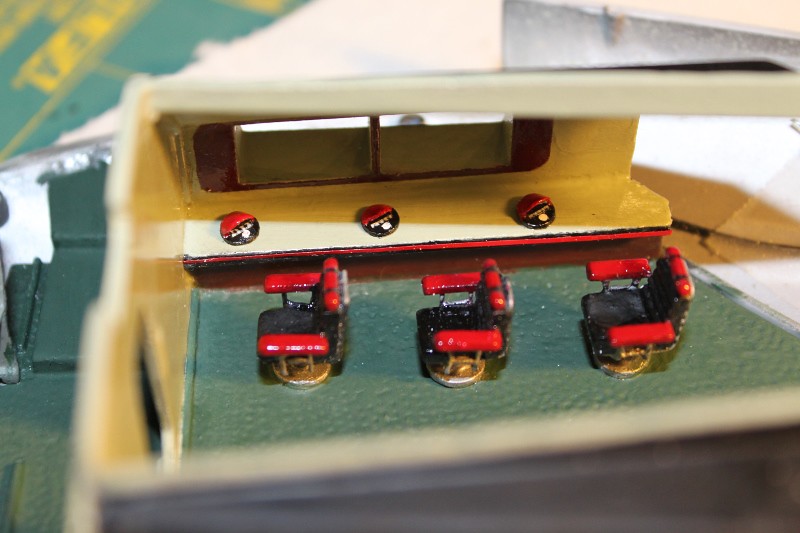
Passenger Chairs and Comm Stations by trekriffic, on Flickr

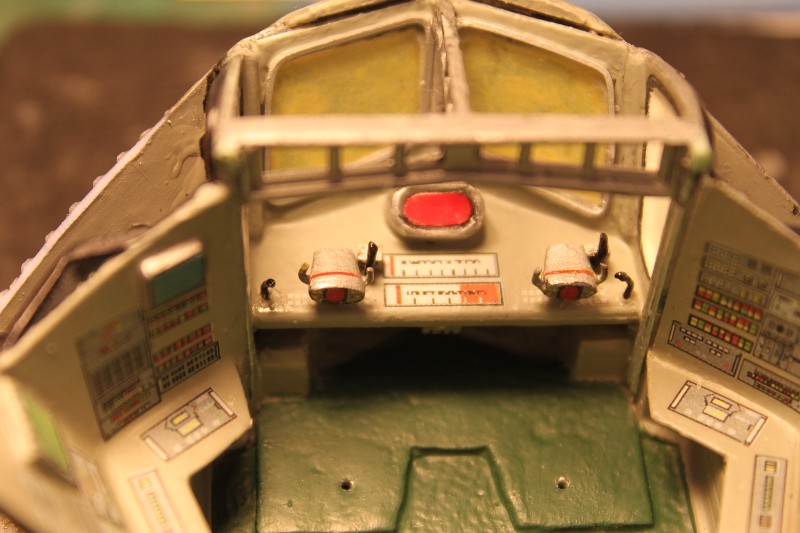
Mods to cokpit forward wall sections..,

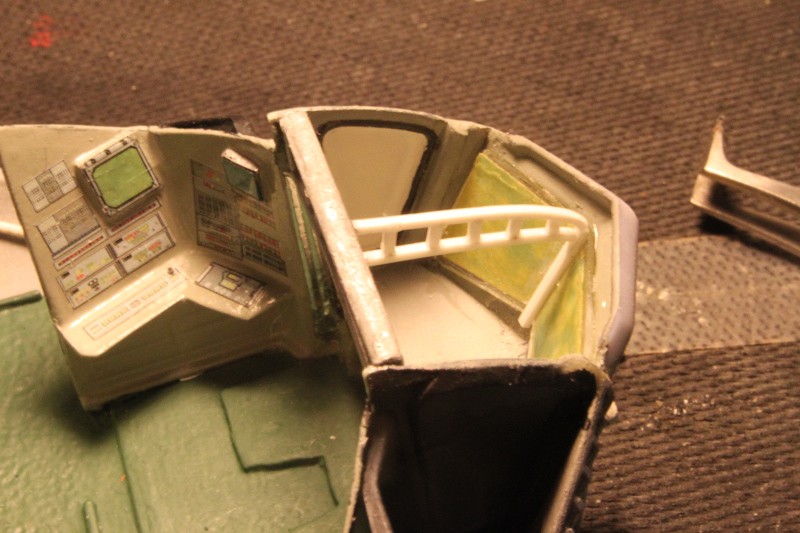
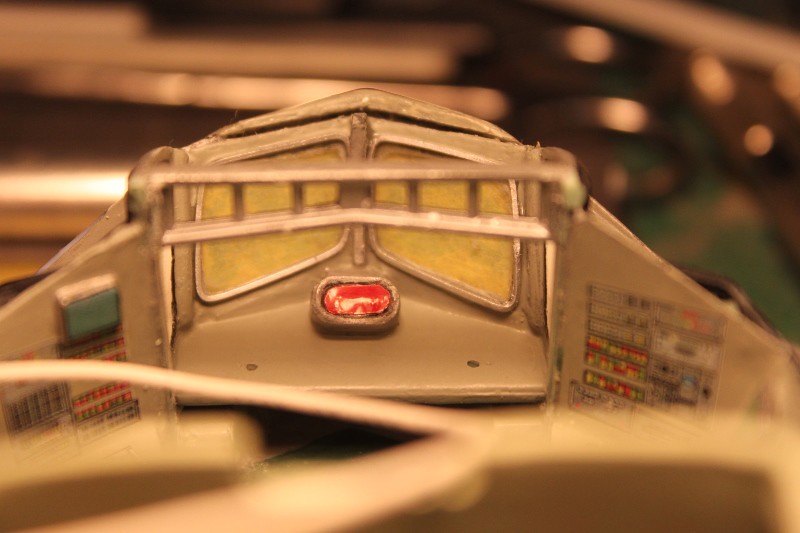
The top of each forward cockpit side wall had to be ground down to allow the upper hull to mate up with the window frame and bow side grills:

Image
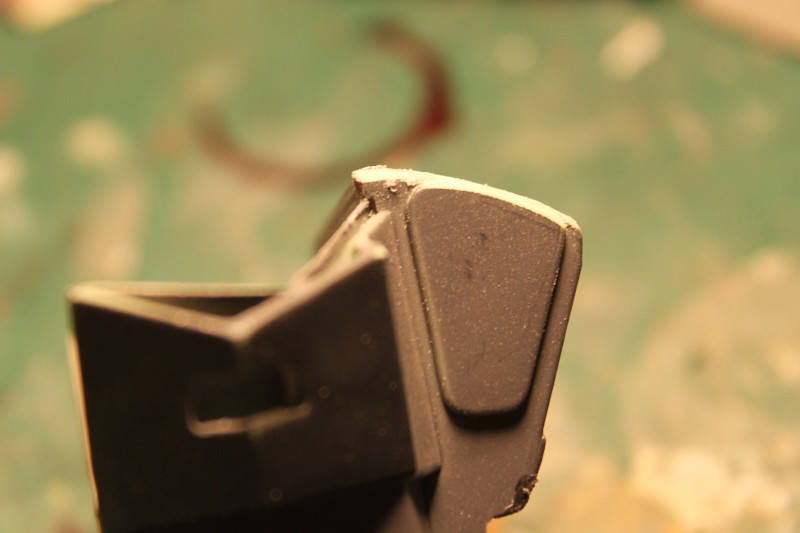
Mods to Cockpit Forward Walls by trekriffic, on Flickr

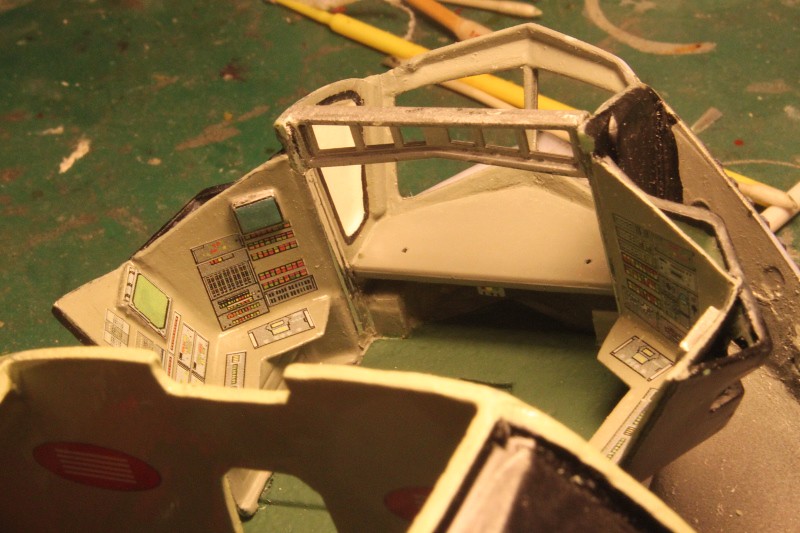
Cockpit walls installed...

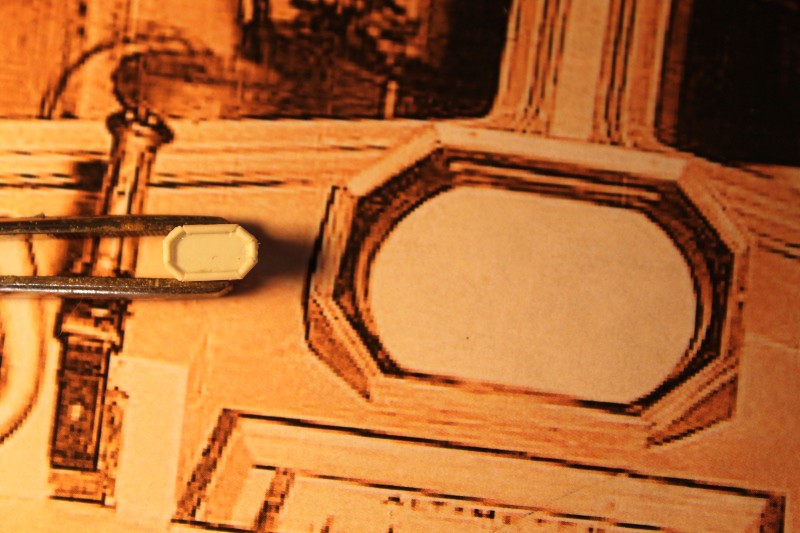
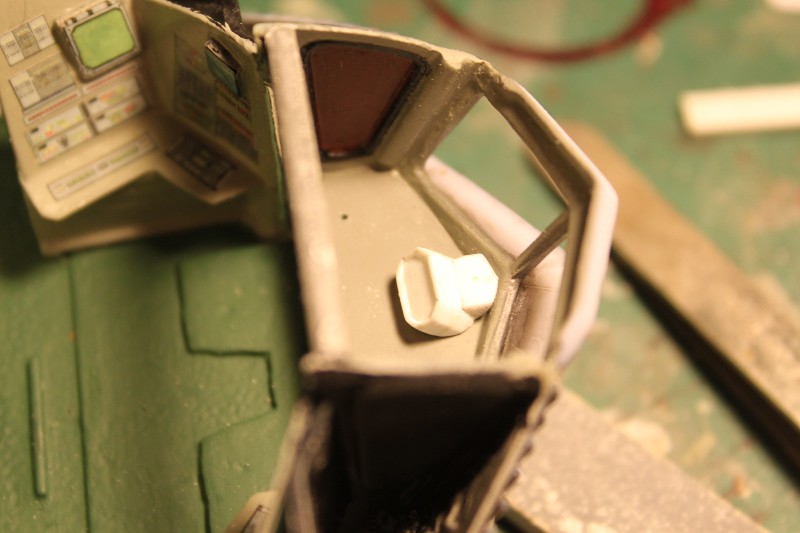
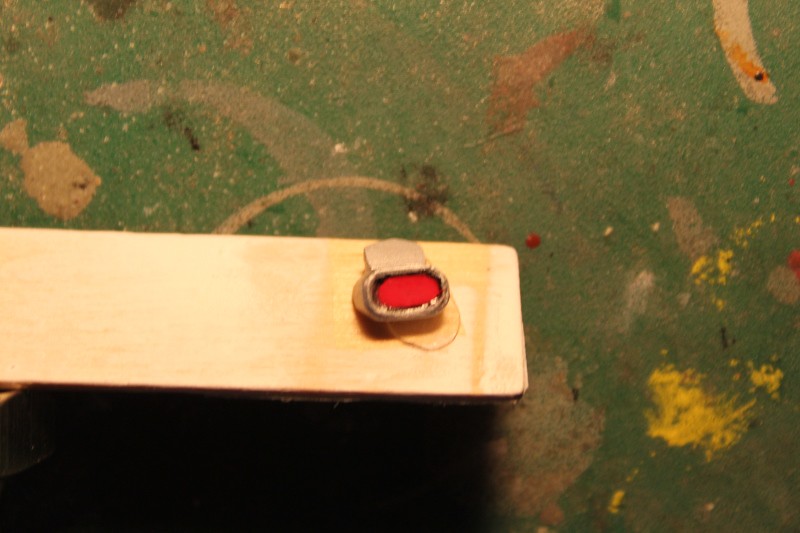
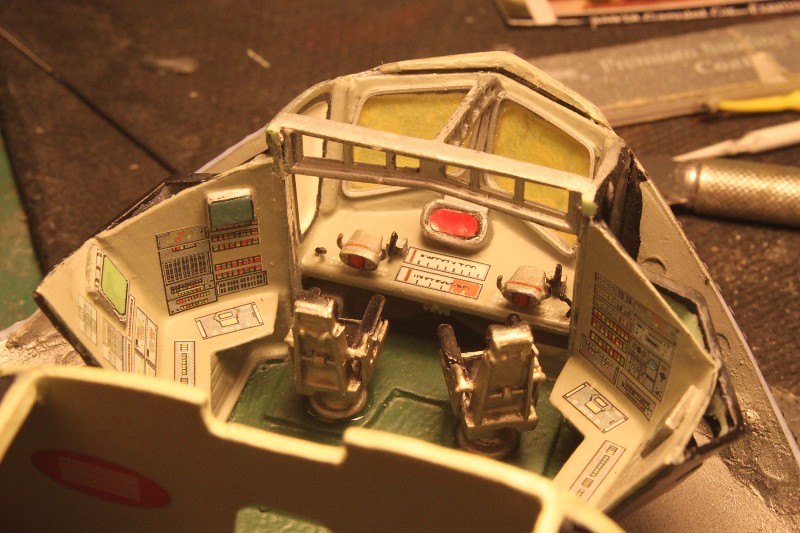
The aft angled walls still need their control panel decals. The brown triangular recessed panels would eventually get painted over with white enamel. I mistakenly went with rust brown at first based on the Lunar Models instruction sheet but in viewing the pilot episode again there was a certain shot where you could just barely see the side panels in the bow and they were either white or a very light gray, certainly not brown:

ImageCockpit Walls installed by trekriffic, on Flickr

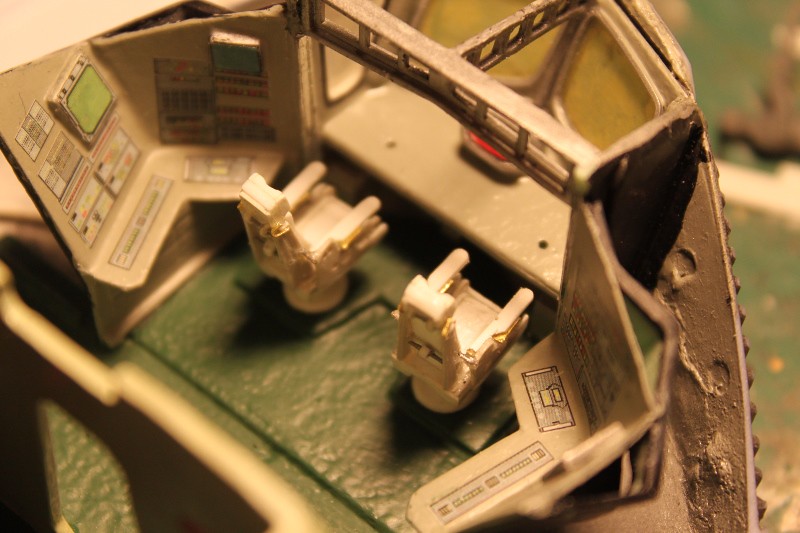
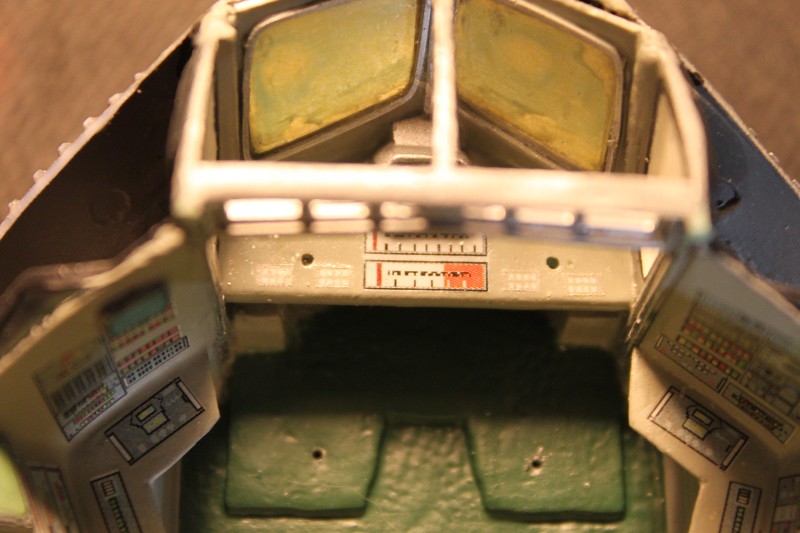
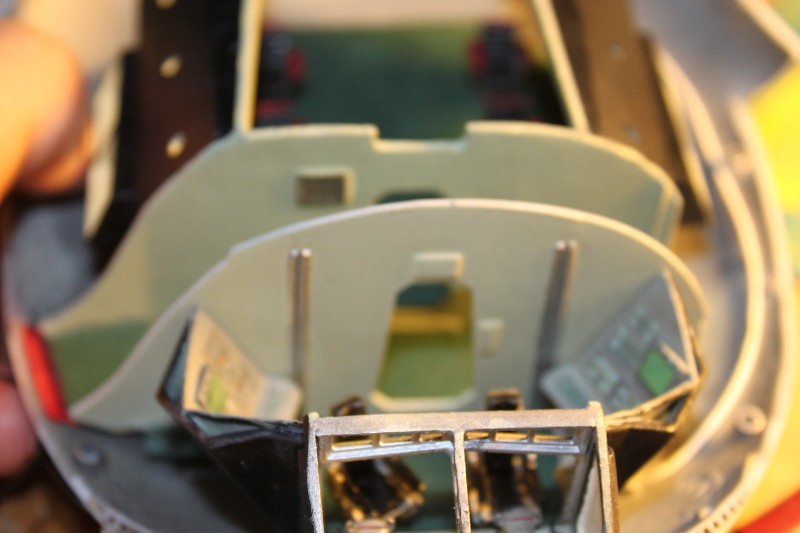
Monitor and control console decals have been trimmed and placed on the sidewalls. The main dashboard shelf is also given a test fit:

ImageCockpit Control Panel Decals by trekriffic, on Flickr

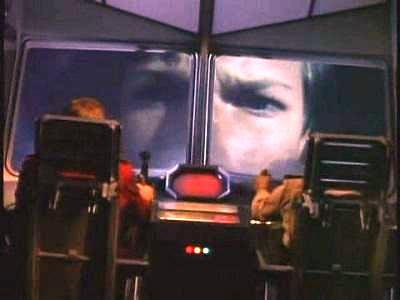
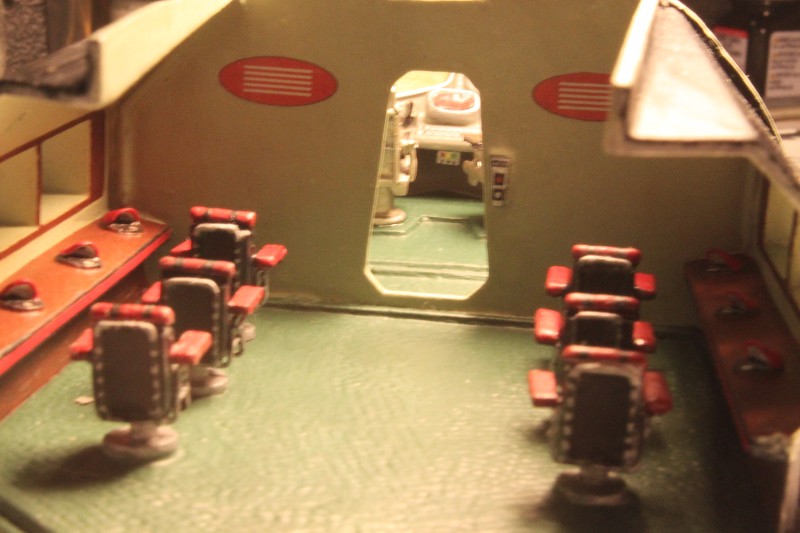
Next we have the mysterious object at the rear of the passenger cabin. Is it an air conditioning unit or a storage chest/cabinet?

Image
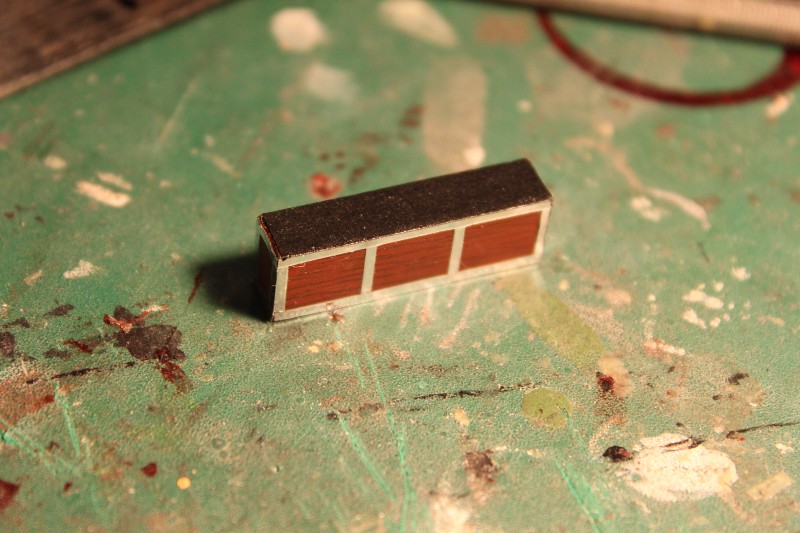
Aft Passenger Cabin Wall “Cabinet” by trekriffic, on Flickr

Image
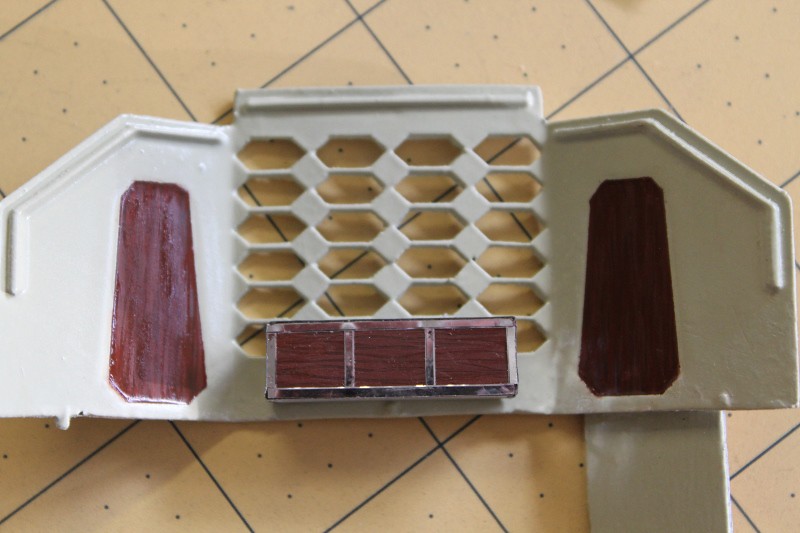
Stowage Chest Positioned in Center of Rear Wall by trekriffic, on Flickr

I’ve seen the Lunar Models instruction sheet describe this as an air-conditioning unit but when watching the LOTG pilot I could definitely see wood grain panels on the front of whatever this box is. The panels do not appear to have any visible knobs so my thinking is this is a storage chest with a hinged upper lid, handy for stowing blankets and pillows or even carry on luggage.

Last thing for now... curtain and homemade decal...

This curtain hangs across the closet at the end the corridor between the cockpit and passenger cabin. The curtain has a leopard skin pattern (Irwin Allen seemed to like leopard skin patterns) which I am simulating using clear decal film with a painted on pattern:

Image
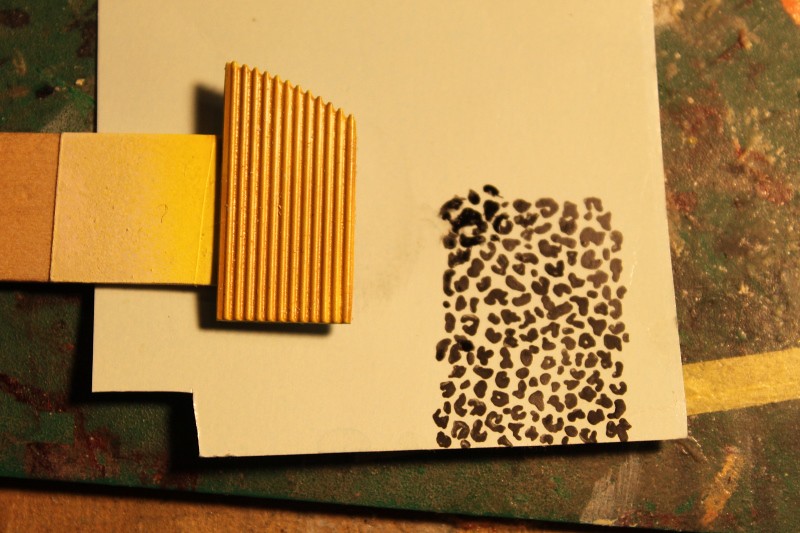
Curtain and Homemade Decal by trekriffic, on Flickr


More to come... stay tuned...
"You broke your little ships."

My albums on flickr: https://www.flickr.com/photos/29607470@N08/sets/
User avatar
trekriffic
Admiral of the Fleet
Posts: 2746
Joined: Mon Oct 01, 2012 4:16 pm

Re: Spindrift from Land of the Giants by Polar Lights

Post by trekriffic »

OK. Time for another update...

Not sure what this monitor is useful for but it flashes with a red glow while the engine is operating:

Imagelotlg2 by trekriffic, on Flickr

I used strip styrene to make my own replica for installation between the forward window ports:

ImageMain Pilot Engine Monitor by trekriffic, on Flickr

The monitor sits at an angle with a horizontal saddle connecting it to the bow window frames:

ImageAnother View of the Forward Engine Monitor by trekriffic, on Flickr

Not bad. A reasonable facsimile if I do say so myself. I measured carefully to make sure the saddle would slide in underneath the lower rim of the clear bow window insert once installed:

ImageScratched Forward Engine Monitor by trekriffic, on Flickr

Test Fit:

ImageEngine Monitor Test Fit by trekriffic, on Flickr

Black and red enamels were used to paint the screen of the engine monitor. The housing itself was sprayed with Tamiya Bare Metal Silver over Tamiya Matte Black lacquer:

ImageEngine Monitor Painted by trekriffic, on Flickr

View of the passenger compartment from aft:

ImageView of the Passenger Compartment from Aft by trekriffic, on Flickr

I painted the shelves under the windows using a mix of Testors Light Brown and Rust enamels. Since taking this photo I cleaned up the tiny splatter drops on the chairs:

ImageShelves Painted Brown by trekriffic, on Flickr

To correct an error I made painting the side panels brown I repainted them with Testors white enamel:

ImageSidewall Panels Re-Painted White by trekriffic, on Flickr

I scratched this center support girder using Evergreen strip. The support was built in place and turned out pretty well I think:

ImageCenter Window Support by trekriffic, on Flickr

The center window girder was painted Testors aluminum:

ImageCentwer Window Support Painted by trekriffic, on Flickr

Jumping over to the other table for some work on the display base...

The base was primed with white lacquer then painted red-orange. Letters were cut from yellow masking tape and stuck down. I'll seal the tape edges with Future then give her an overspray with ModelMaster flat black:

ImageMasking Tape Lettering on Base by trekriffic, on Flickr
"You broke your little ships."

My albums on flickr: https://www.flickr.com/photos/29607470@N08/sets/
User avatar
MSgtUSAFRet
Can-Do Captain
Can-Do Captain
Posts: 531
Joined: Wed Jun 15, 2016 5:49 pm
Location: Houston, TX

Re: Spindrift from Land of the Giants by Polar Lights

Post by MSgtUSAFRet »

Looking Good, Trekriffic!

Loving the detail!

Where do you get your supplies for scratch building stuff? LHS or Amazon?

I'm thinking I should get acquainted with other sources as Hobby Town is more like Ghost Town for modelers.

Keep going! This is looking great!

Steve
User avatar
trekriffic
Admiral of the Fleet
Posts: 2746
Joined: Mon Oct 01, 2012 4:16 pm

Re: Spindrift from Land of the Giants by Polar Lights

Post by trekriffic »

MSgtUSAFRet wrote:Looking Good, Trekriffic!

Loving the detail!

Where do you get your supplies for scratch building stuff? LHS or Amazon?

I'm thinking I should get acquainted with other sources as Hobby Town is more like Ghost Town for modelers.

Keep going! This is looking great!

Steve
I used to get my styrene strips, rod, tubing, and sheet from my local HobbyTown USA. They had three large freestanding rotating display rack of Plastruct and Evergreen products. Then they closed which left me with Hobbies Unlimited up in San Leandro which is about 25 miles north of me here in Fremont, CA. They have a countertop display box with sheet styrene and two others with metal and plastic tubing and rod. Not as big a selection as HobbyTown had but for my needs it usually does the trick. Al, the owner, is a great guy and I've been going to his store for about 45 years. I dread the day he decides to hang it up.
"You broke your little ships."

My albums on flickr: https://www.flickr.com/photos/29607470@N08/sets/
User avatar
trekriffic
Admiral of the Fleet
Posts: 2746
Joined: Mon Oct 01, 2012 4:16 pm

Re: Spindrift from Land of the Giants by Polar Lights

Post by trekriffic »

Brief update...

I've noticed in looking at interior stills of the pilots looking out the bow windows that the windows have frames around them. The clear kit window insert ; however, does not have any framing.
So I decided to make a pair of frames myself from square styrene rod using a jig. The rod was laid into the grooves then gently warmed with a heatgun to set their shape. After cooling, the frames were popped out of the jig:

ImageJig and Bow Window Frame by trekriffic, on Flickr

The frames were sprayed with Tamiya Bare Metal Silver lacquer over Matte Black then glued in place using 5-minute epoxy. The windows are still masked on the outside in this pic:

ImageWindow Frames Installed by trekriffic, on Flickr

Next up I started in on the pilot seats...

Here's an image of one of the seats used in the series which was actually an ejector seat from a 1960's era fighter jet:

ImageSpindrift Pilot's Chair from Land of the Giants by trekriffic, on Flickr

Closeup detail of the area under the armrest:

ImageSpindrift Pilot's Chair from Land of the Giants by trekriffic, on Flickr

So based on these images I began scratch building the pilot seats. You can see I used styrene sheet and strip for the basic structure:

ImagePilot Seat Components by trekriffic, on Flickr

Coming along pretty well. The seat on the left has had it's armrest brackets glued in place:

ImagePilot Seats In Progress by trekriffic, on Flickr

Almost done. Still need to add a few more details like armrests and the base:

ImagePilot Seat Almost Done by trekriffic, on Flickr

You can see how small these seats are. Too small to fit any of the figures included with the kit which are close to 1/64 scale whereas the ship itself is closer to 1/76 scale. Taking some measurements of the passenger and pilot seats a figure between 1/72 and OO (1/75) scale should be just about right. I may go more towards getting some 1/72 scale figures since I may need to remove some material in order to sculp them to the final shape of the cast members.

I'll hold off completing the pilot seats until I can stop by my LHS tomorrow and get some figures. Then I'll do some test fitting and make any adjustments.
"You broke your little ships."

My albums on flickr: https://www.flickr.com/photos/29607470@N08/sets/
User avatar
trekriffic
Admiral of the Fleet
Posts: 2746
Joined: Mon Oct 01, 2012 4:16 pm

Re: Spindrift from Land of the Giants by Polar Lights

Post by trekriffic »

Rolling right along...

Stopped off on Tuesday on the way home from work and bought this box of 42 1/72 scale figures at my LHS.
I selected these "Modern Urban Resisters" since they were wearing civilian clothing (mostly) and they don't have helmets which I would have had to remove to make the Spindrift crew and passengers:

ImageModern Urban Resisters (aka Terrorists) by trekriffic, on Flickr

The kit provided crew figure behind one of the 1/72 scale figures:

ImageSize Comparison by trekriffic, on Flickr

Note the significant size difference. As I've said previously, The kit figures are oversized when compared to the Spindrift itself. I tried standing this kit crewmember up in one of the open doorways and he was taller than the doorway. Captain Steve Burton would smack his forehead into the top of the doorway every time if he didn't duck.

Working on one of the seated pilots. Unfortunately none of the 1/72 scale figures were in a seated pose but some were kneeling on one knee so just had to cut off one leg and reposition it. Then had to carve and sculpt the clothing to match the pilot's jump suit. The arms will be attached later once I have the pilot in seated position in the cockpit:

ImageModifications in Progress by trekriffic, on Flickr

Bouncing back to the pilot seats...

Leftover brass PE fret material was trimmed to make these brass mounting plates that the armrests will be glued to. The brass gives the arms added strength:

ImageArmrest Mounting Plates by trekriffic, on Flickr

After gluing the styrene armrests on I added some additional detailing to the back of the seats using brass rod and more plastic strip. Here are a few pics of the finished seats. They look pretty decent I think considering they are so small:

ImageFinished Pilot Seat by trekriffic, on Flickr

ImageFinished Pilot Seat by trekriffic, on Flickr

I did a dry run just to see how they looked in the cockpit. I think they look pretty good don't you?

ImagePilot Seat Test Fitting by trekriffic, on Flickr

Test fit with the seated figure. I think I kinda nailed it:

ImageTest Fit with 1/72 Scale Figure by trekriffic, on Flickr

Gave the seats a shot of Tamiya Fine Surface Primer. They will be painted Titanium and Black:

ImagePilot Seats in Primer by trekriffic, on Flickr

ImagePrimed Pilot Seat by trekriffic, on Flickr

ImagePrimed Pilot Seat Rear by trekriffic, on Flickr

Veering off...

Decals were applied to the main control console. After they dried I gave them a second sealing coat of Future clear acrylic floor wax. Next I'll install the steering yokes:

ImageMain Control Panel Decals by trekriffic, on Flickr

Thanks for reading along. Take care and keep an eye out for any wayward giants stumbling around.
"You broke your little ships."

My albums on flickr: https://www.flickr.com/photos/29607470@N08/sets/
User avatar
Tesral
Administrator
Administrator
Posts: 4937
Joined: Tue Dec 18, 2012 12:58 pm
Location: Dearborn, Mi -- at my desk.
Contact:

Re: Spindrift from Land of the Giants by Polar Lights

Post by Tesral »

Stunned, really.

Look at Preiser models. They make figures over every scale for every reason. Even unclothed figures you can dress yourself.
Garry AKA --Phoenix-- Rising above the Flames.
"I saw it done on Voyager" is no excuse for anything, even breathing.
User avatar
trekriffic
Admiral of the Fleet
Posts: 2746
Joined: Mon Oct 01, 2012 4:16 pm

Re: Spindrift from Land of the Giants by Polar Lights

Post by trekriffic »

Okay LOTG fans time for a post Christmas holiday update! :xmastoast:

The main contol panel was sorted out...
Steering yokes were added along with a pair of microphones made from bent 28 AWG black wire.

ImageMain Control Panel Finished by trekriffic, on Flickr

The pilto serats were sprayed with Tamiya Bare Metal Silver, sprayed with Dullcote, then rubbed with Tamiya Titanium pastel chalk. Afterwards they were sealed with more Dullcote:

ImageSilver Pilot Seats Getting Pastel Chalk Treatment by trekriffic, on Flickr

The cushions were brushed with Testors semi-gloss black:

ImageFinished Pilot Seat by trekriffic, on Flickr

The seats were glued in using 5-minute epoxy:

ImageSeats Installed in Cockpit by trekriffic, on Flickr

ImagePilot Seats in Cockpit from Rear by trekriffic, on Flickr

Looking forward from the passenger cabin into the cockpit. You can see the small panel located under the lip of the main control panel with the red, yellow, and green, indicator lights:

ImageView Forward into Cockpit from Passenger Cabin by trekriffic, on Flickr

Next I started in on making the crew and passengers. Here's a photo of the cast from the show:

ImageLOTG Cast by trekriffic, on Flickr

Captain Steve Burton figure in progress. The figure's arms were pinned in place using music wire to allow them to be moved into final position during test fitting in the pilot's seat. Once in position the arms were cemented with CA:

ImageSteve Burton Figure In Progress by trekriffic, on Flickr

I also started the Betty Hamilton figure using the "terrorist" figure on the left. After some mods to thin and shorten them a tad I also used the model kit provided Betty's arms and legs; the hands, though, were sliced off and replaced with hands from the donor figure:

ImageBetty Hamilton Figure in Progress by trekriffic, on Flickr

Betty is primed. I'll wait until she's ready for final paint before attaching her arms but before that I'll do a test fit in the rear passenger seat to get them in the right pose on the armrests.

ImageBetty Hamilton Gets Primed by trekriffic, on Flickr

Finished Steve Burton and Betty Hamilton figures. Need to coat with Floquil matte varnish to get rid of the glossiness:

ImageFinished Steve Burton and Bett Hamilton Figures by trekriffic, on Flickr

Two down and five to go (plus Chipper the dog) assuming my eyes hold out:

ImagePilot and Stewardess Figures Finished by trekriffic, on Flickr

Next up... Dan Erickson, the ship's copilot. I'm having Dan stand next to his seat looking past Steve's shoulder.

ImageDan Erickson Figure Up Next by trekriffic, on Flickr

After some cleanup the figure is brushed with Tamiya Surface Primer:

ImageDan Erickson Figure Primed by trekriffic, on Flickr

I dunno, after Dan is painted and these three are cemented into the ship, I may take a break from figures for awhile and work on the Spindrift herself.

Thanks for reading and I hope everyone had a great Christmas holiday.
"You broke your little ships."

My albums on flickr: https://www.flickr.com/photos/29607470@N08/sets/
User avatar
trekriffic
Admiral of the Fleet
Posts: 2746
Joined: Mon Oct 01, 2012 4:16 pm

Re: Spindrift from Land of the Giants by Polar Lights

Post by trekriffic »

Greeting fellow LOTG enthusiasts! Time for a post-holiday :( update I think...

Glued the aft cockpit wall in place. Ended up having to shave off the top and file a slot to allow the roof to sit level though:

ImageAft Cockpit Bulkhead Installed by trekriffic, on Flickr

Pretty much finished the Dan Erickson (copilot) figure. Added epaulets to his jacket later on:

ImageDan Erickson Front by trekriffic, on Flickr

ImageDan Erickson Rear by trekriffic, on Flickr

Mark Wilson, the impatient businessman character...

Like the others, this character needed a lot of modifications made to the Caesar Miniatures figure. I finally gave up and decided to make the arms from scratch using styrene rod. I'll attach hands from the Caesar Miniatures figures though. I'll also remove the beard:

ImageMark Wilson by trekriffic, on Flickr

I made a collar for his dress shirt and added his tie:

ImageMark Wilson Tie by trekriffic, on Flickr

Using AVES I molded a jacket with lapels:

ImageMark Wilson Suit Jacket by trekriffic, on Flickr

I like how Mark Wilson turned out in his business suit. He and Steve Burton have been Future coated; they will both get a shot of Dullcote soon prior to installation in their seats:

ImageFinished Mark Wilson and Steve Burton Figures by trekriffic, on Flickr

Dan and Betty. I added a wristwatch to Dan's left hand. They've been sealed with Future gloss acrylic floor wax. Need to give them a shot of Dullcote to get rid of the glossiness:

ImageDan Erickson and Betty Hamilton Figures by trekriffic, on Flickr

Valerie Scott, the headstrong, jet-set heiress...

Here's Deanna Lund wearing her outfit from the first episode:

ImageDeanna Lund as Valerie Scott by trekriffic, on Flickr

I started working on the Valerie Scott figure using the leftover head and torso from the Betty Hamilton figure included with the kit. Had to file and sand on the kit figure a bit to reduce the size to 1/72 scale. Used parts from the Caesar Miniatures figures for the arms, had to shave off the sleeves as Valerie had bare arms in the first episode. I'm scratch building the legs and boots:

ImageValerie Scott by trekriffic, on Flickr

So that's where I'm at so far. Had to take a break for a few days to let my stiff neck get better. Spent too many hours with my head bent down working on these little figures. My wife reminded me that, at 60 years old, I should remember to take a break now and then but, it's hard when you get into "the zone"; you modellers out there will understand what that's like.

More to come as my neck now feels much better!
"You broke your little ships."

My albums on flickr: https://www.flickr.com/photos/29607470@N08/sets/
User avatar
MSgtUSAFRet
Can-Do Captain
Can-Do Captain
Posts: 531
Joined: Wed Jun 15, 2016 5:49 pm
Location: Houston, TX

Re: Spindrift from Land of the Giants by Polar Lights

Post by MSgtUSAFRet »

Very nice indeed, trekriffic!

So, in addition to neck aches, do your eye twinge, too! That is small stuff!

Well done!

Okay, so plaid, purple dress for Valerie Scott? This I GOTTA see!

Steady on, Old boy!

Steve
Post Reply

Return to “Off Topic”