So, this is my second ever post on here, the first being an introduction of myself in the Newbs section.
Been reading through posts on here for quite a while, checking out some of the builds by some truly talented people, and I thought now was the perfect time to contribute.
So, i'll give a little background on my project.
A few weeks ago the Missus and I were cleaning out our spare bedroom and I came across a box of old Star Trek models in various states of disrepair.
I'd put them in storage with the intention of displaying them once we had settled in to our home, but life got in the way. So they remained in there, unloved
Anyway, upon finding them I was instantly hit with the modelling bug again. It brought a wave of nostalgia to me that filled me with joy!
The ships I have are:
Polar Lights 1:350 USS Enterprise A (which was never properly assembled)
Polar Lights 1:350 Enterprise NX-01
AMT USS Enterprise C
AMT USS Enterprise D
AMT USS Enterprise E
AMT USS Defiant
Revell USS Voyager
AMT Klingon Bird of Prey
I decided that these ships had been in storage long enough, and should be displayed in all their glory! But they do need some TLC. Unfortunately they were stored incorrectly and some of them have bits that have fallen off, and decals which have ripped or gone yellow, and paint jobs that are just, well, bad!
My intention is to repair them and give them fantastic new paint jobs and display them.
I have found these fantastic stands: https://tshobbies.com/uss-enterprise-d-1-1400/
I'm going to purchase the Ent-C/D stands and I think.
For the other models (aside from the 1:350 Ent which has its own base) I'm going to use these: https://www.amazon.com/exec/obidos/ASIN ... cketfin-20
I will be saving the 1:350 Ent a for last, as its a beast.
The first ship i'm going to have a crack at is my USS Enterprise-D 1:1400 scale and this is what this thread will be about. I will make separate threads for the other models
She wasn't damaged that much. Just in an unloved state. I've had her for close to 20 years I'd say, and she is my favourite ship. I want to repaint her and apply some fantastic detailed aztec decaling.
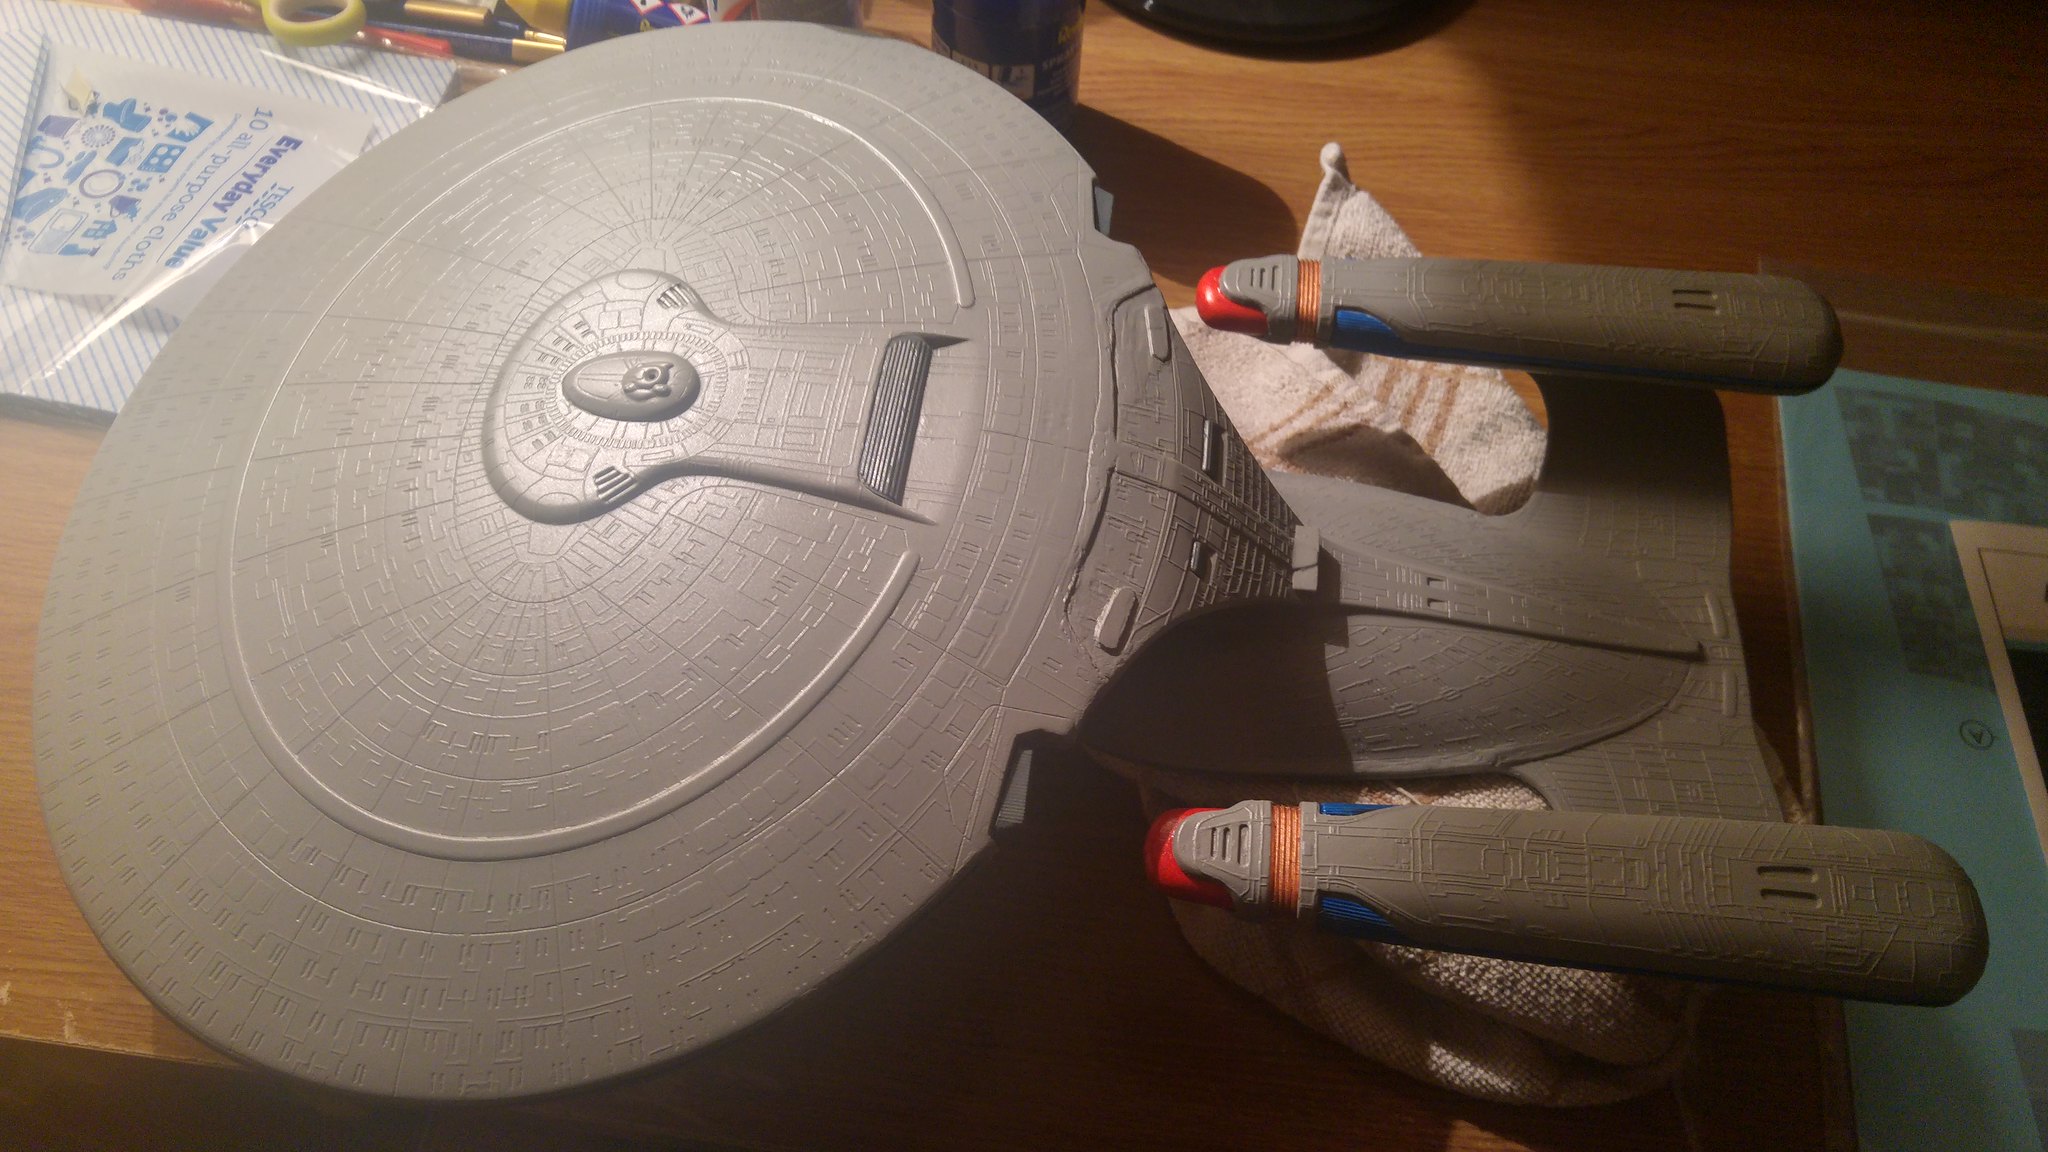
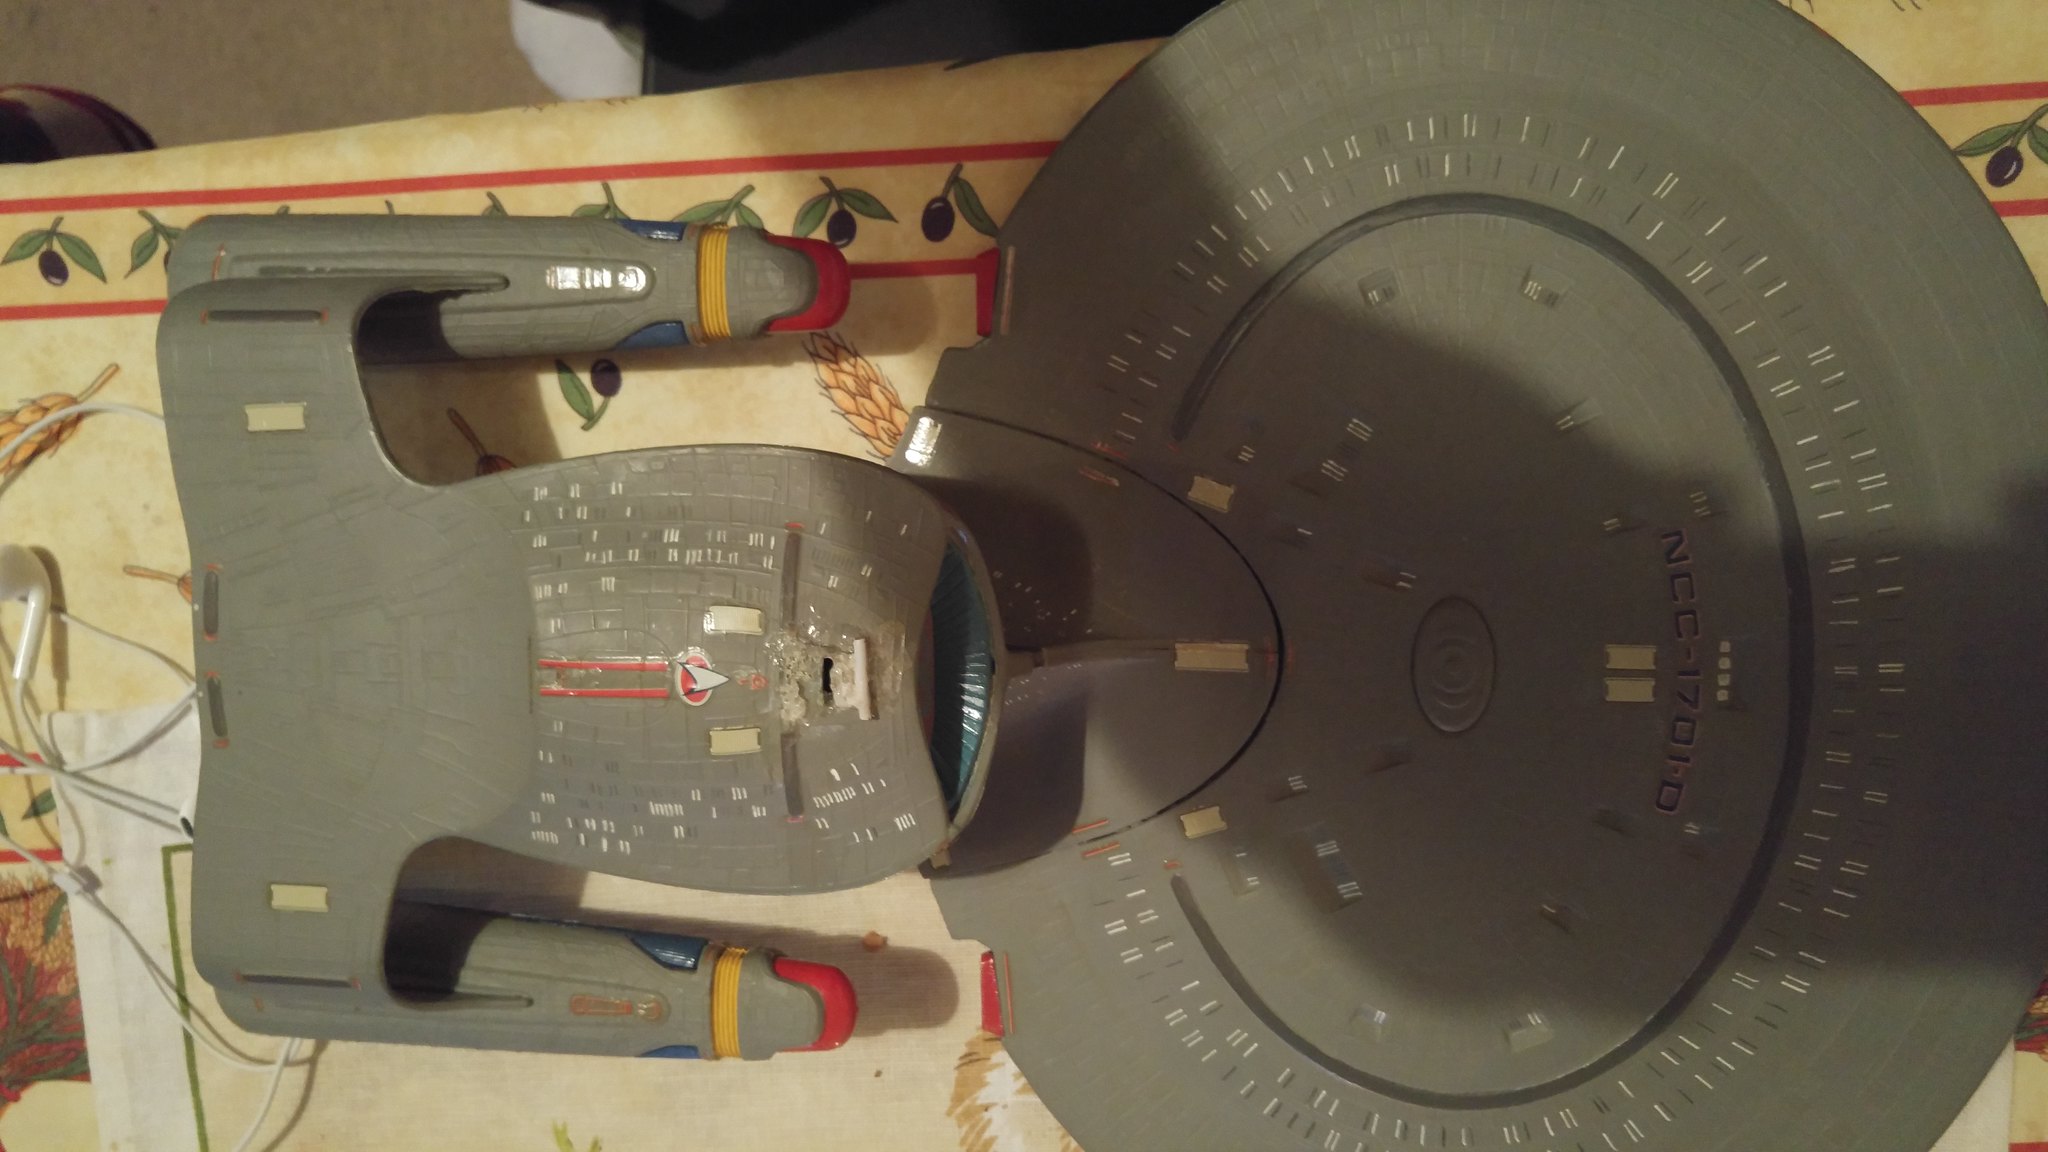
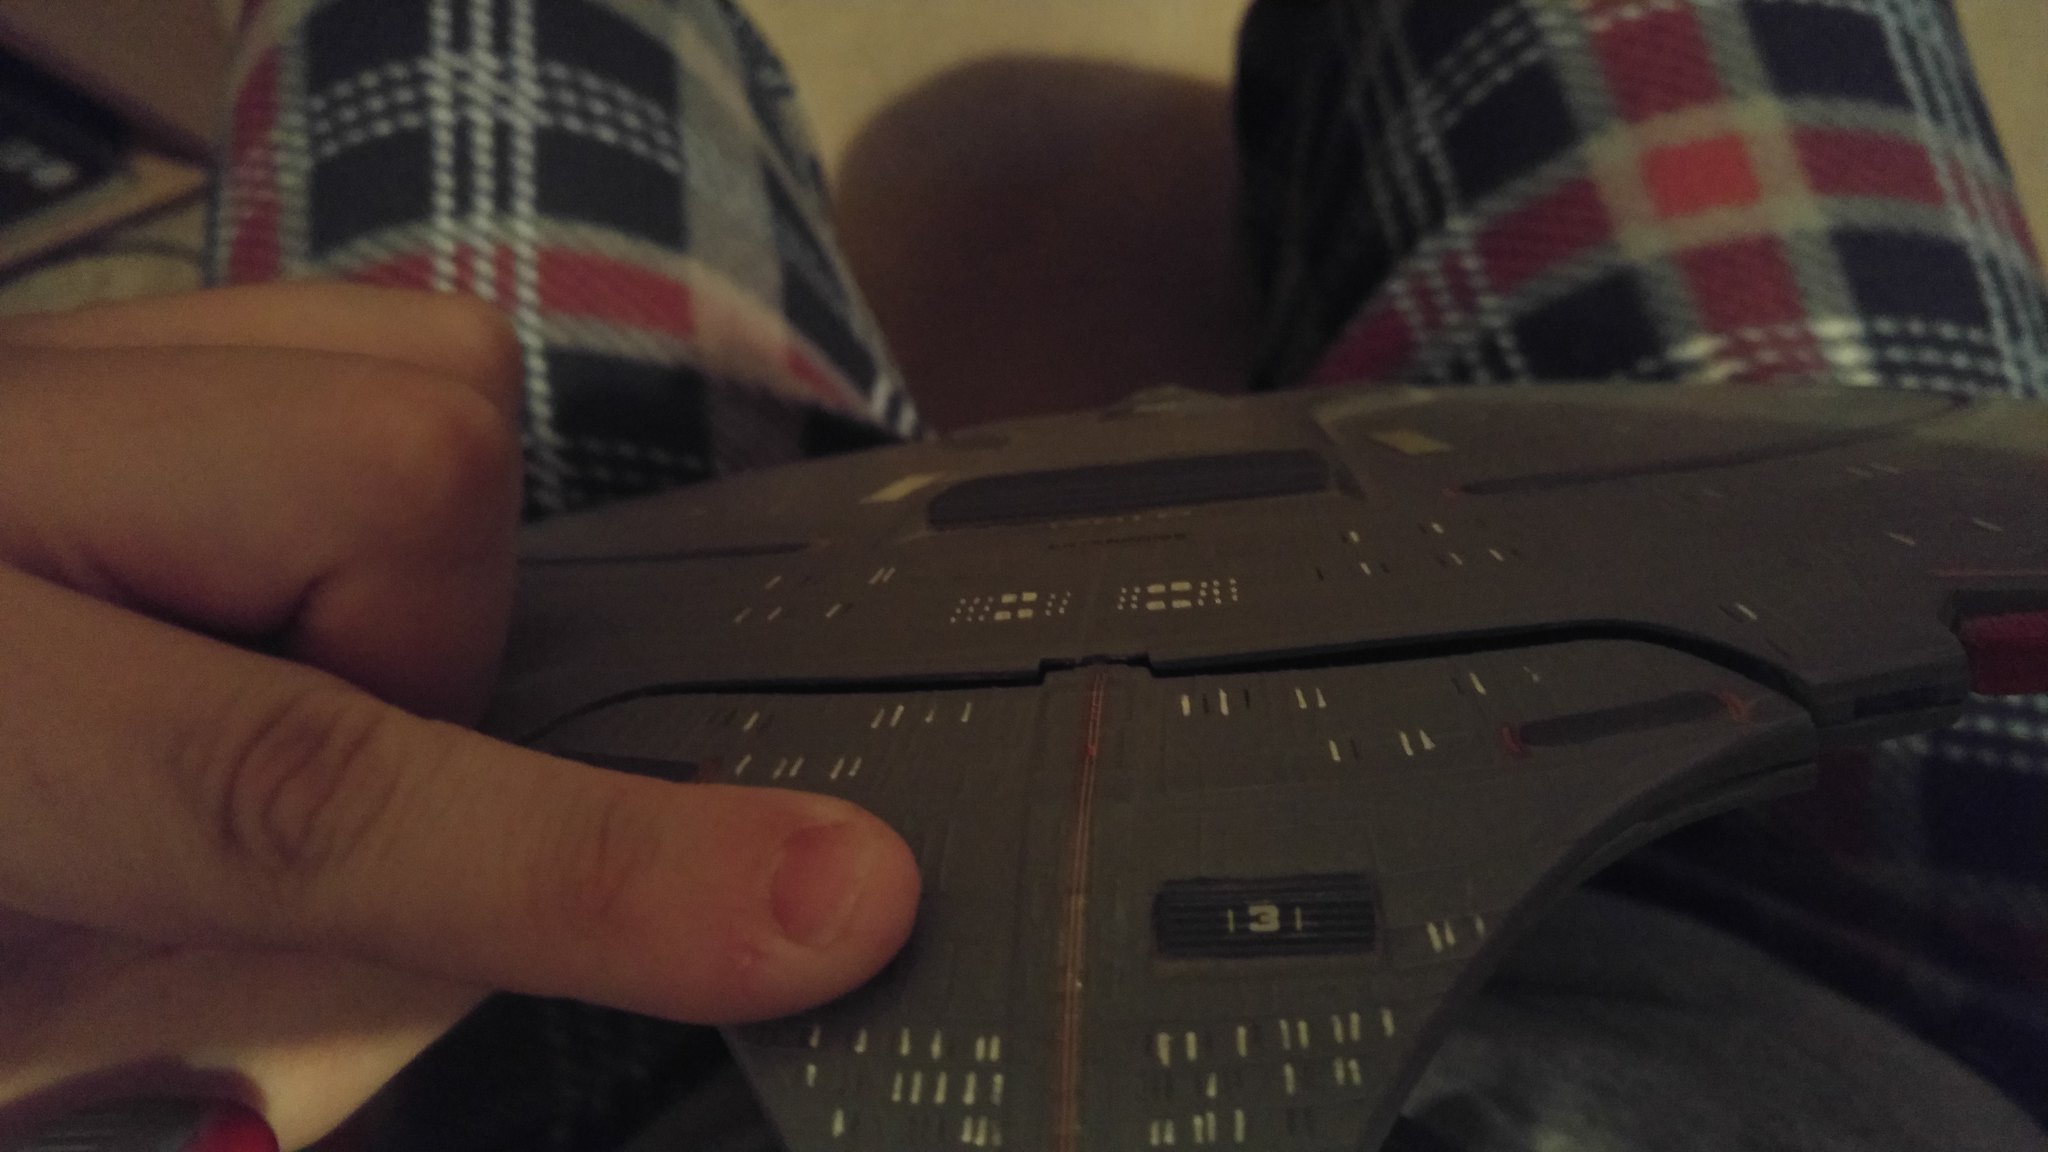
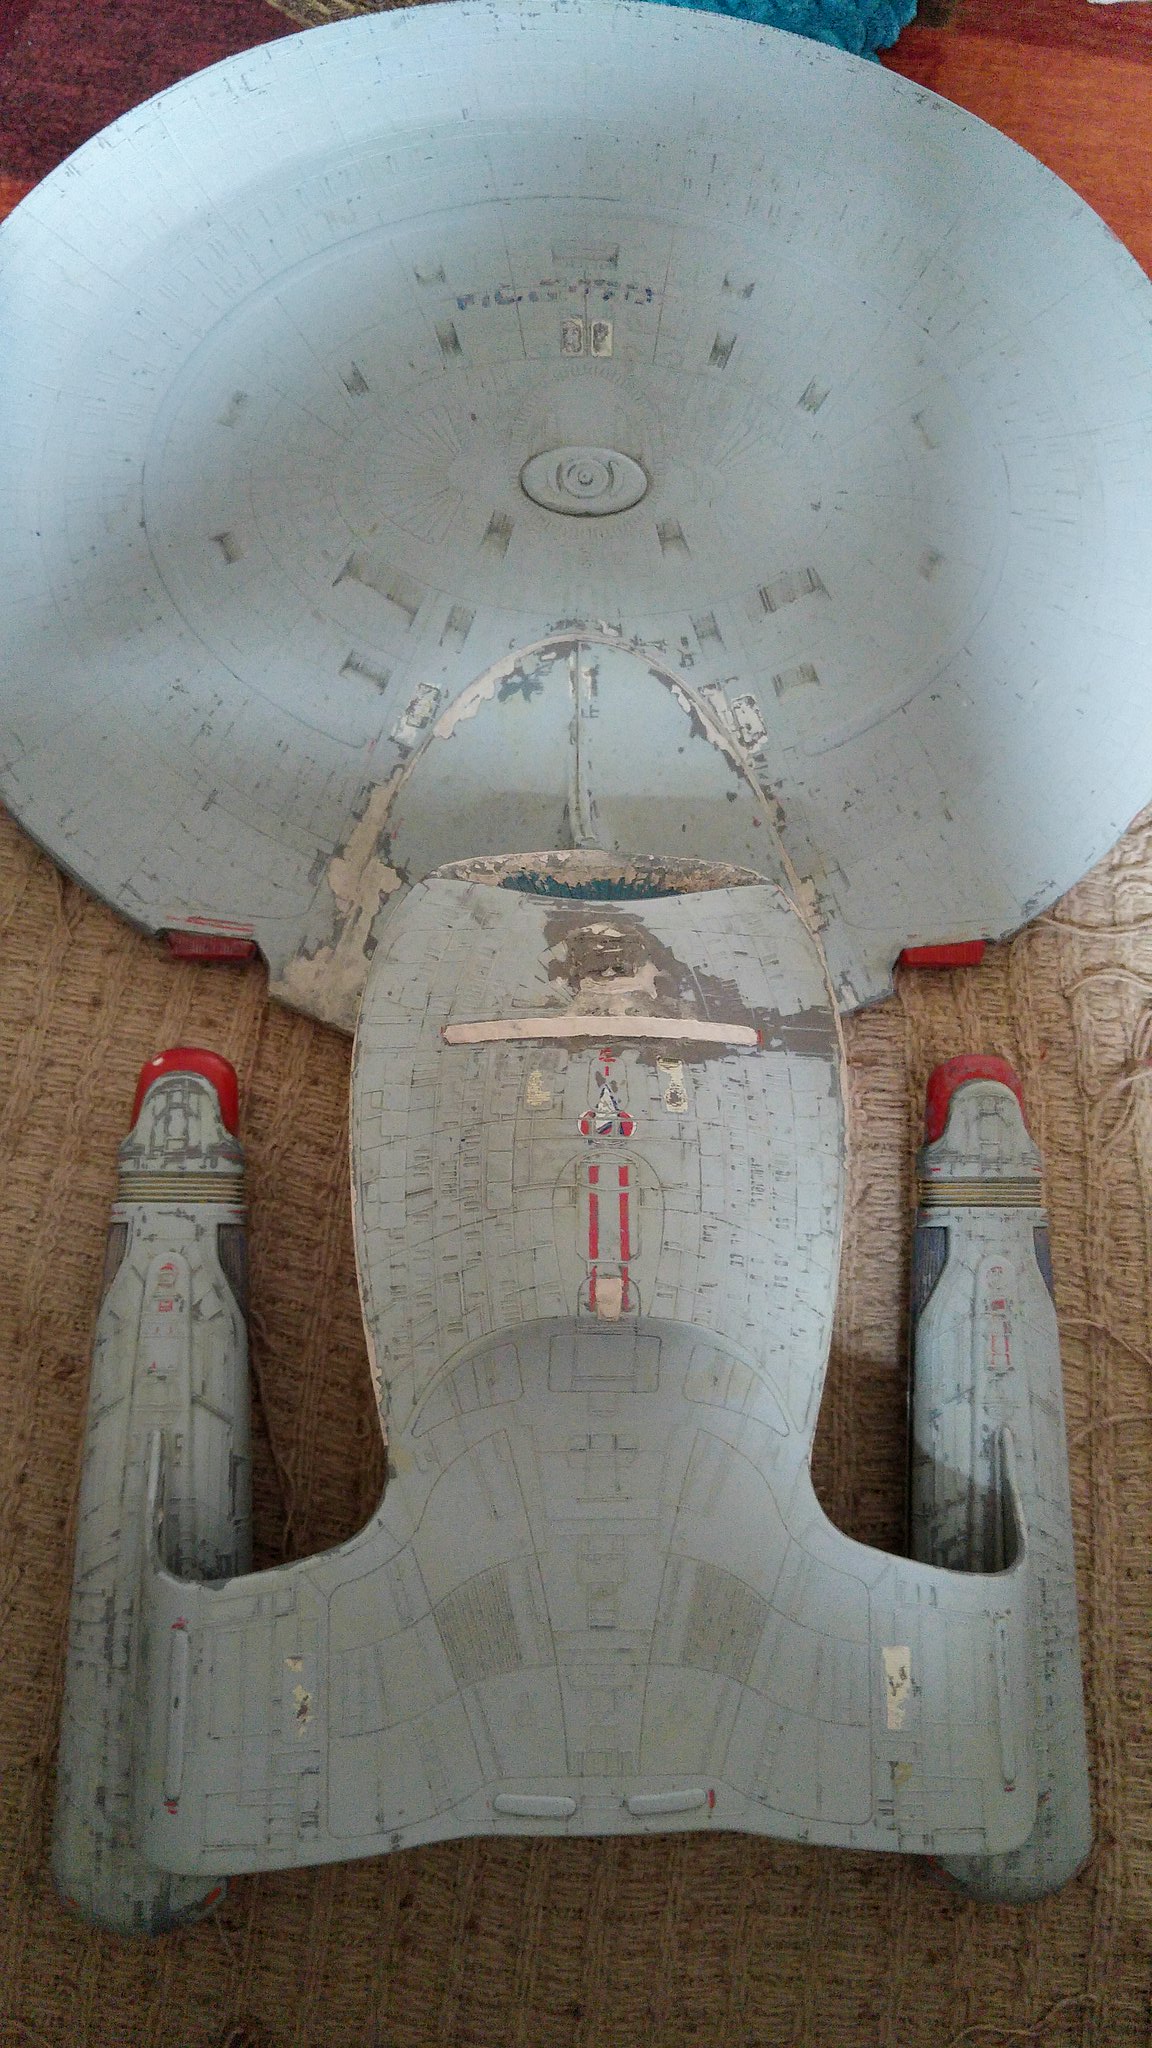
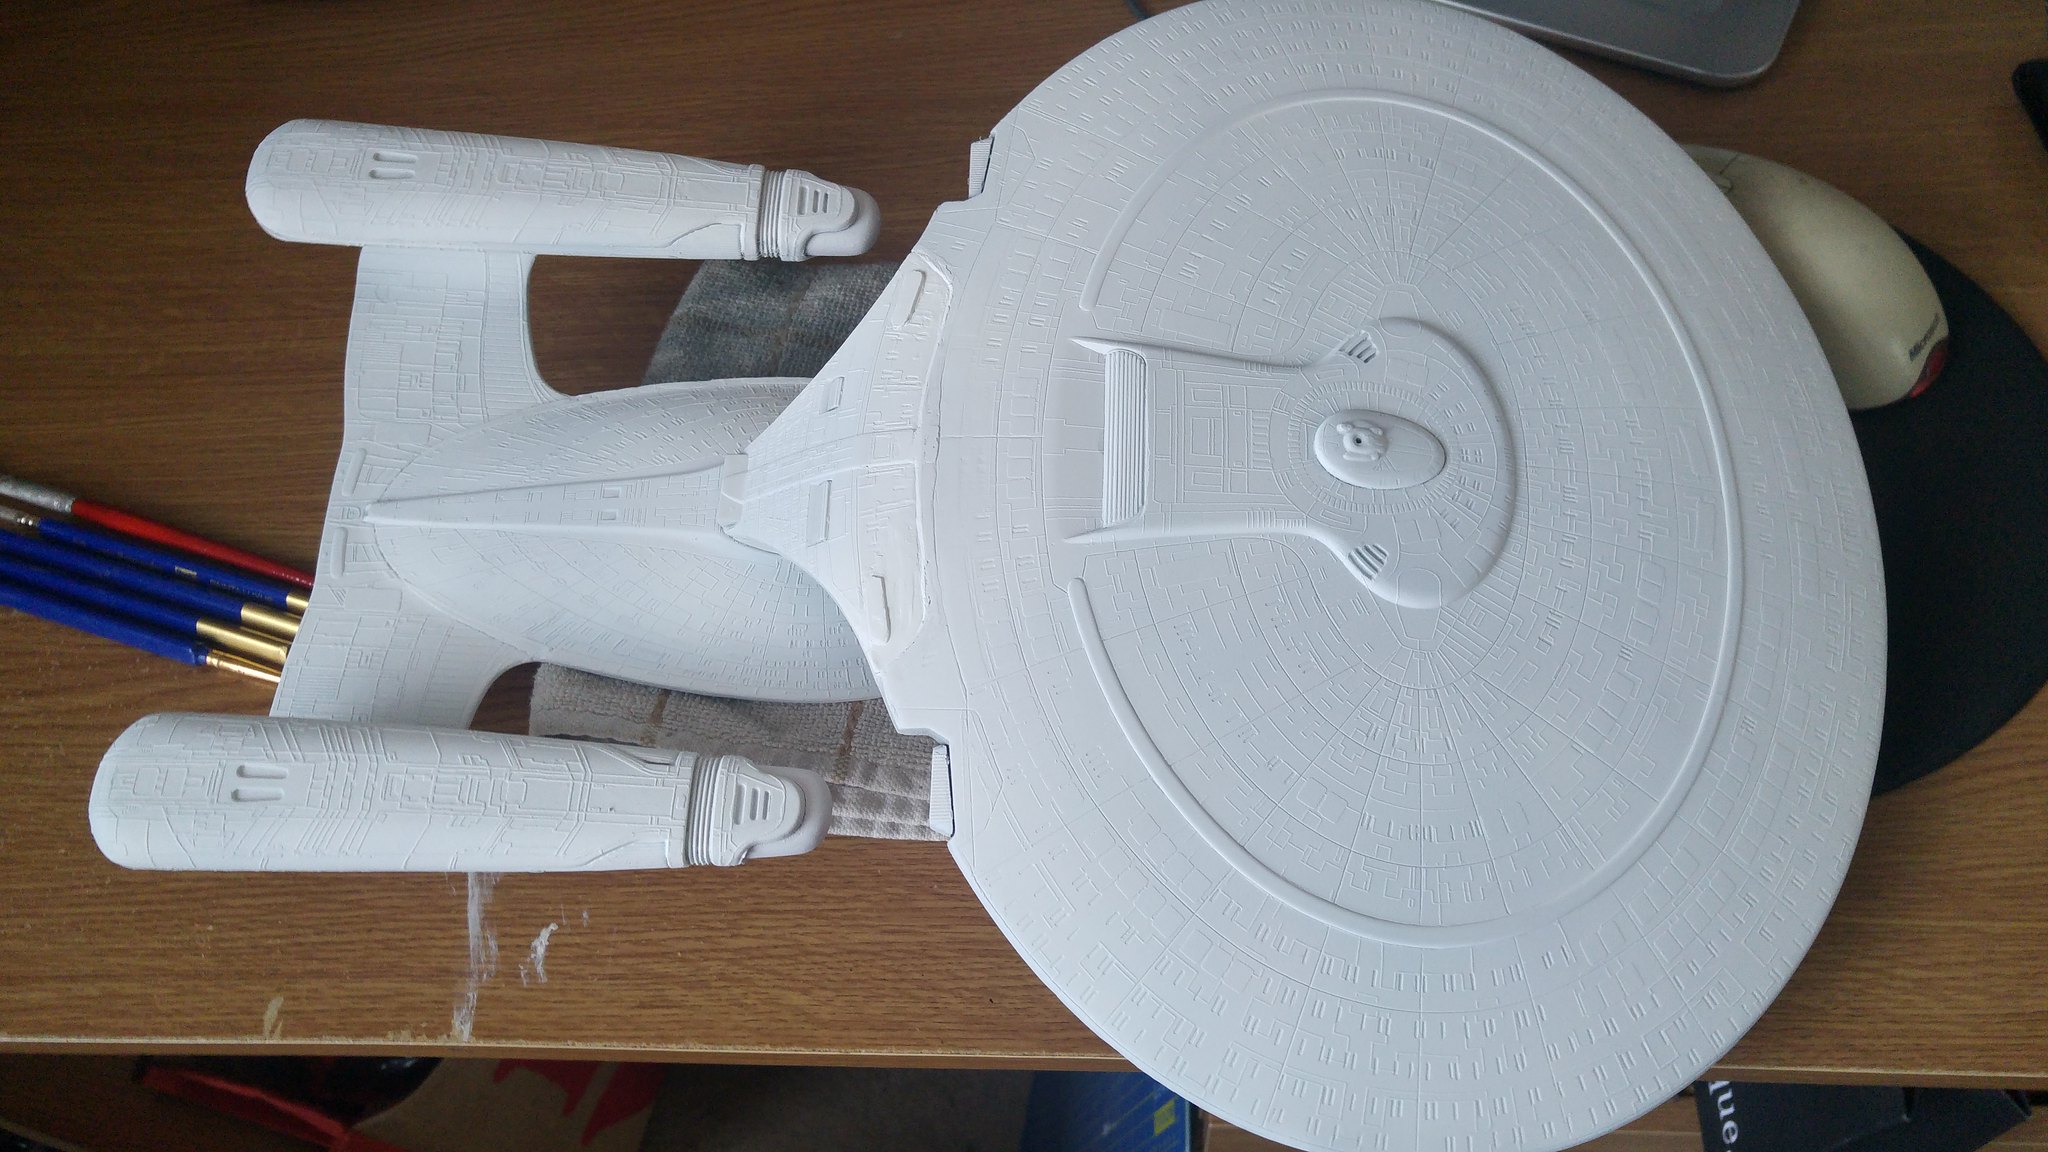
Here she is before I go at her...
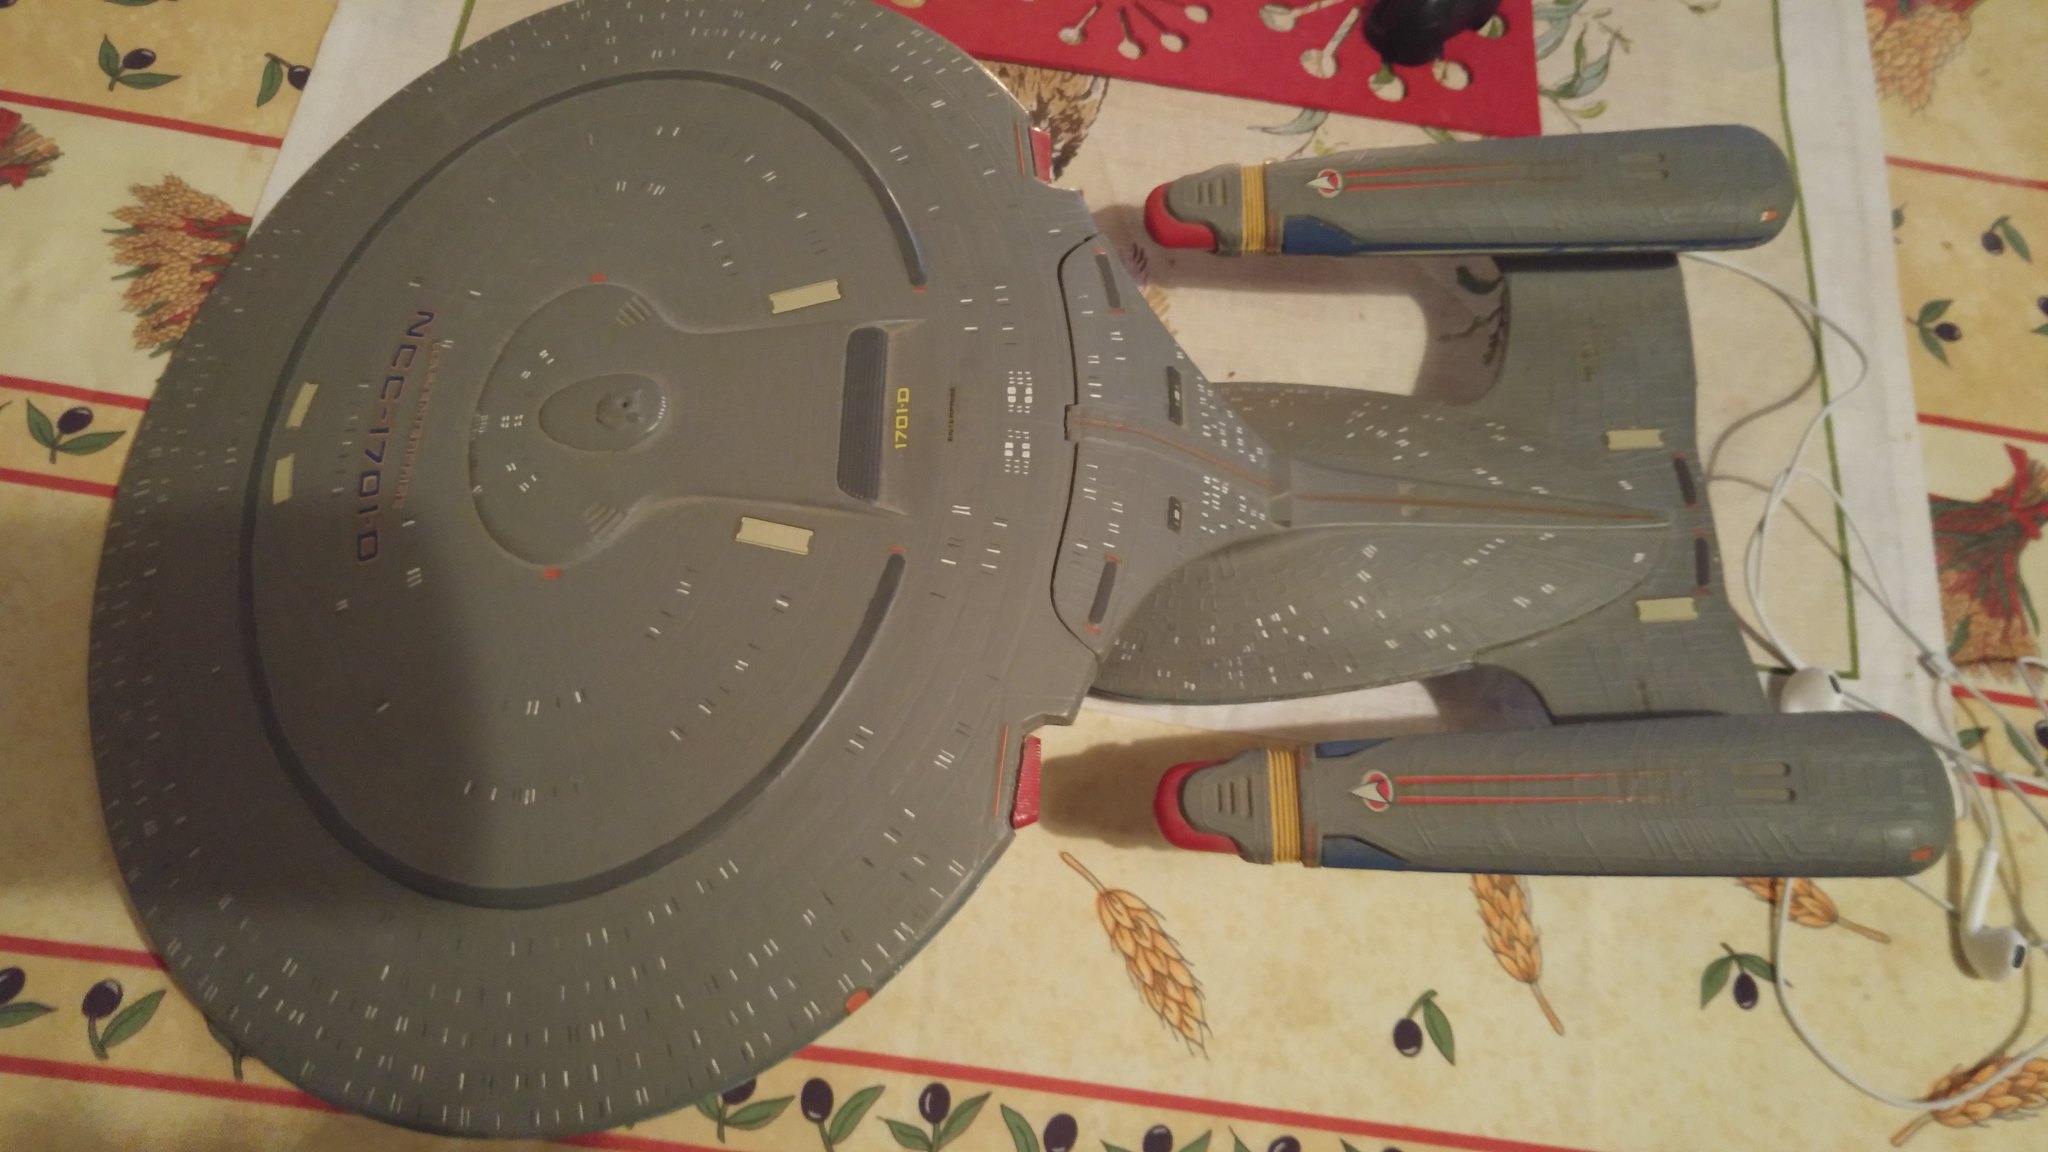
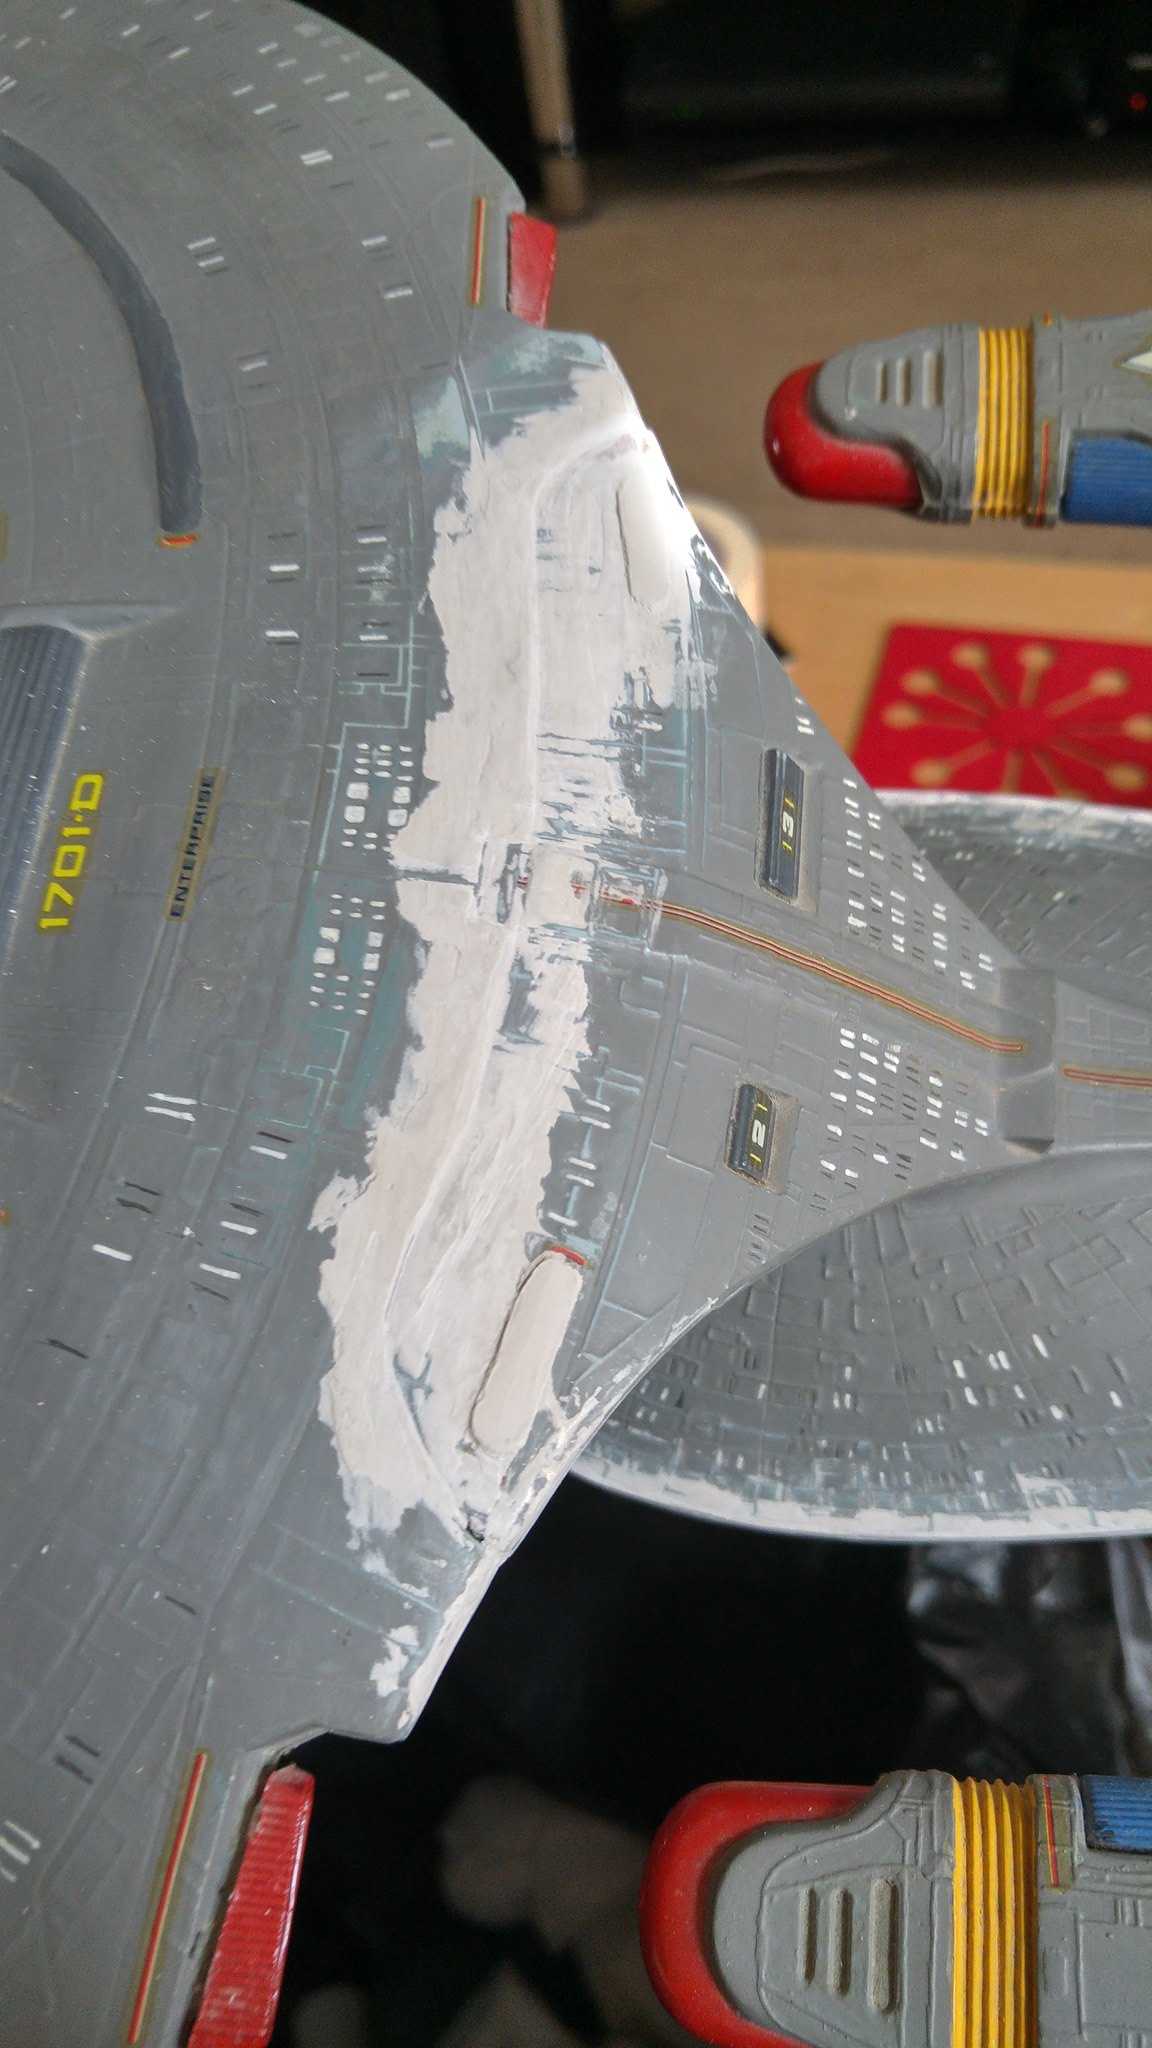
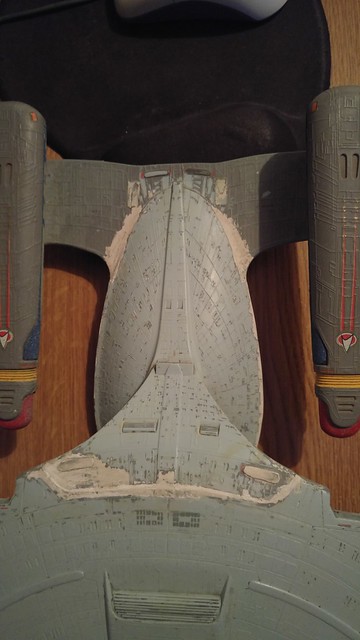
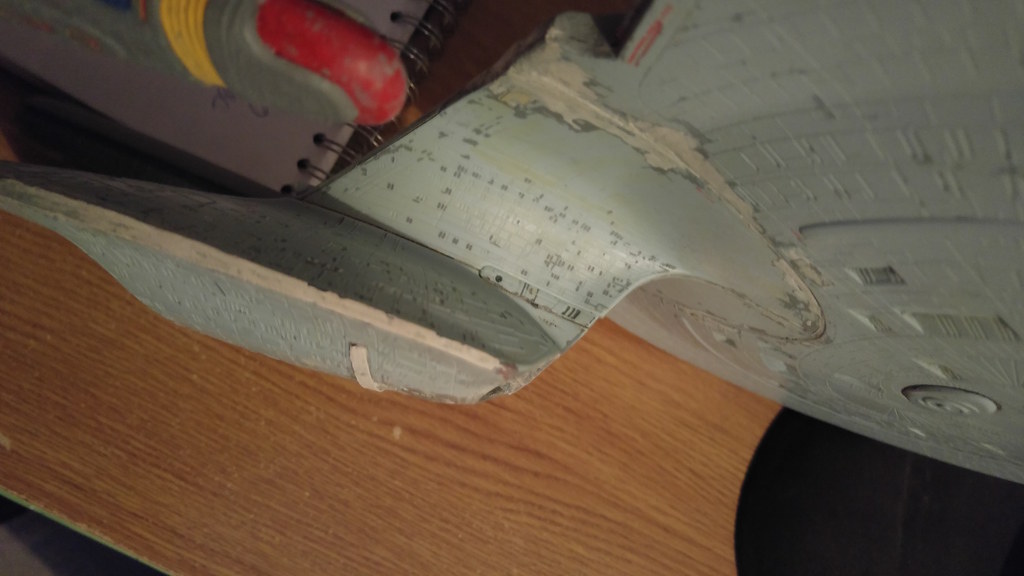
She doesn't look too bad from the top, but from the side...
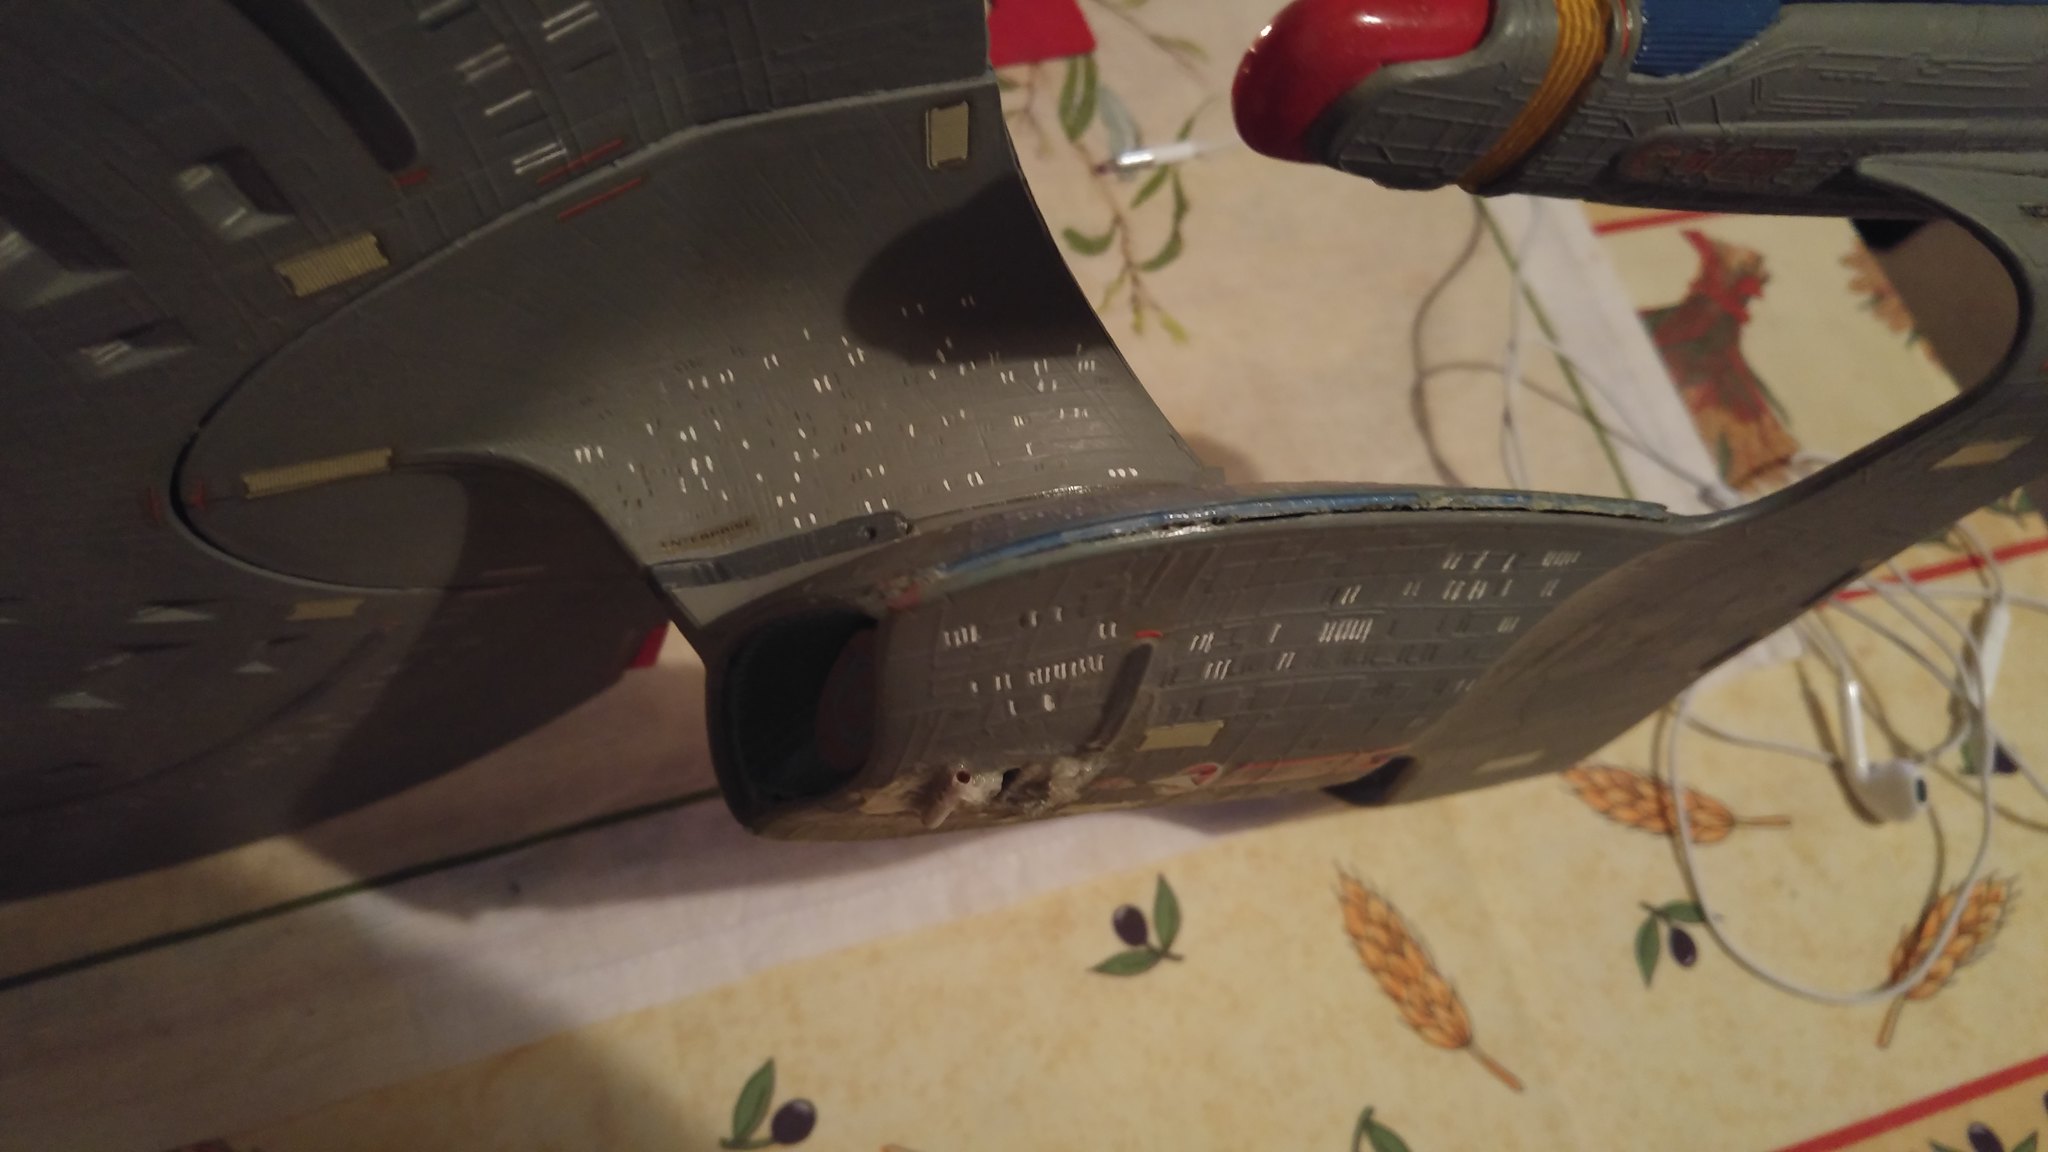
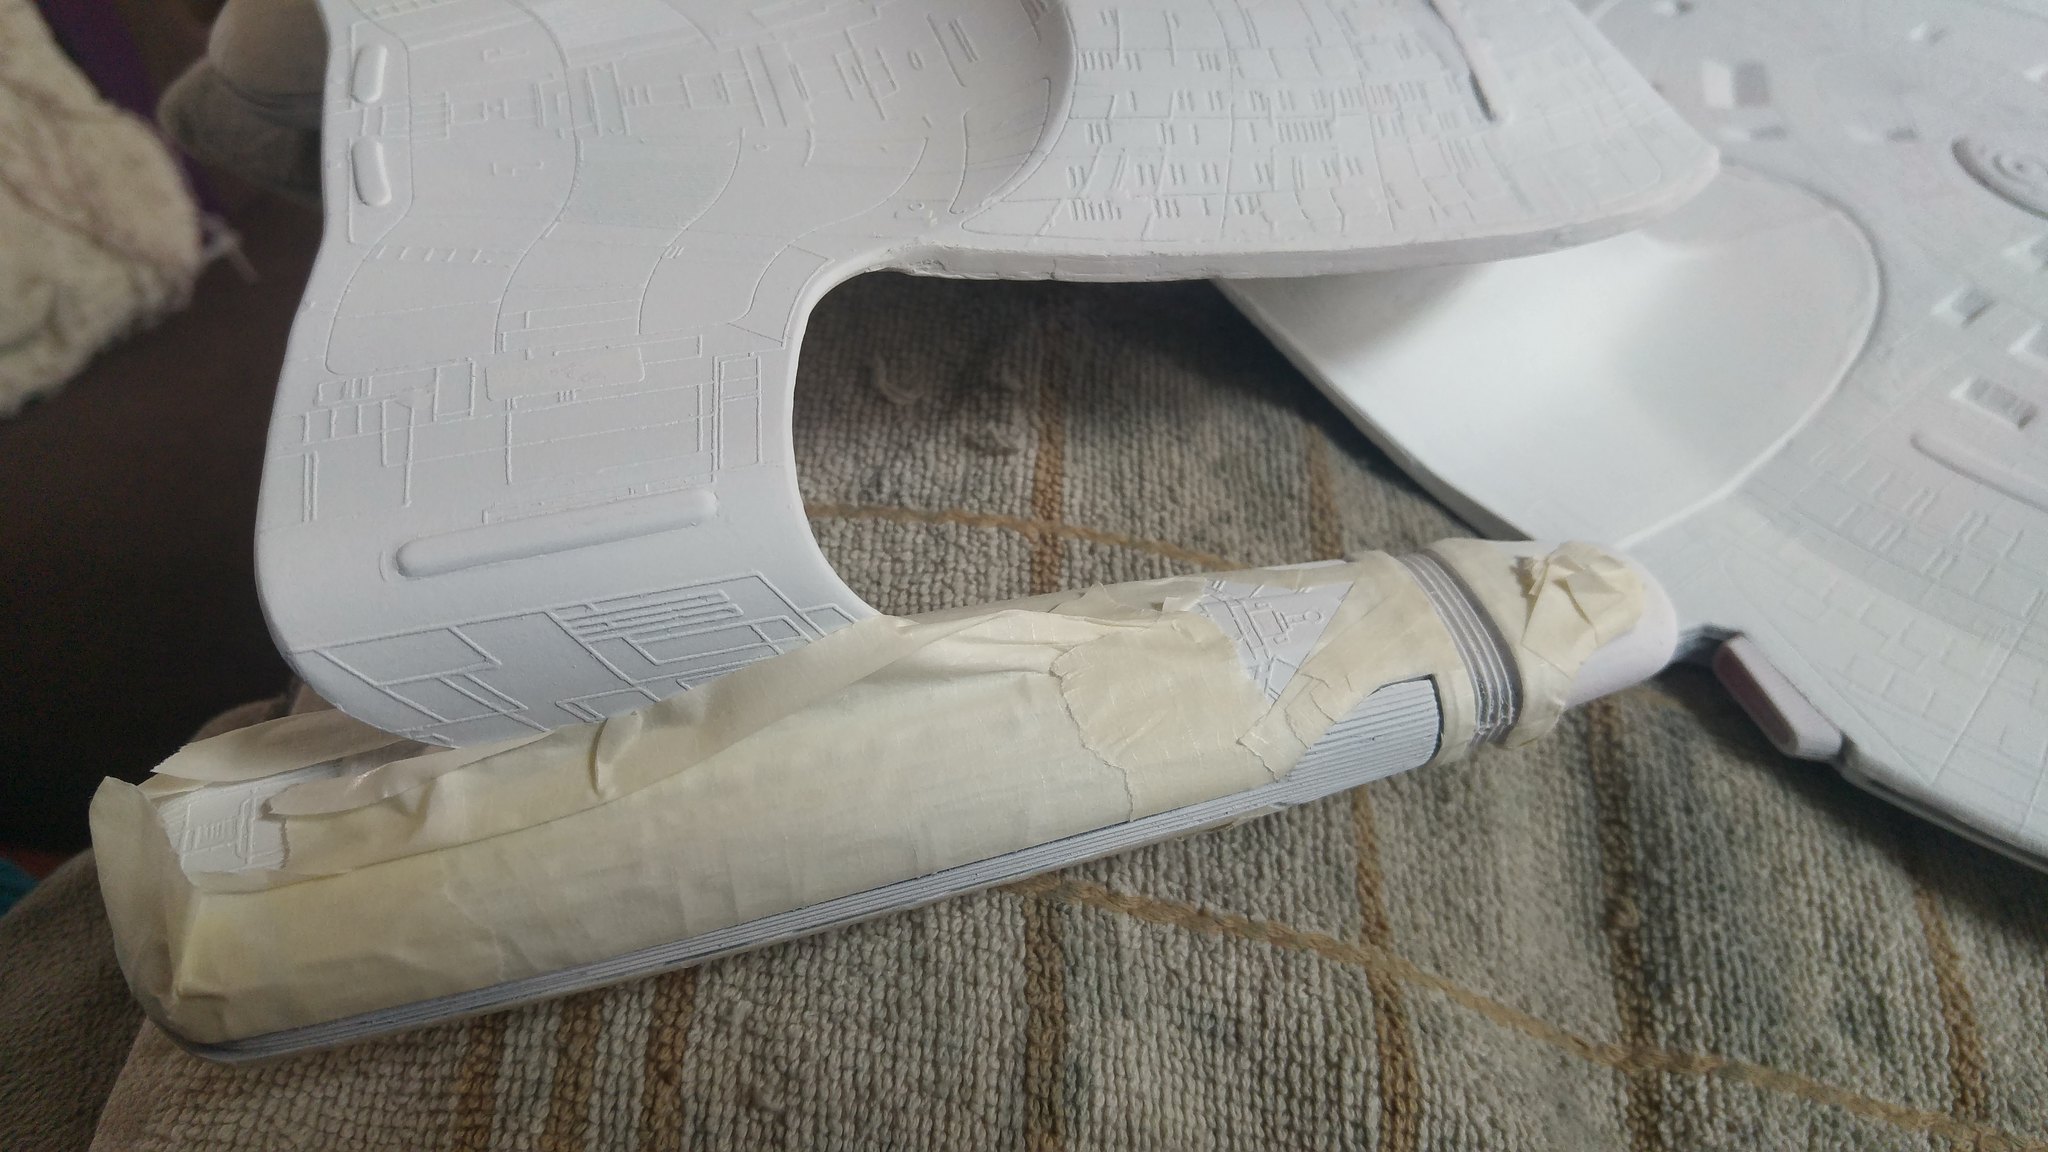
You can see where she is coming apart at the join, and where I did a poor job (quite some time ago) of fixing it. Notice the little pipe thing near the stand hole! Underneath is the poor attempt I did at mounting her, after her stand busted. I think that white thing is the plastic bit of a q-tip. What was I thinking??
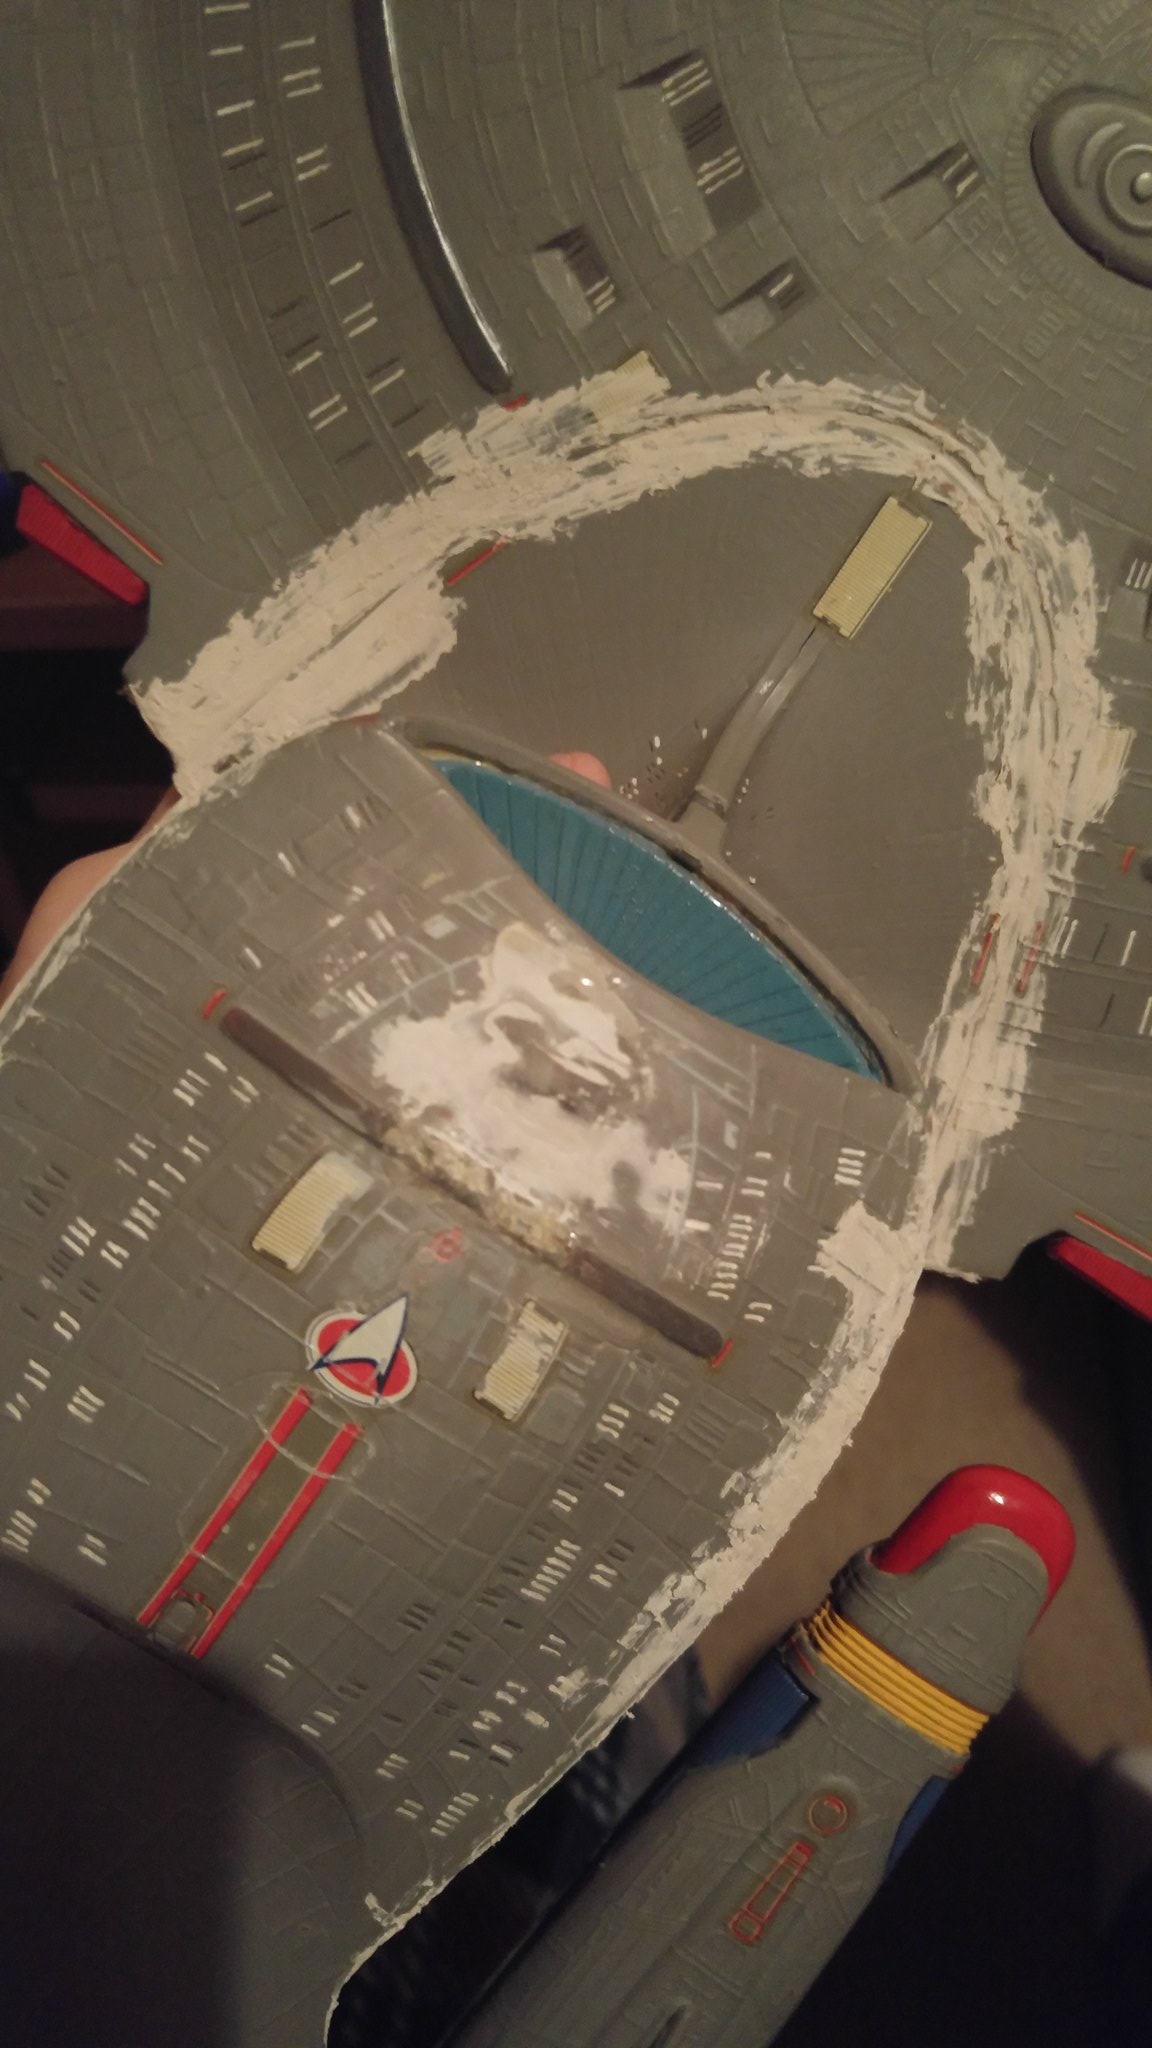
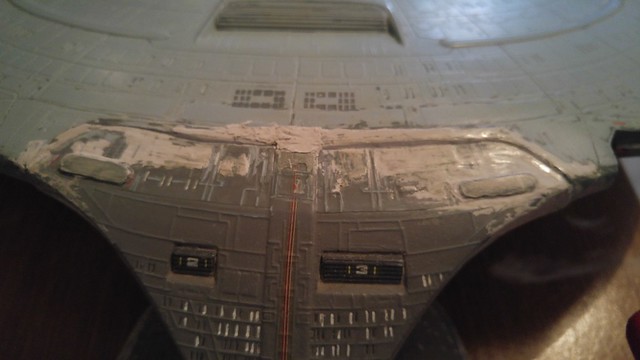
You can see also the massive gap between the saucer section and the drive section. I will fill this with some filler.
I will fill this gap too on the top section!
I then managed to remove the weird q-tip thing I'd glued on the bottom of the ship and sanded it down as much as I could to remove the residual glue. It gave it a nice smooth finish, even if it looks a little rough around the edges.
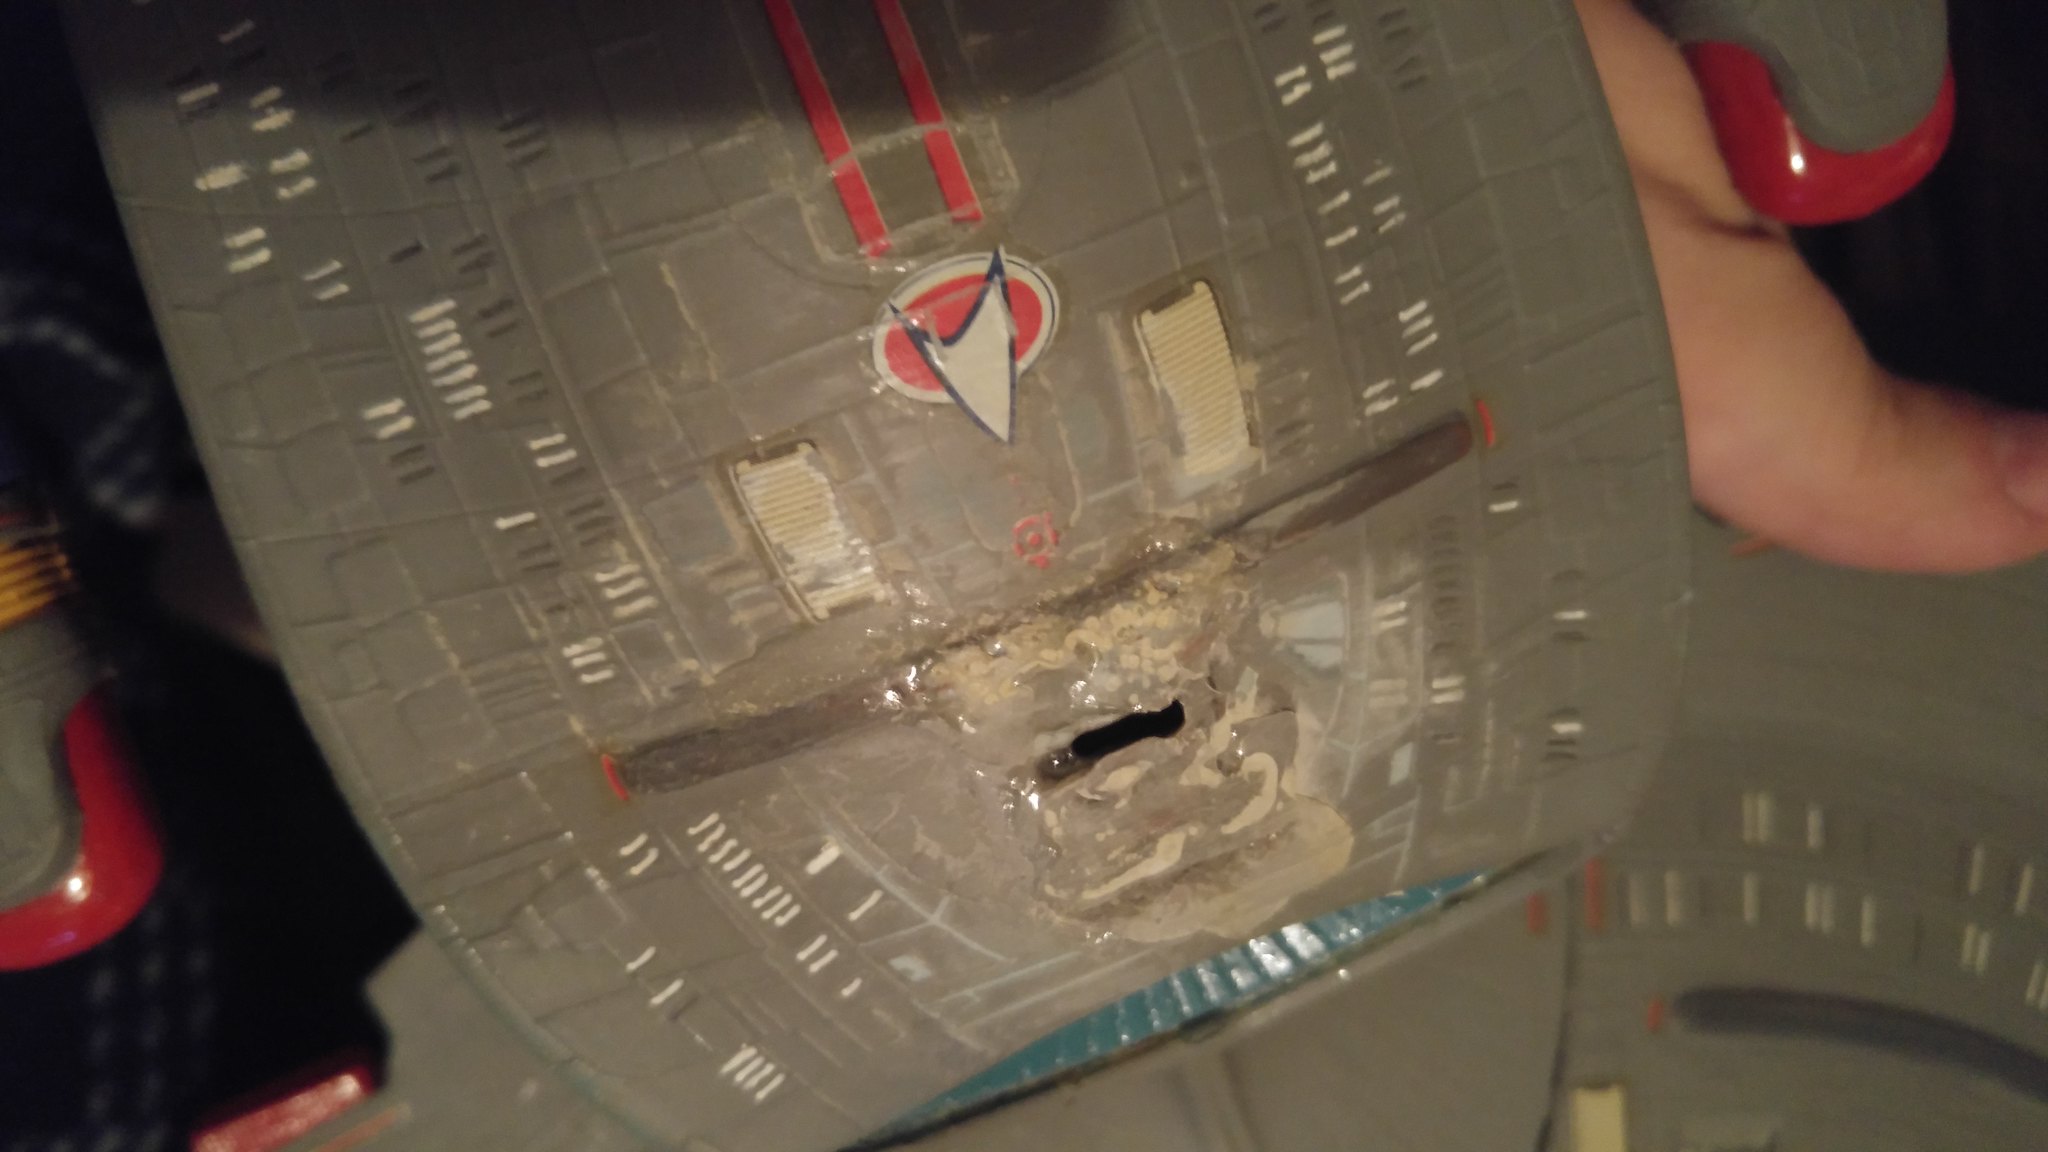
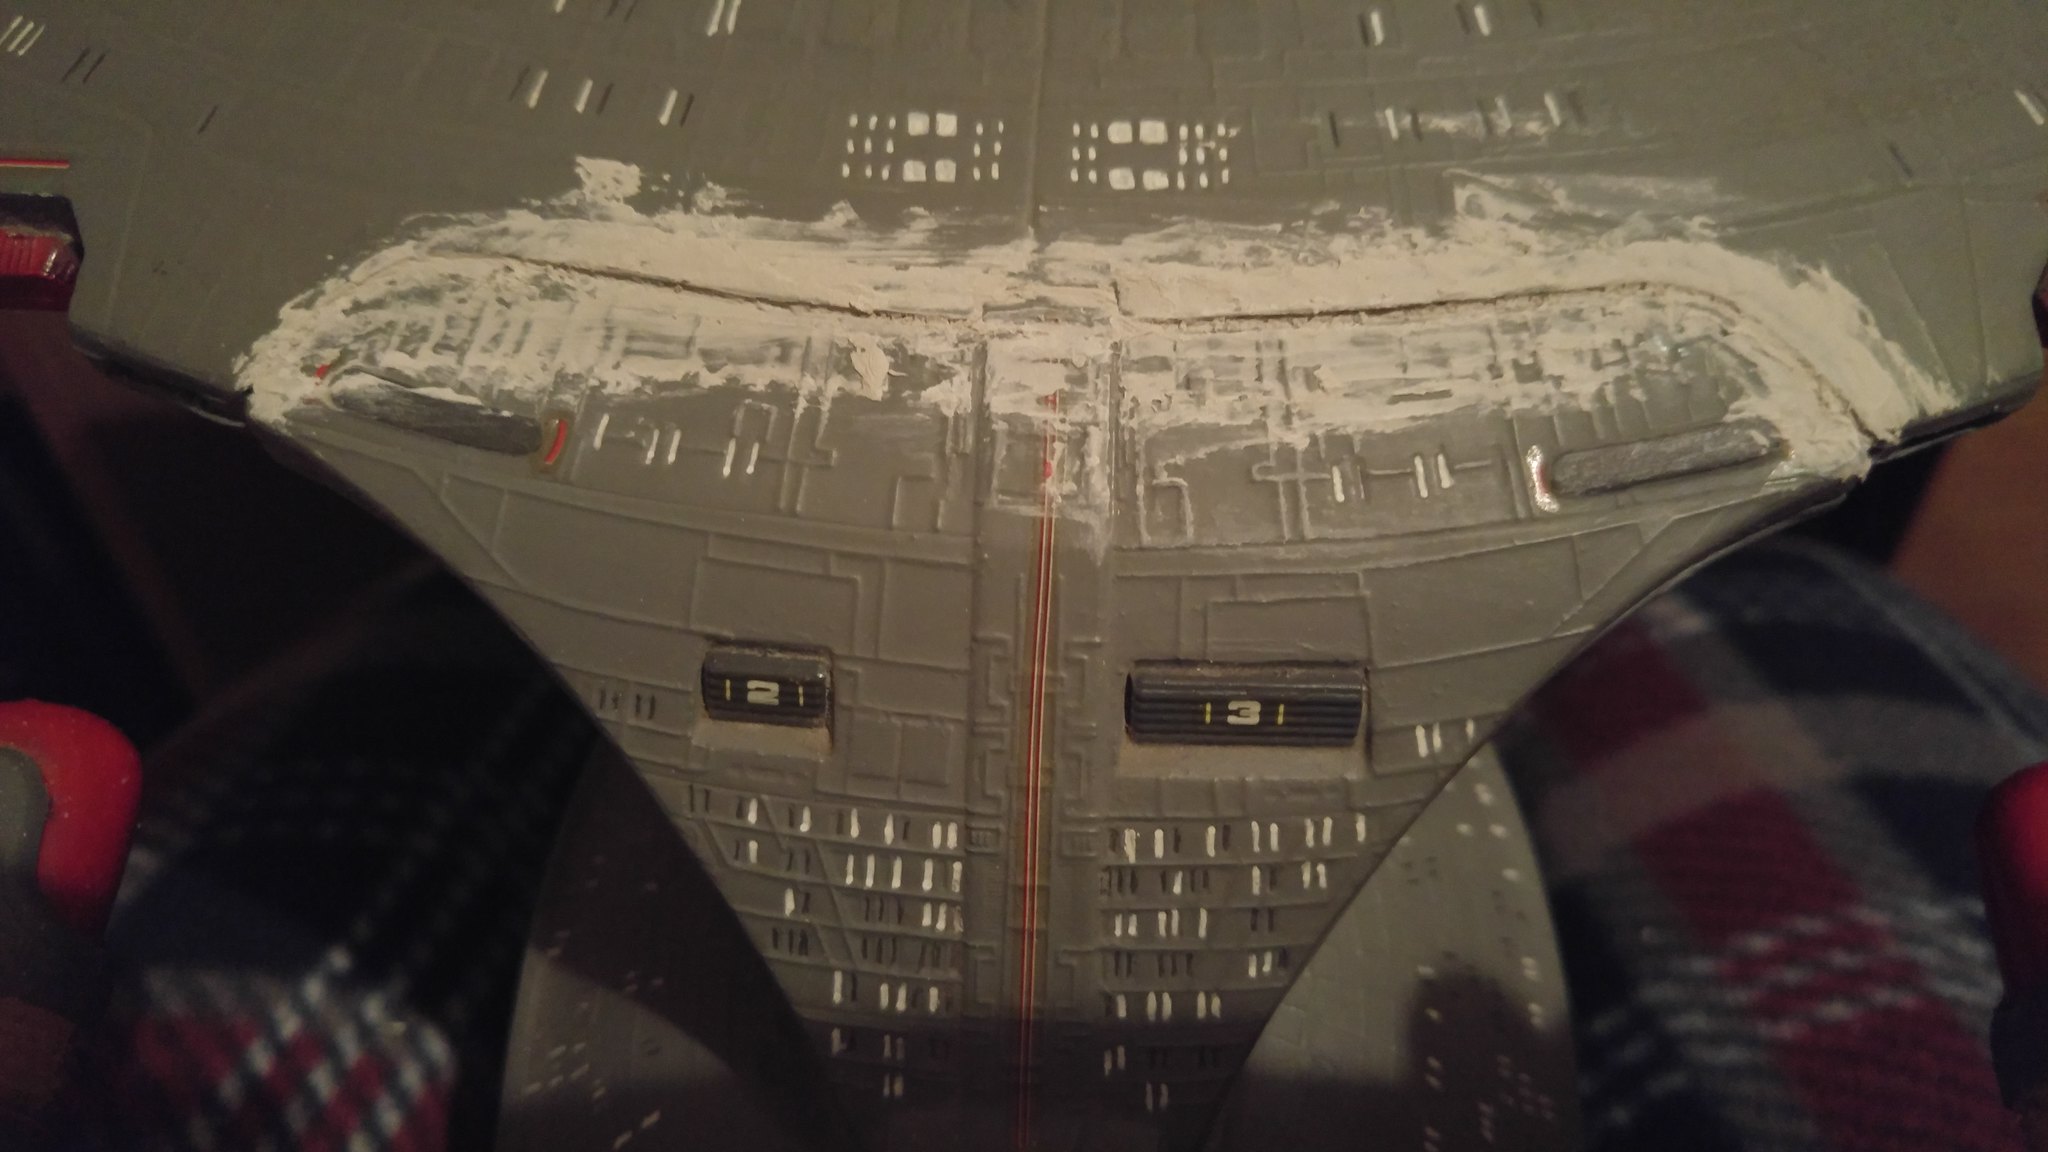
My plan was to fill the hole, I think I got a little generous with the filler
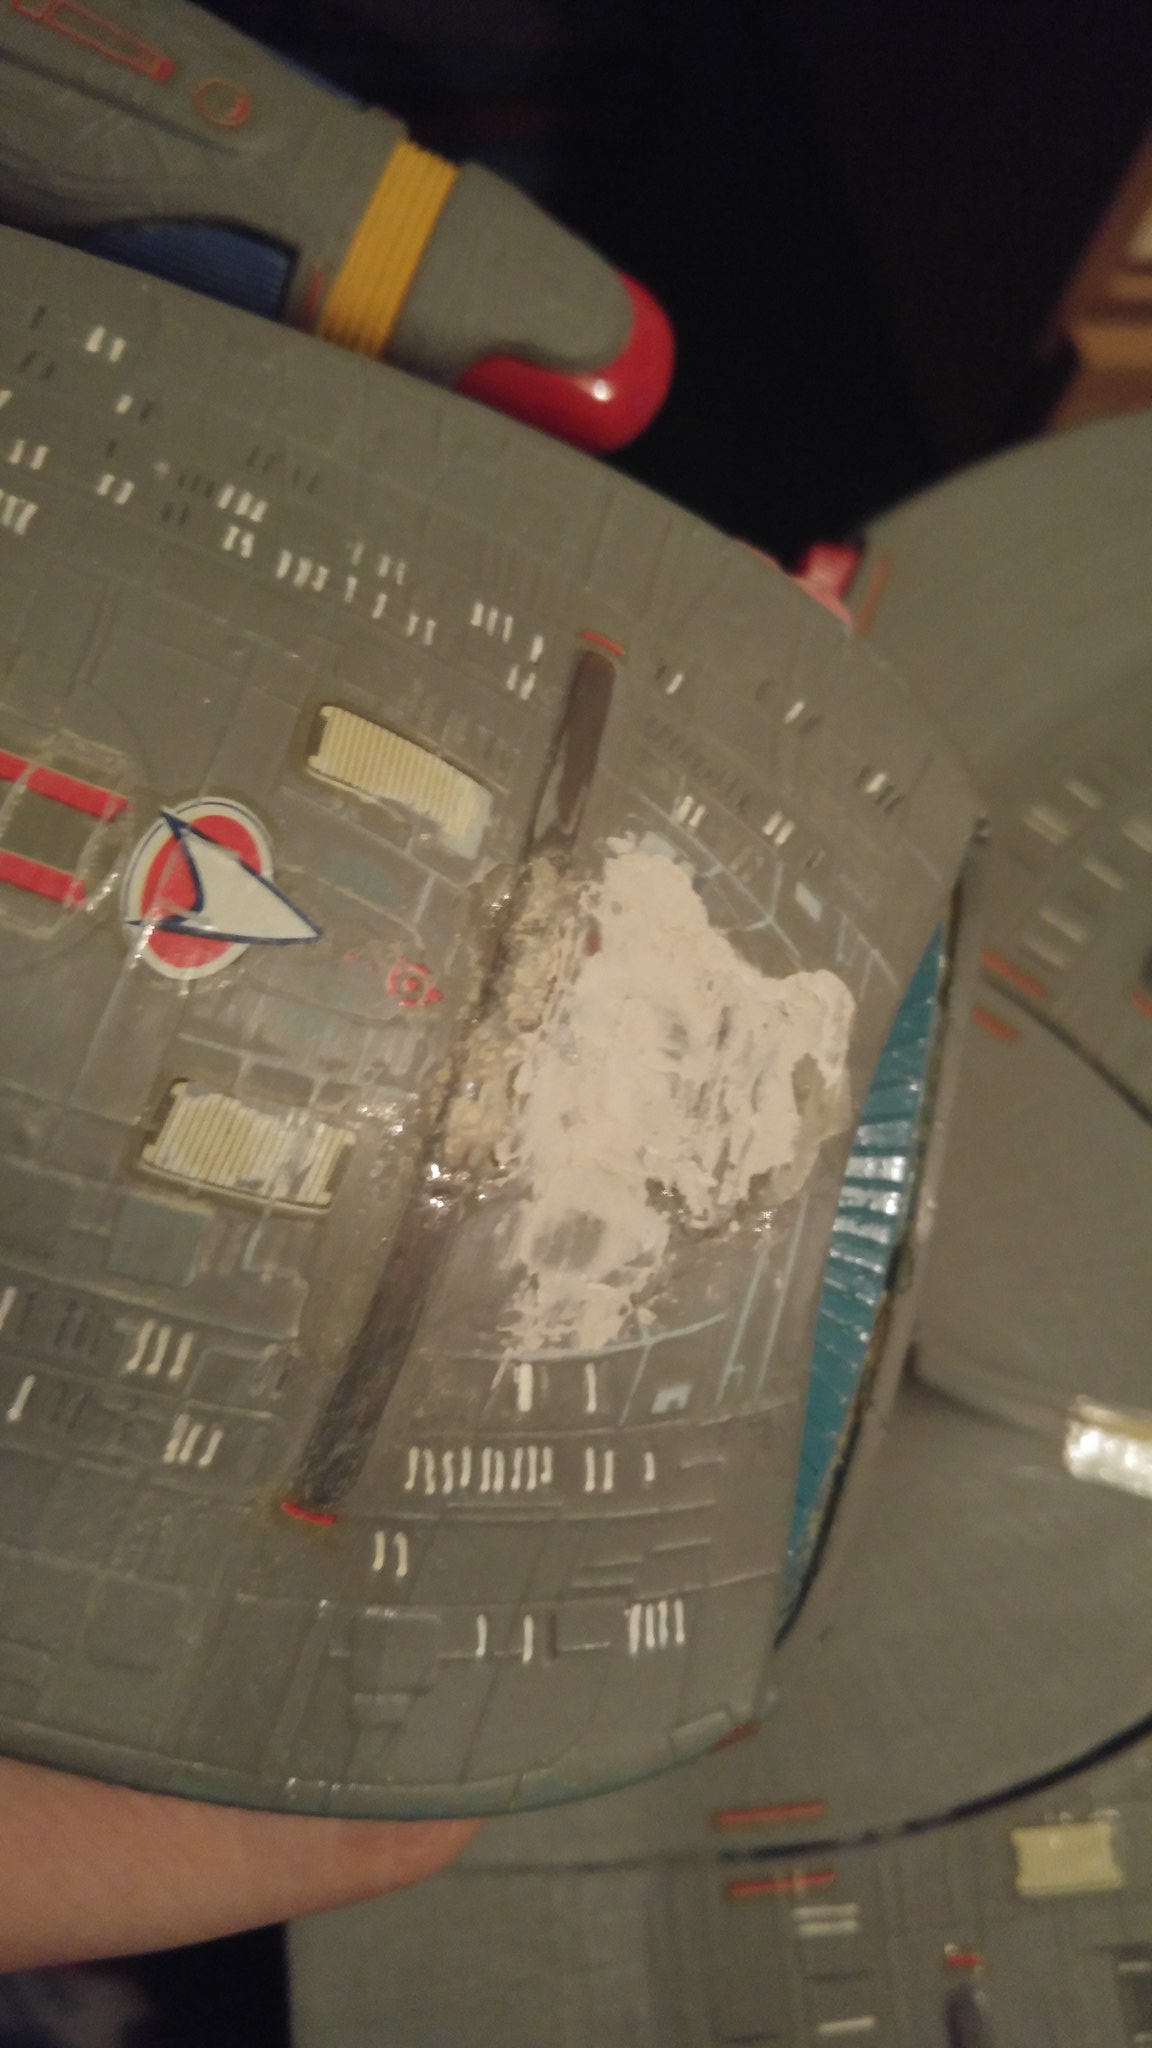
I decided to use filler on the join between the saucer and drive section. I got a little over eager here too and used a little too much filler again (you'll see shortly what I ended up doing)
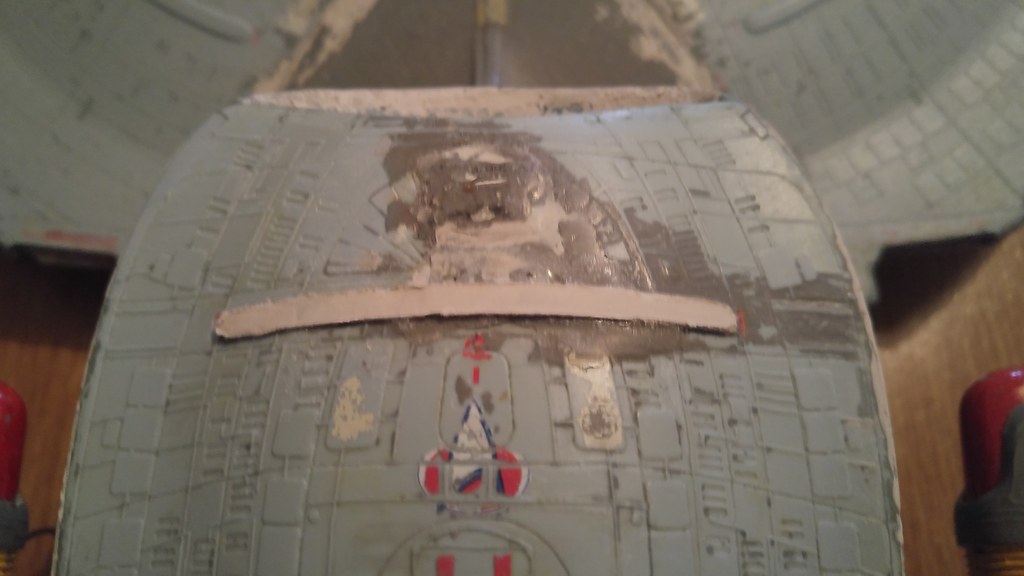
The saucer section from underneath where I've used filler again! You can also see where I've sanded down the very bottom of the ship, from when I filled the hole. Notice how the phaser strip looks really rough.... I couldn't have that!
So I masked the area off and used (you guessed it) filler, to clean that bit up.
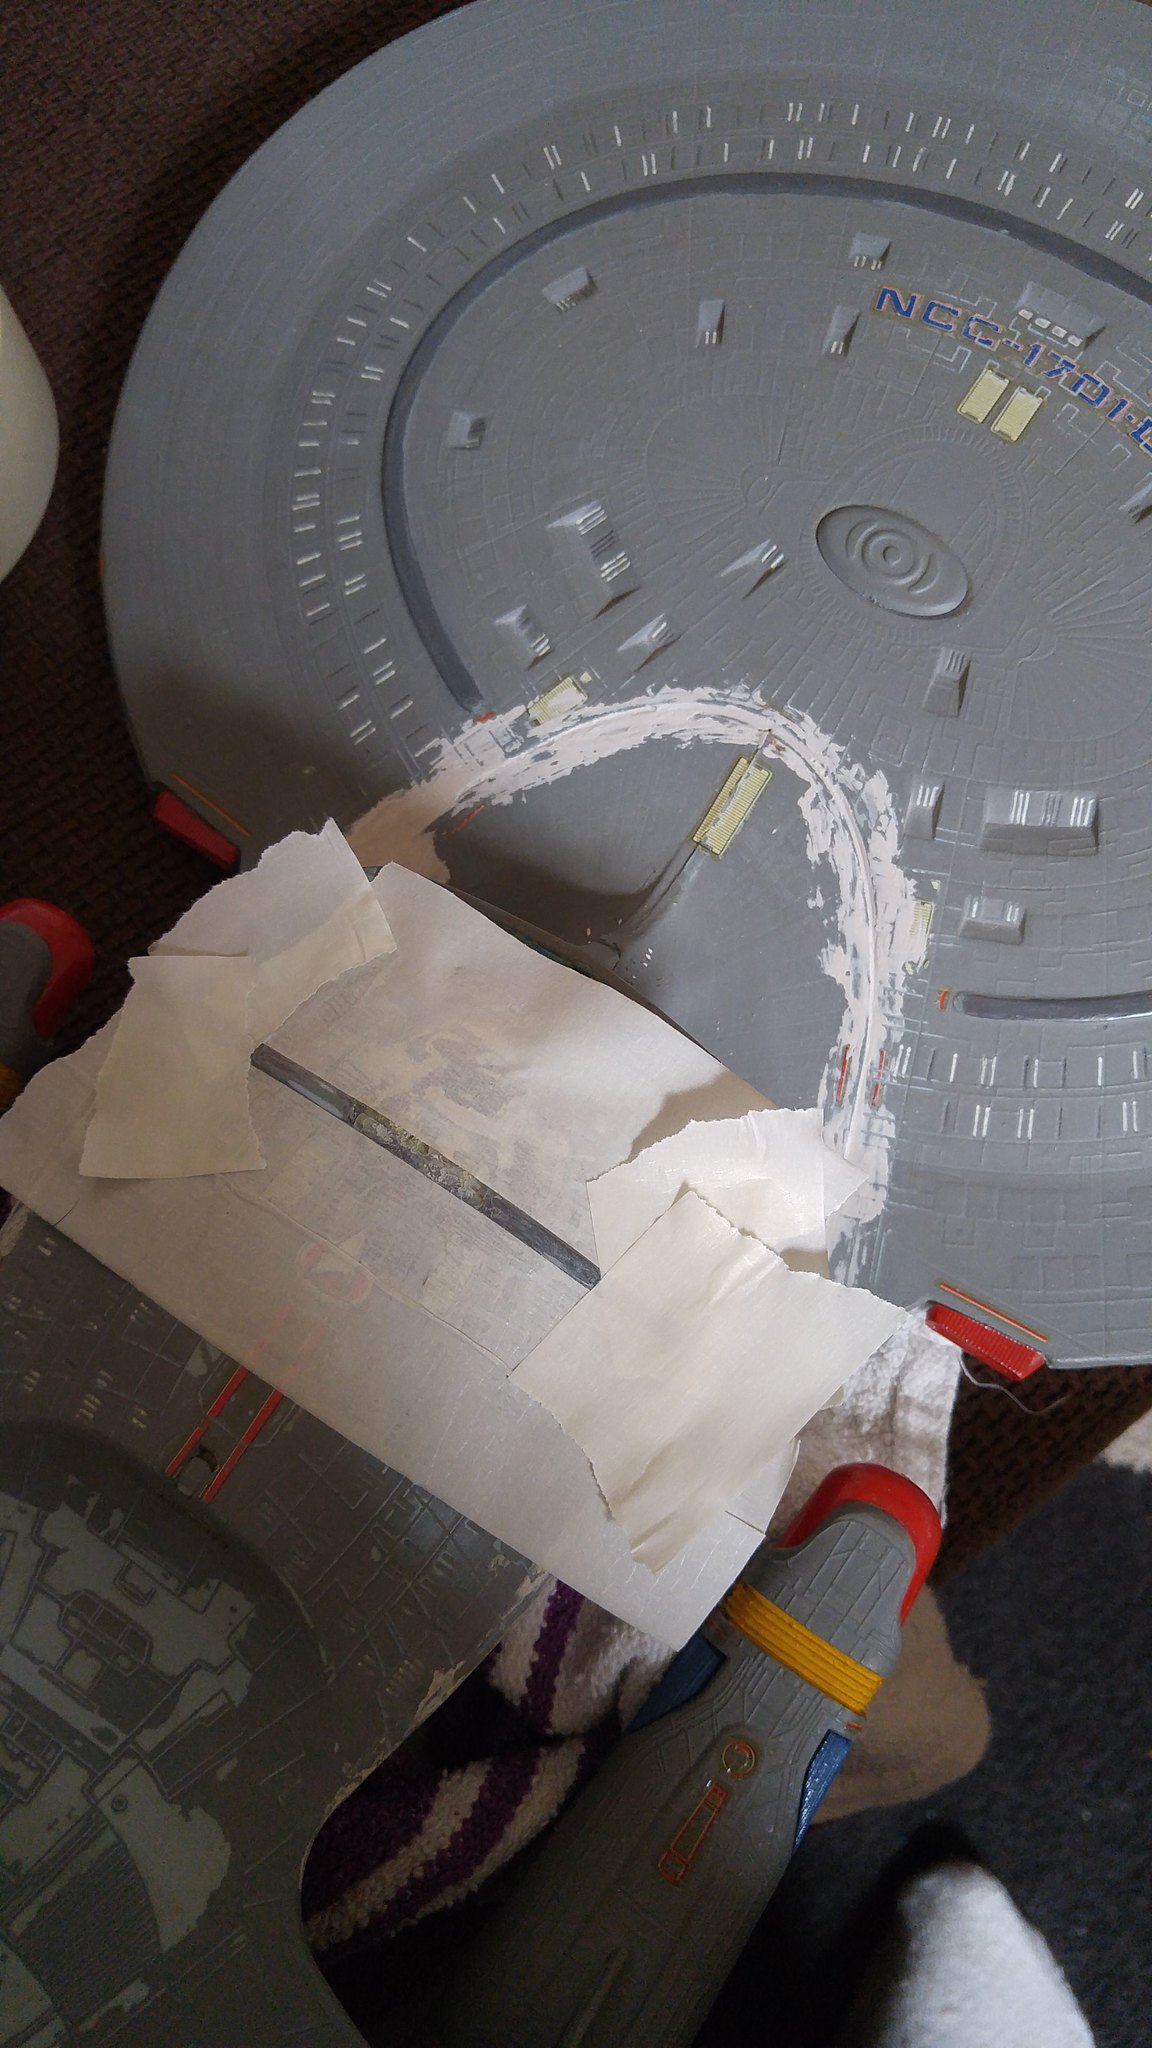
Worked pretty well I'd say
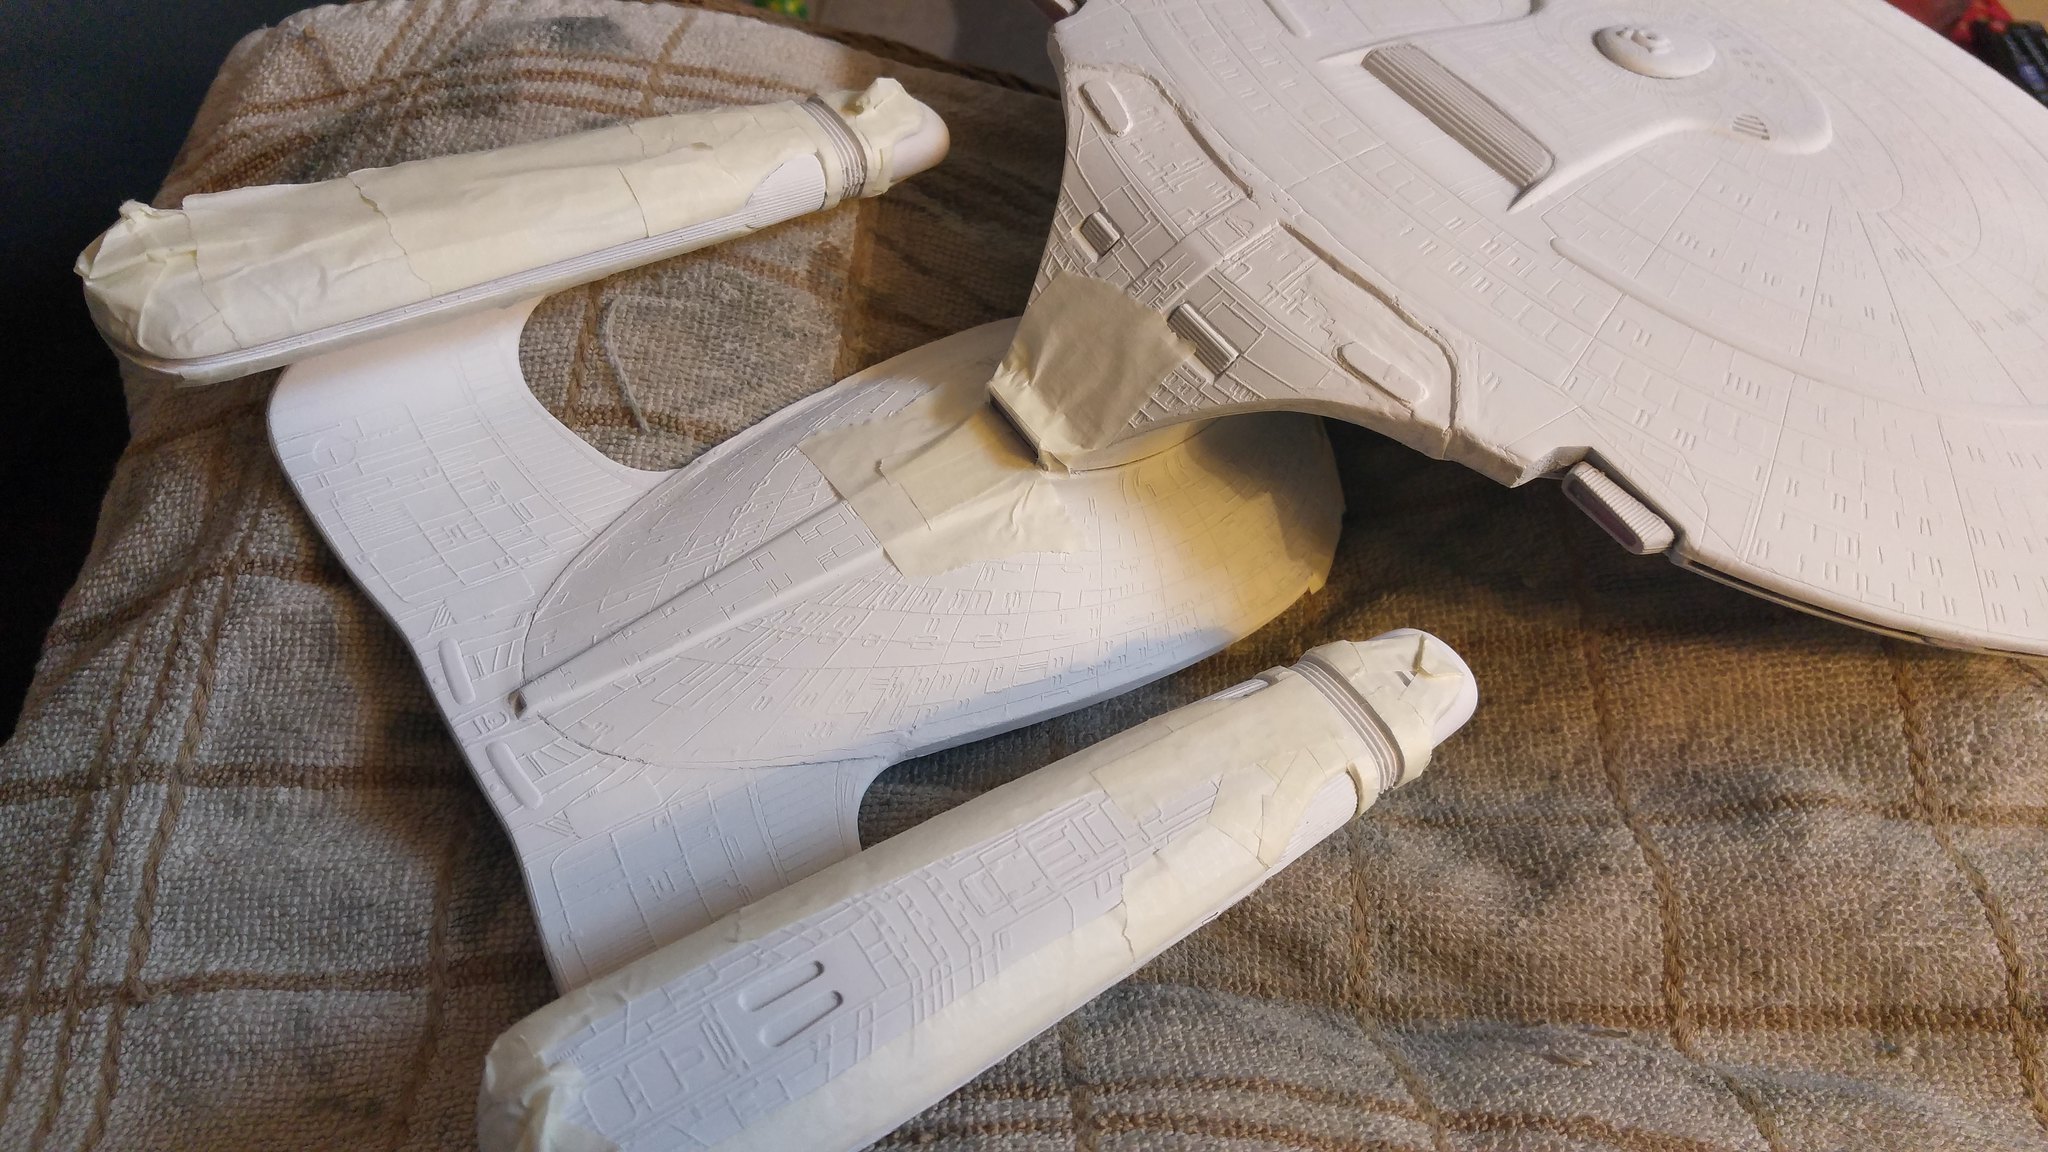
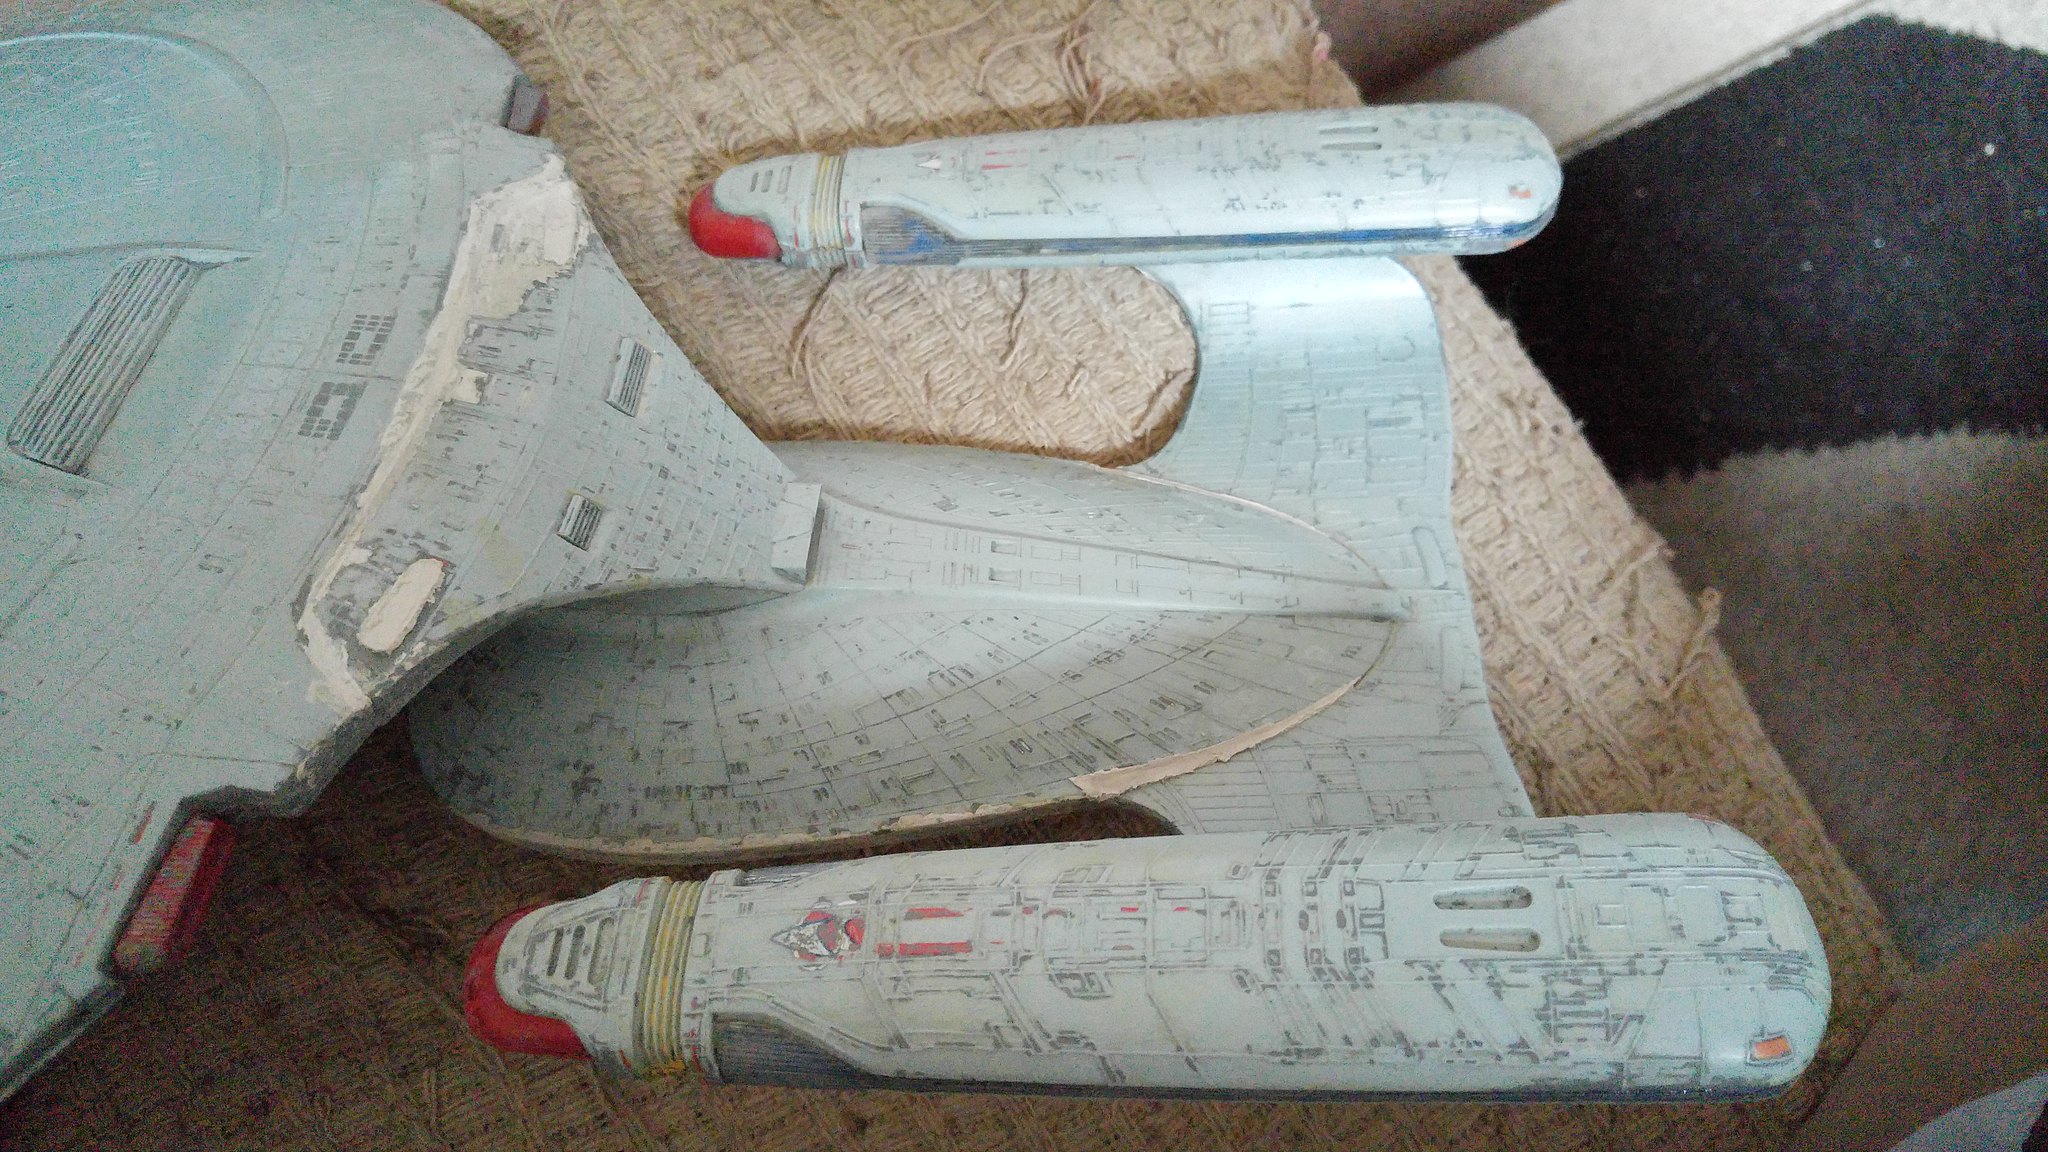
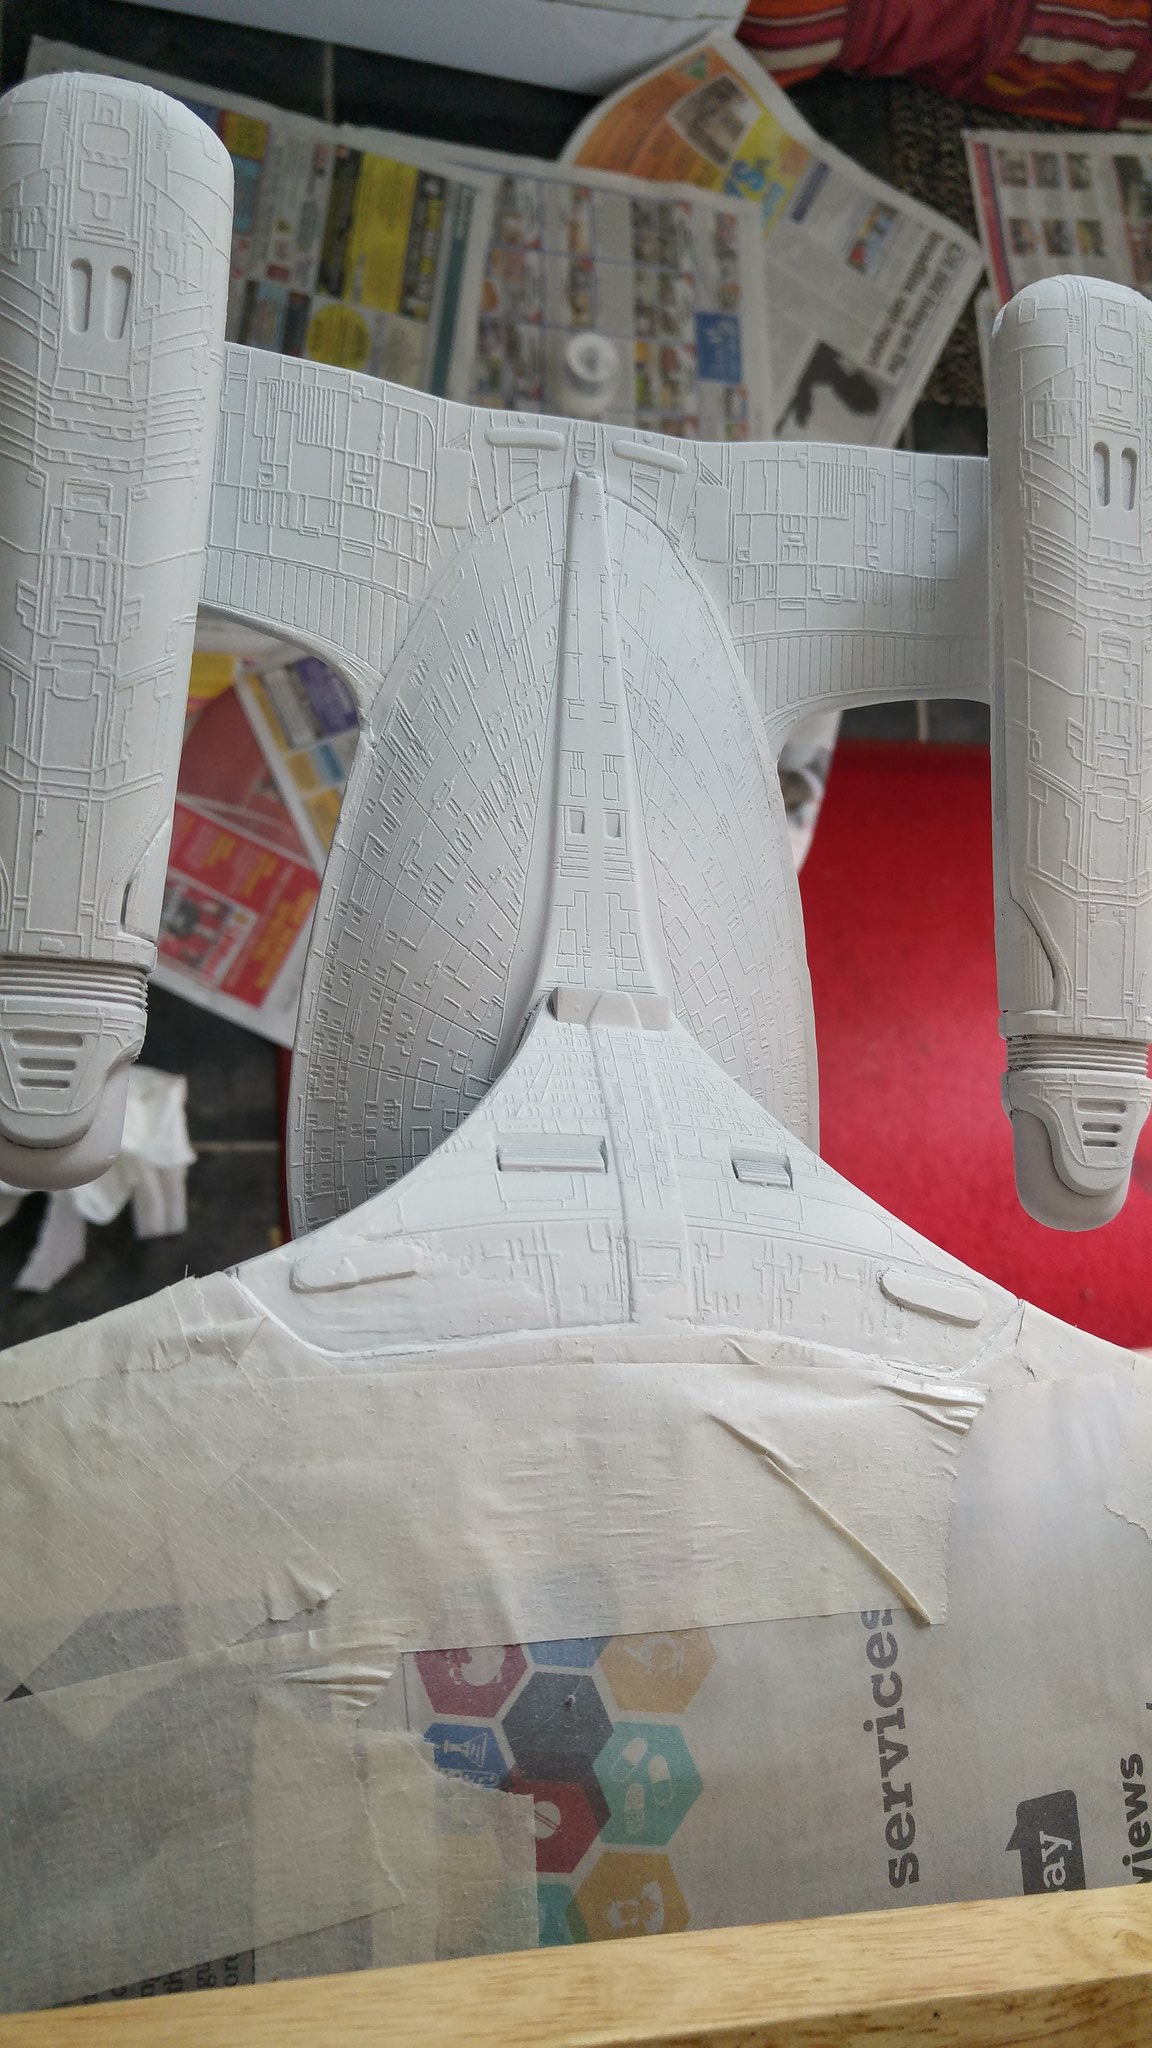
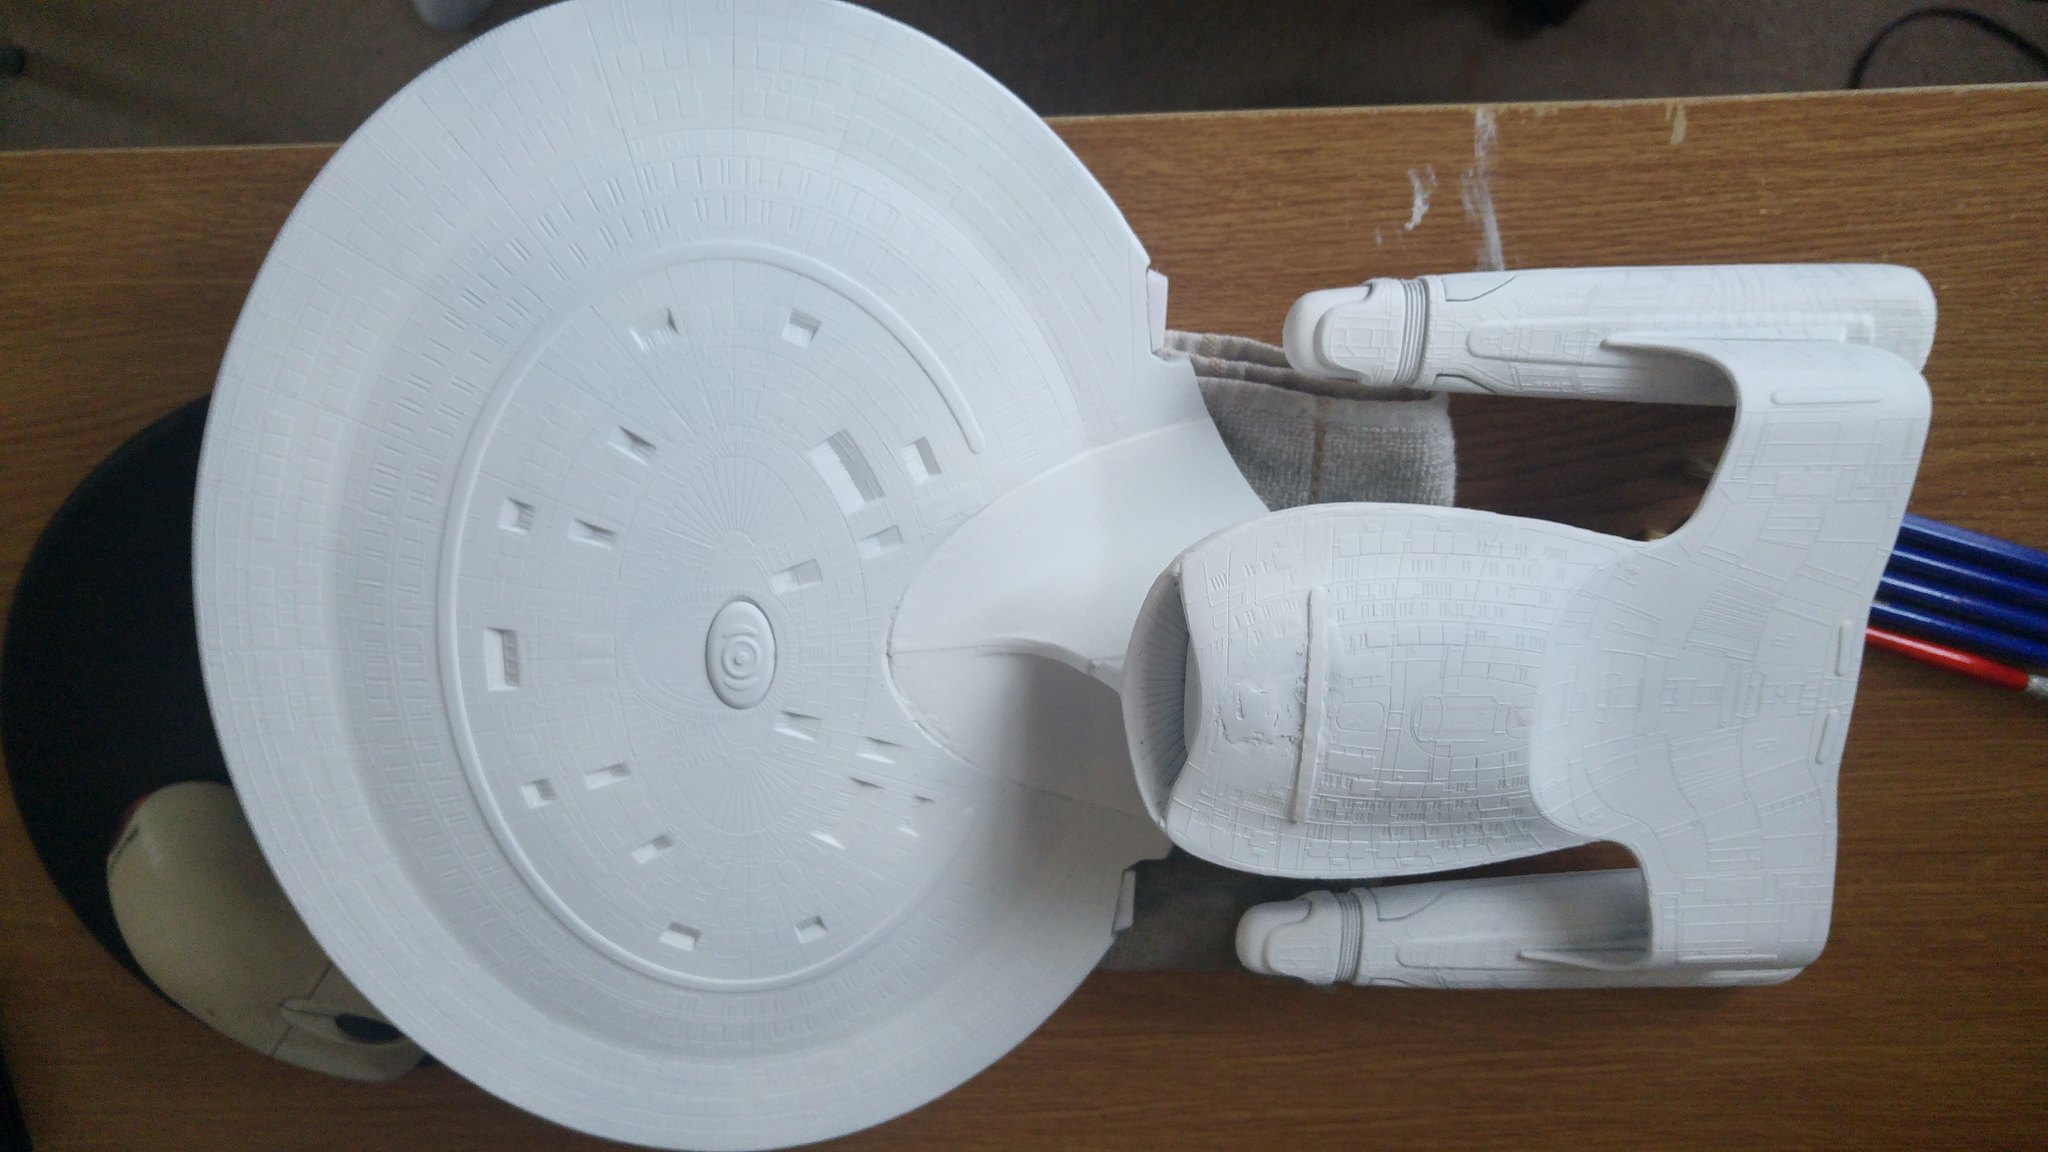
This image you can see where I have cleaned up the sides of the ship (not sure if the actually have a name)
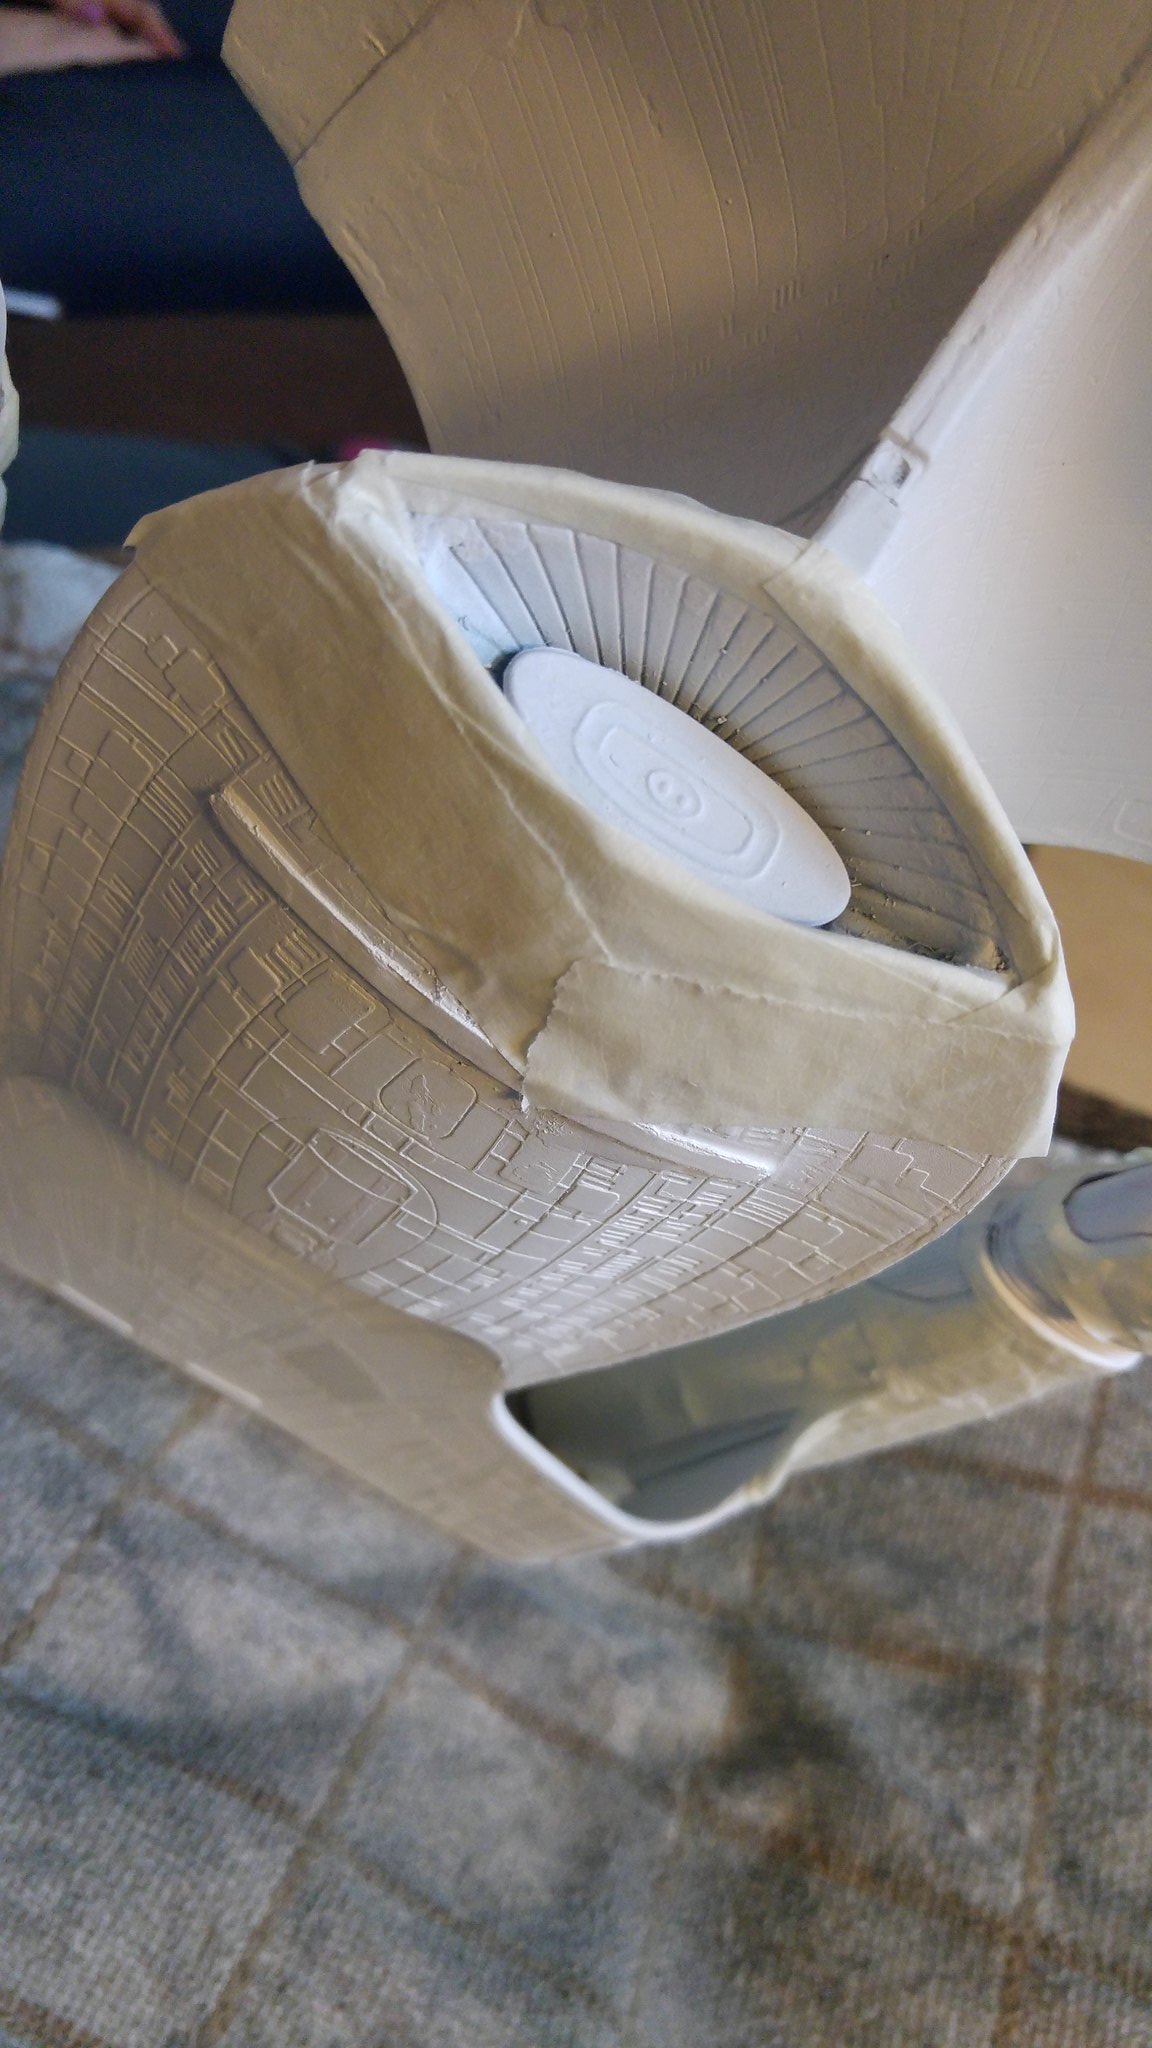
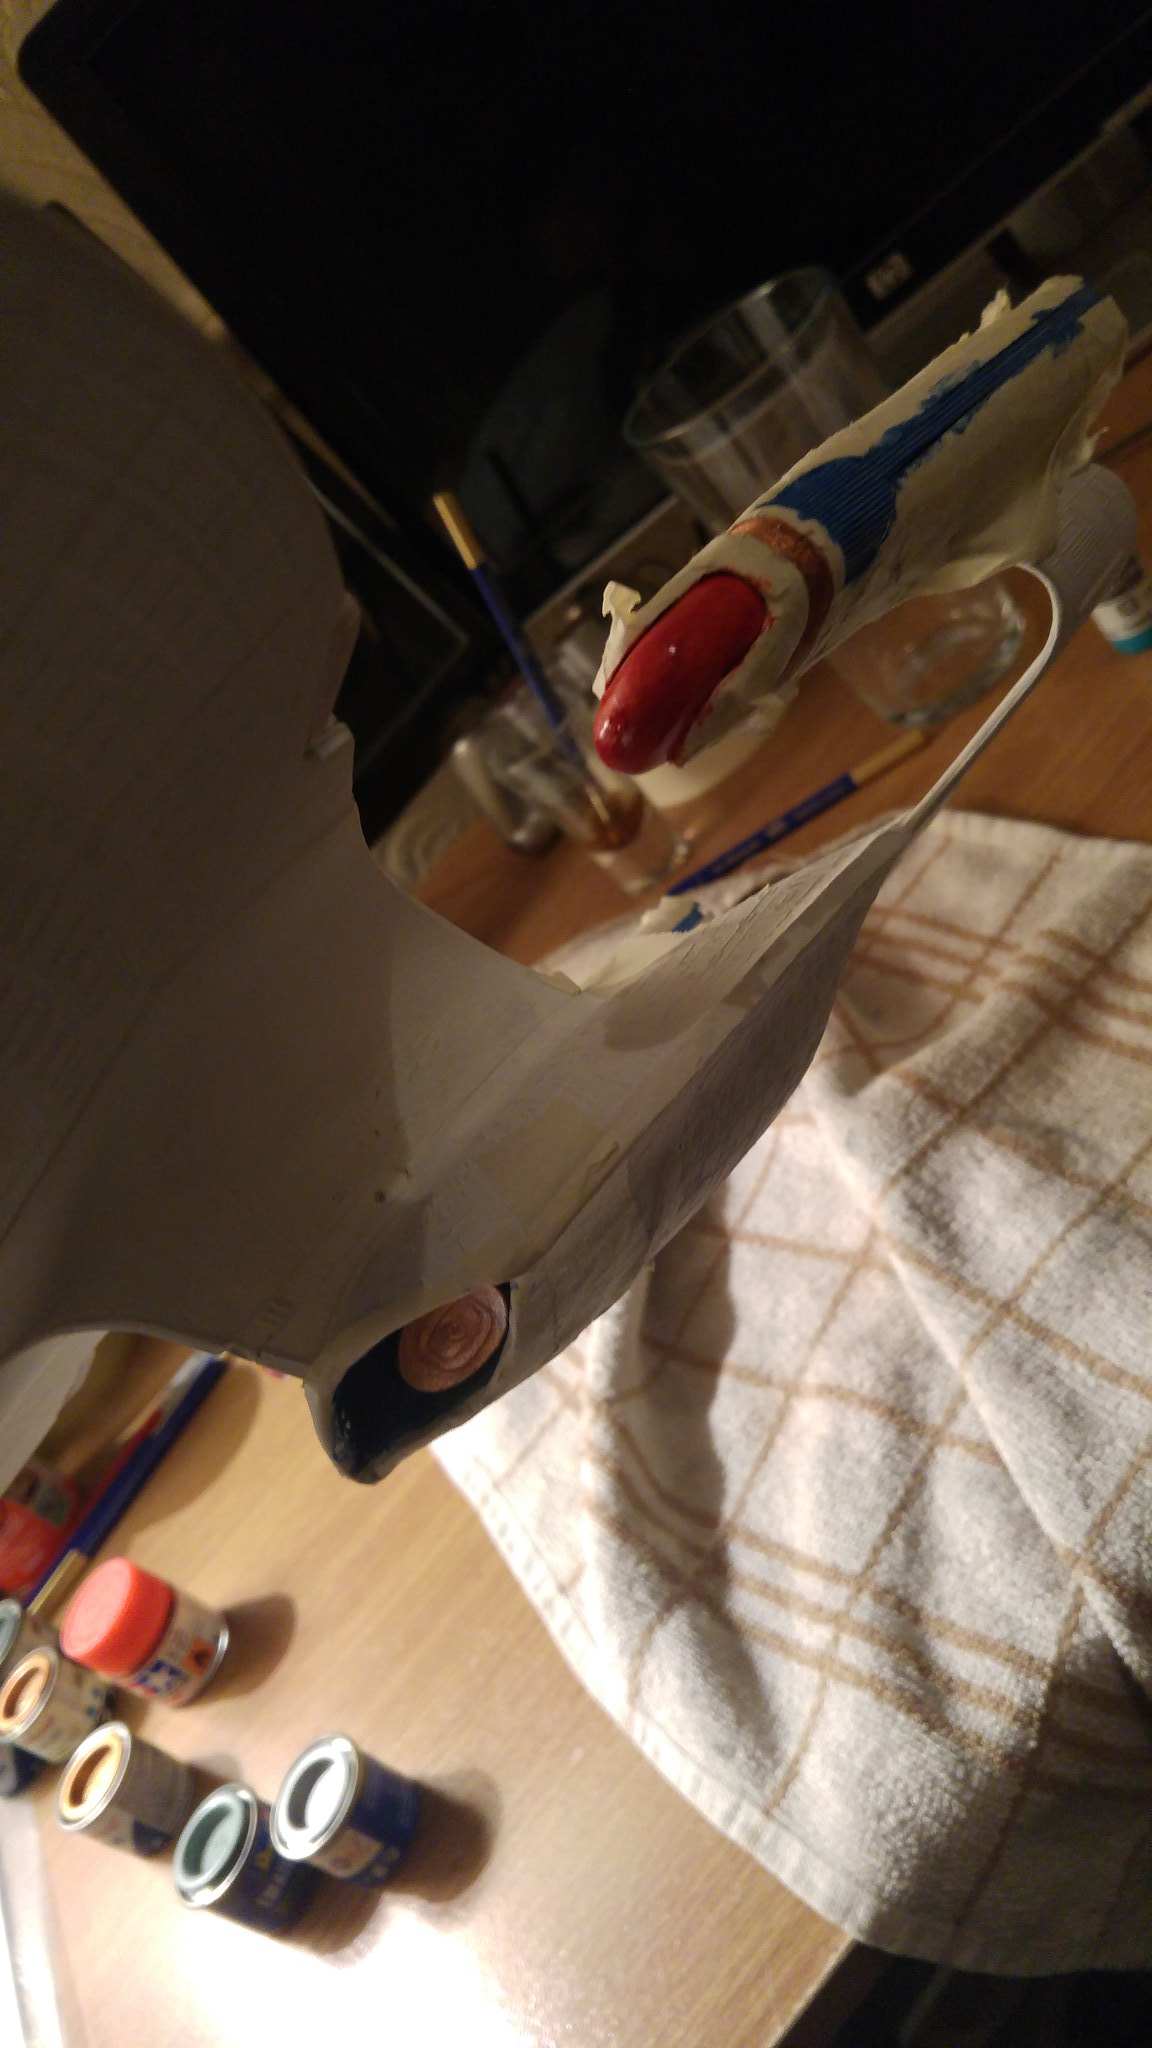
But I noticed the deflector dish needed sorting. Gaps everywhere!!
Another shot of the dorsal phaser strip looking a lot cleaner
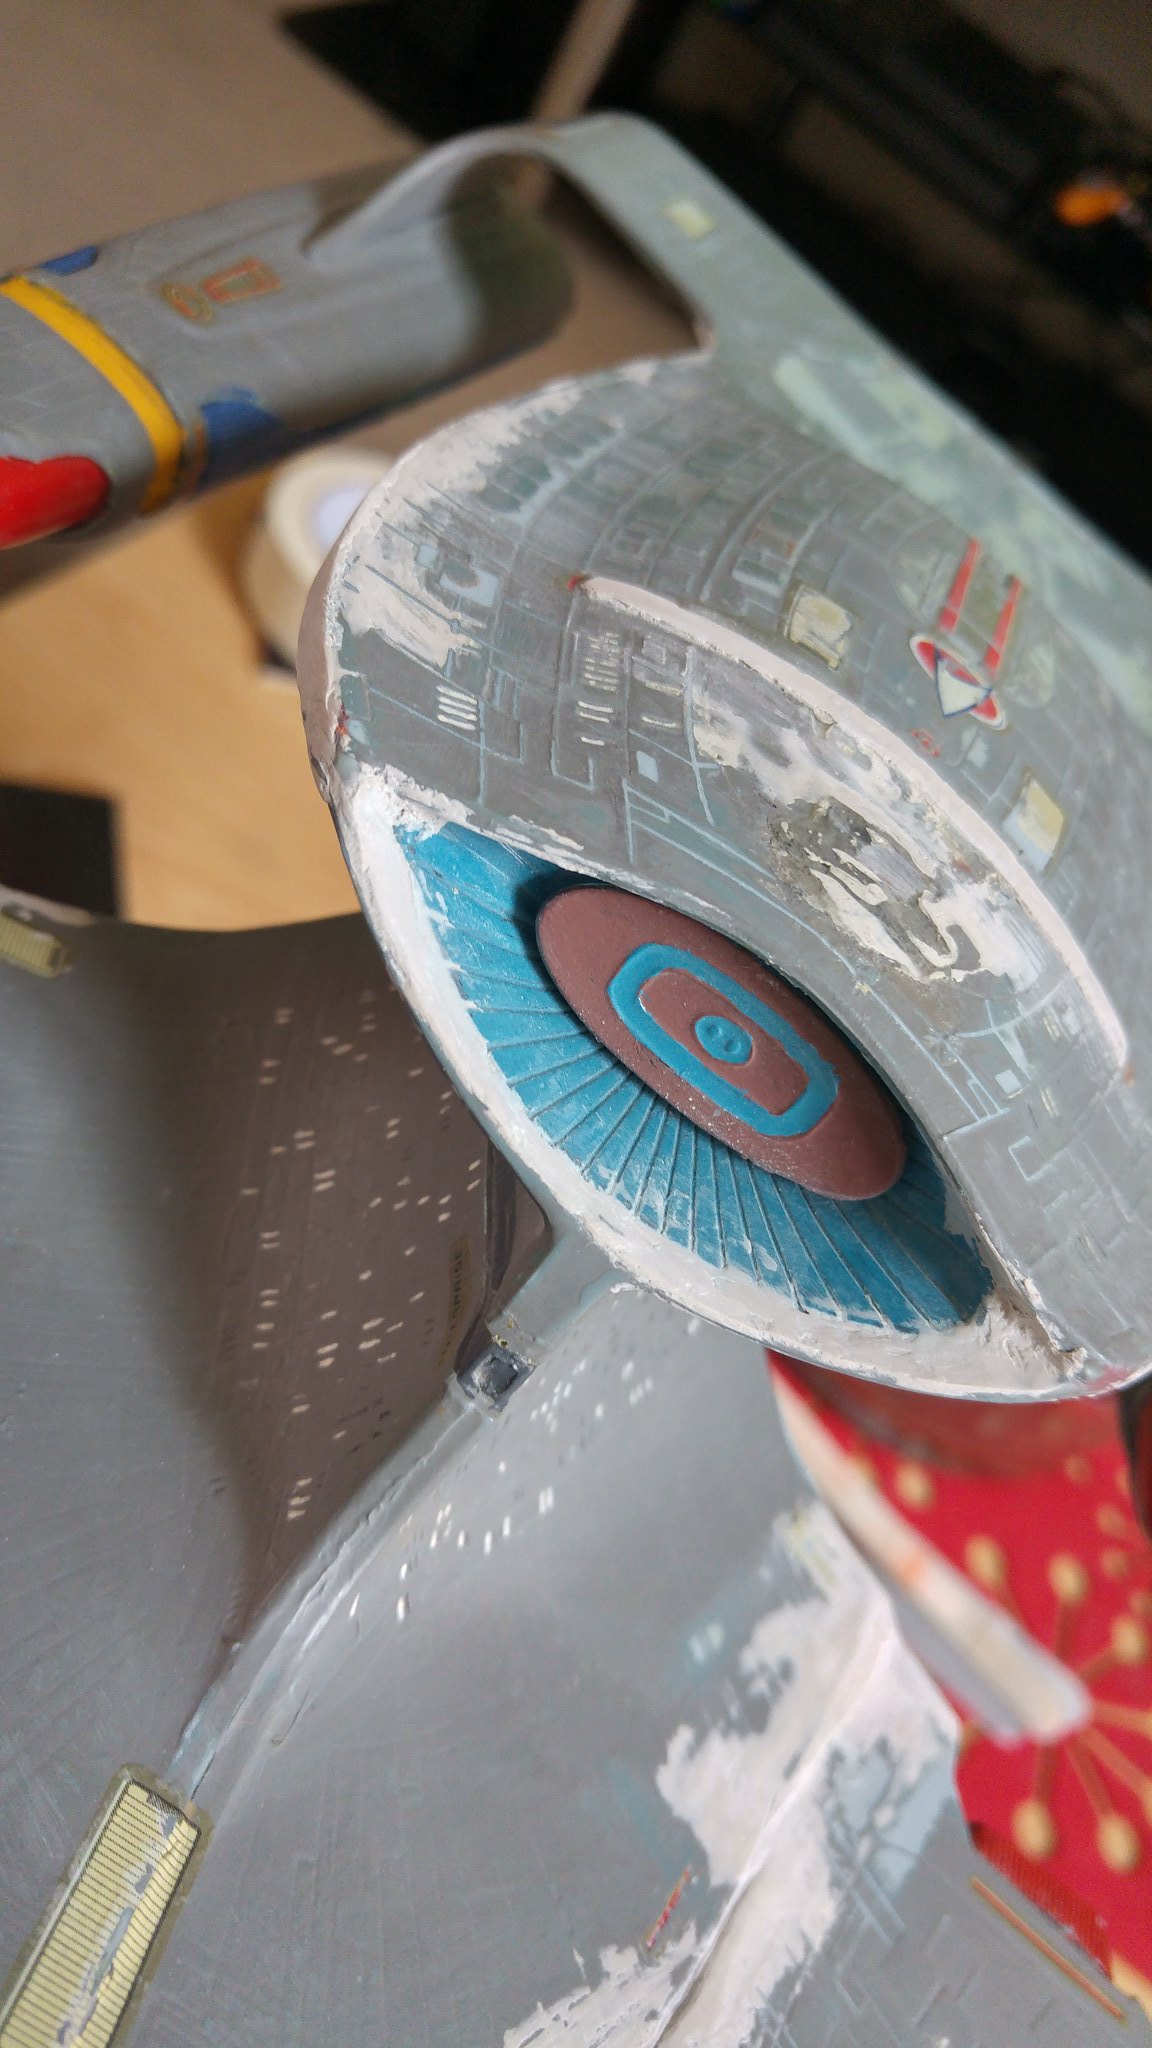
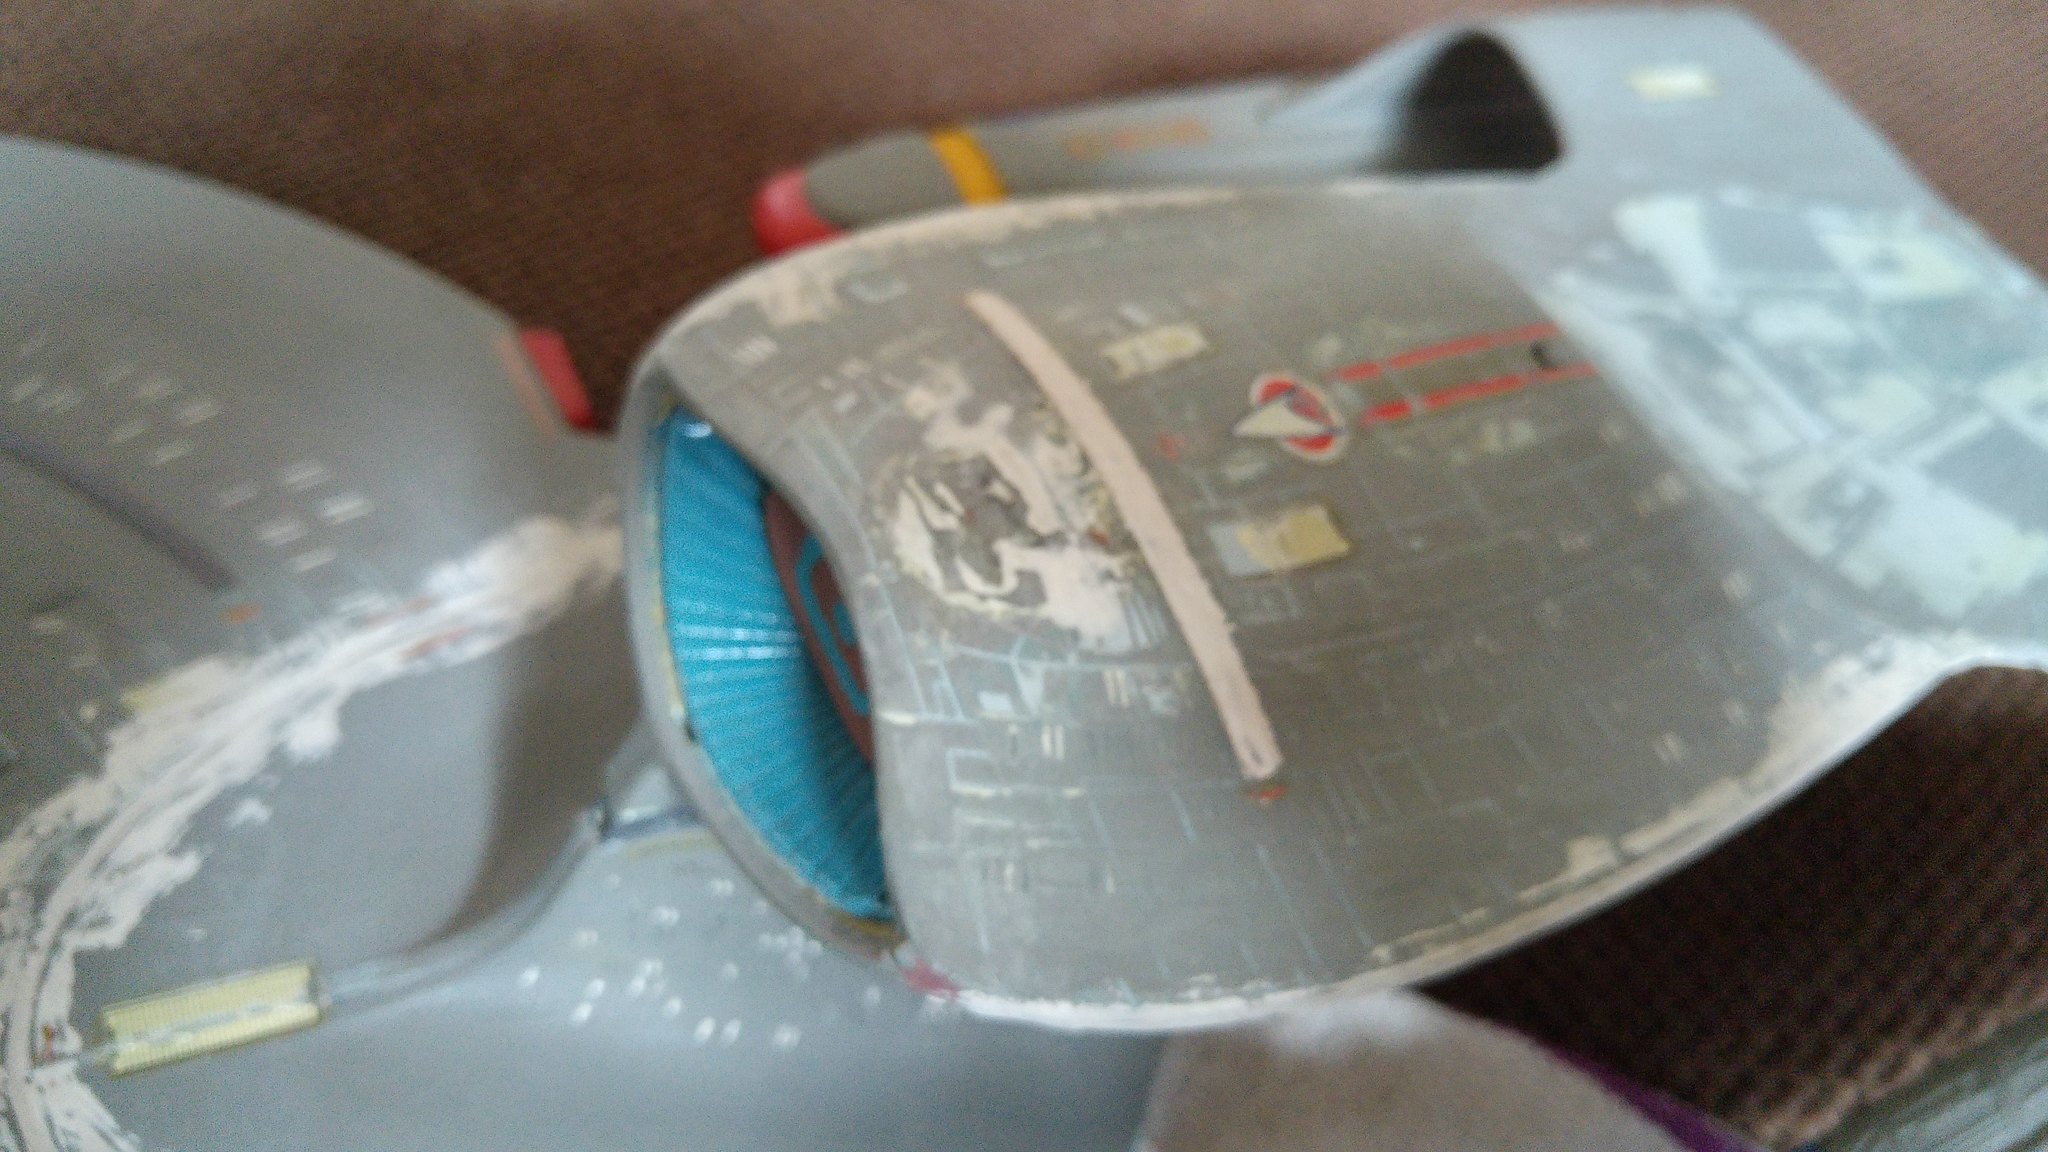
As I mentioned early, I got a little generous with the filler here, totally covered the detailing and the phaser strips :-O
So I had to get a little creative. Took me a while with a very small screwdriver but I managed to etch back in some detail. I used the same technique on these phaser strips as I did on the dorsal one.
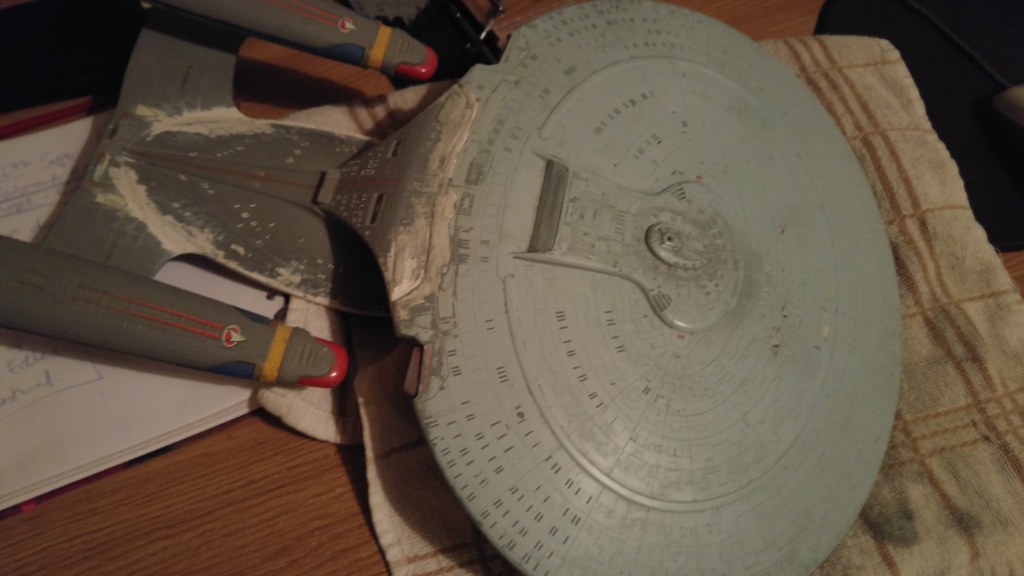
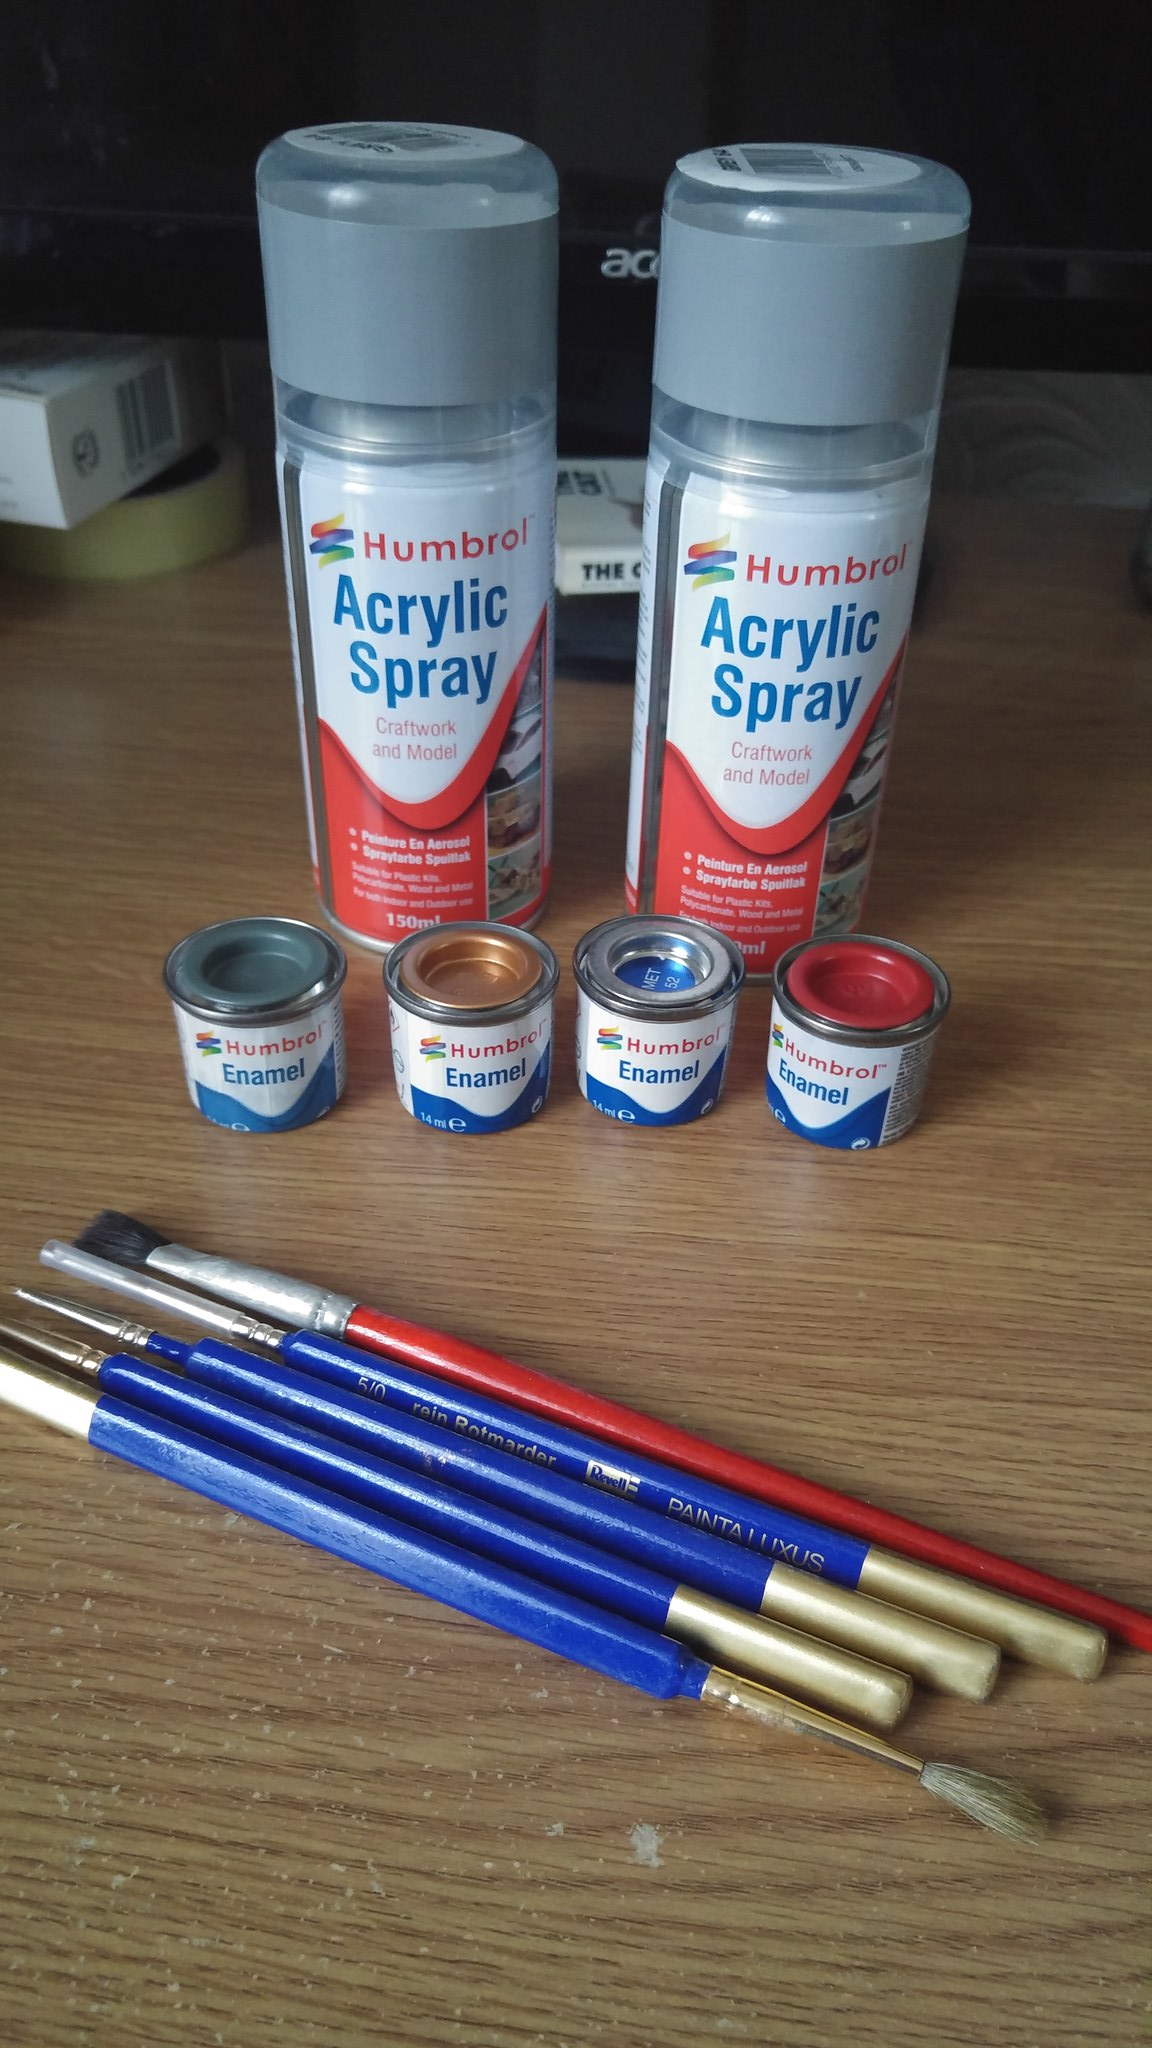
A couple days later I started the epic job of cleaning the paint off her, using Revell Paint Remover https://www.emodels.co.uk/revell-100ml- ... 39617.html
This is really good stuff for removing paint, and a lot easier than I thought it would be. I can't remember if the horrible paint job was acrylic or enamel (I'm sure I used a combination of both) but this stuff did a really good job of taking it off...

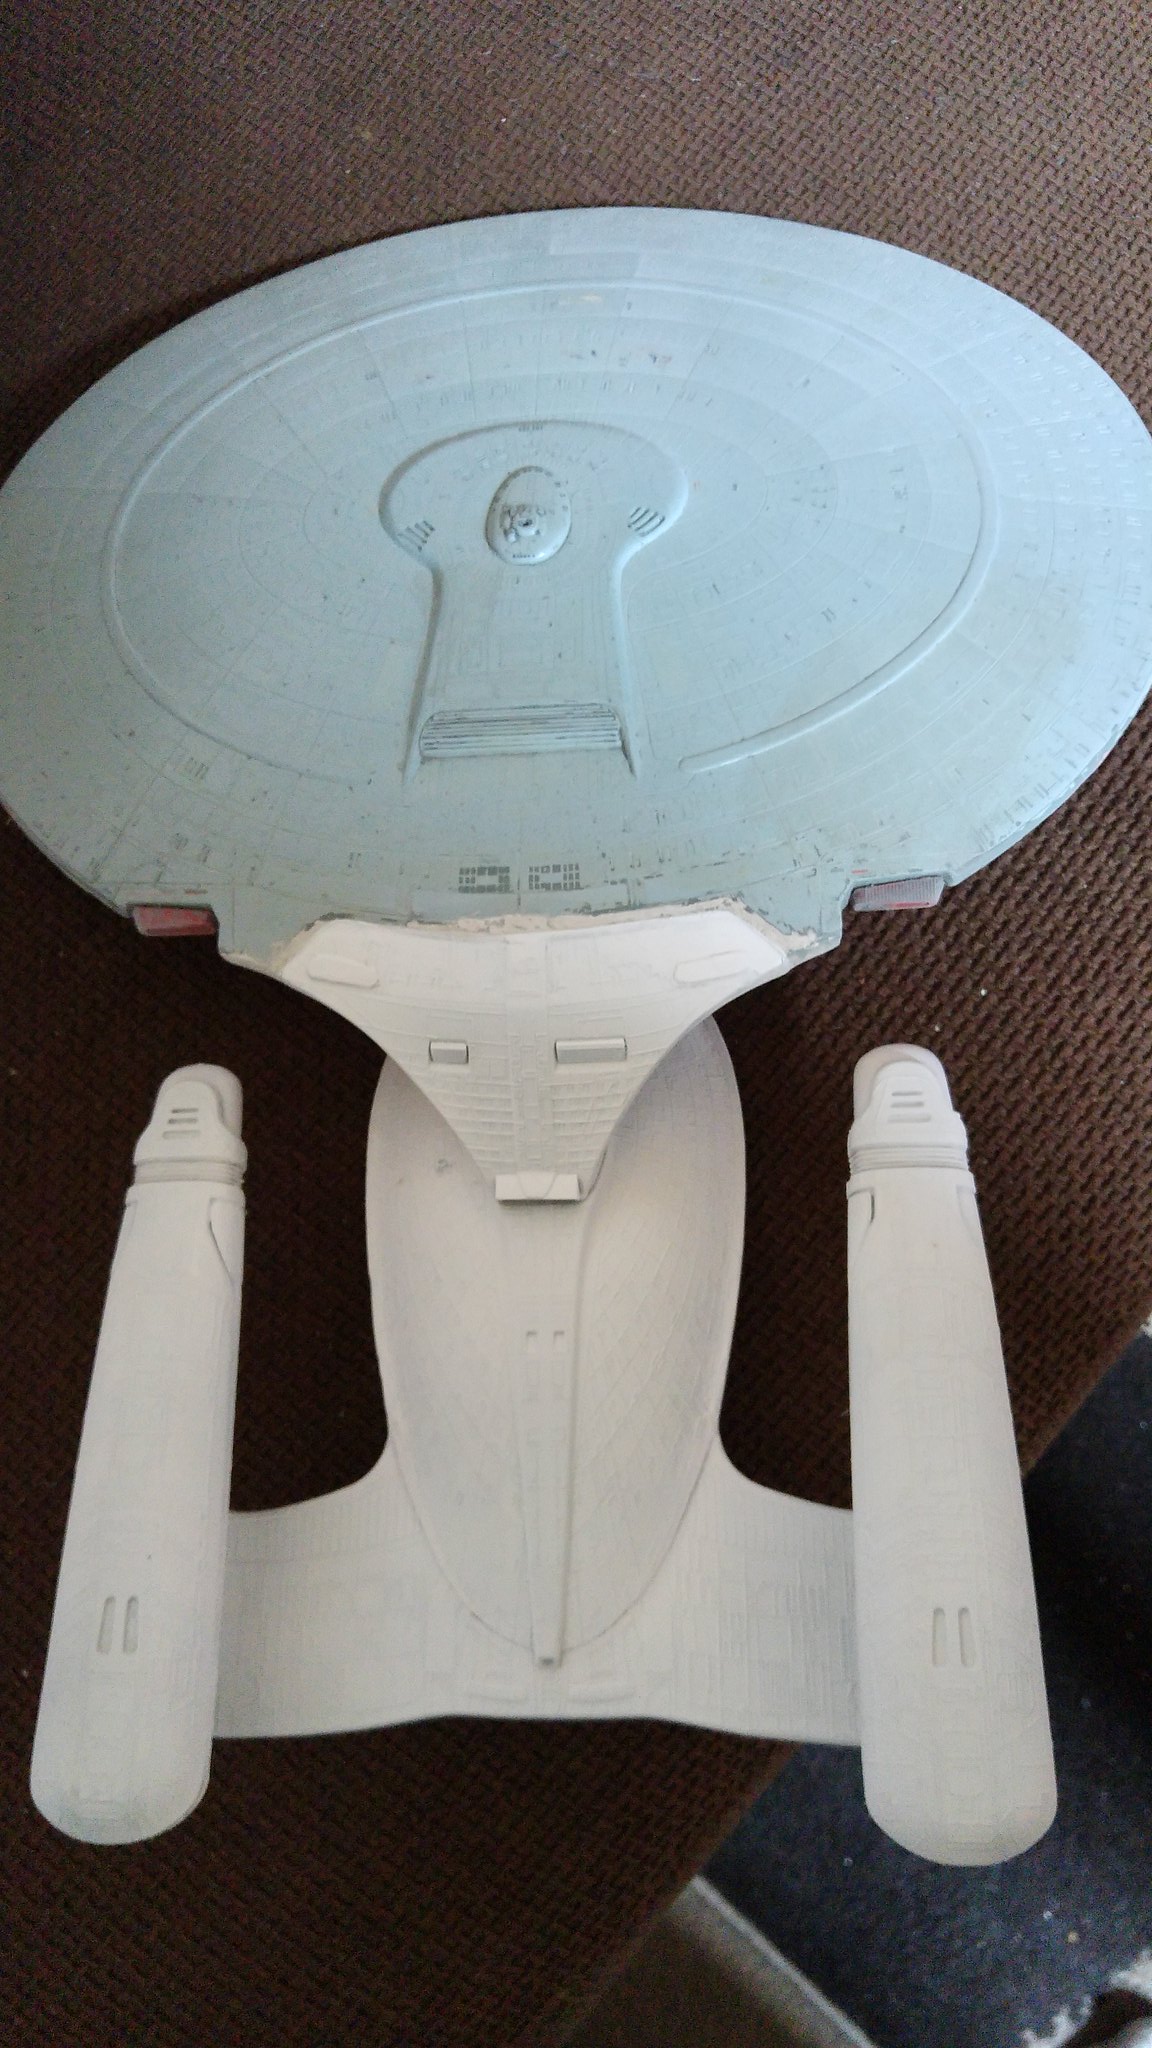
I'd not seen that light blue of the original plastic for almost 20 years
With the paint off, the detail pops

I continued to scrub scrub scrub the paint away...
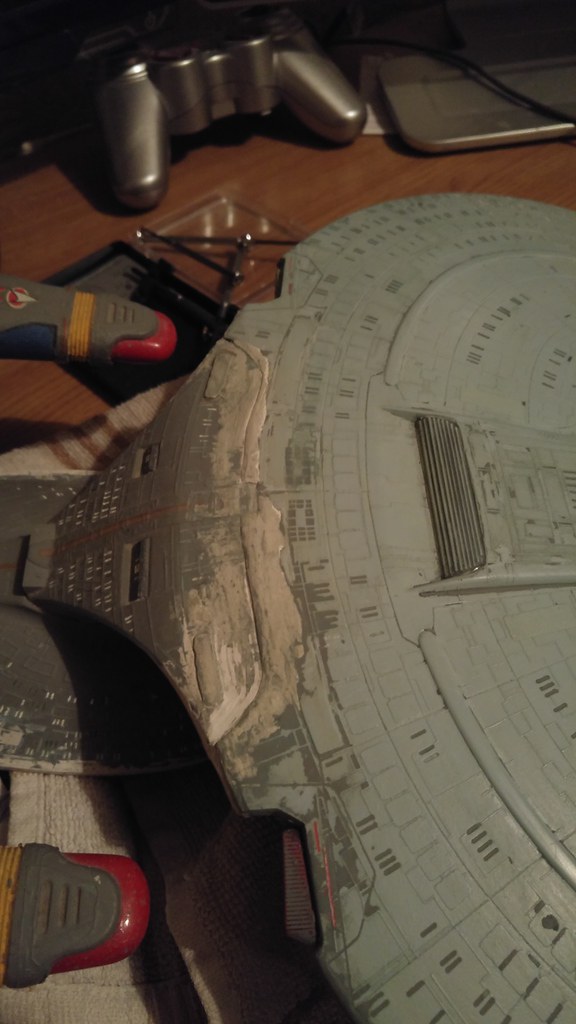
It was hard going but really rewarding
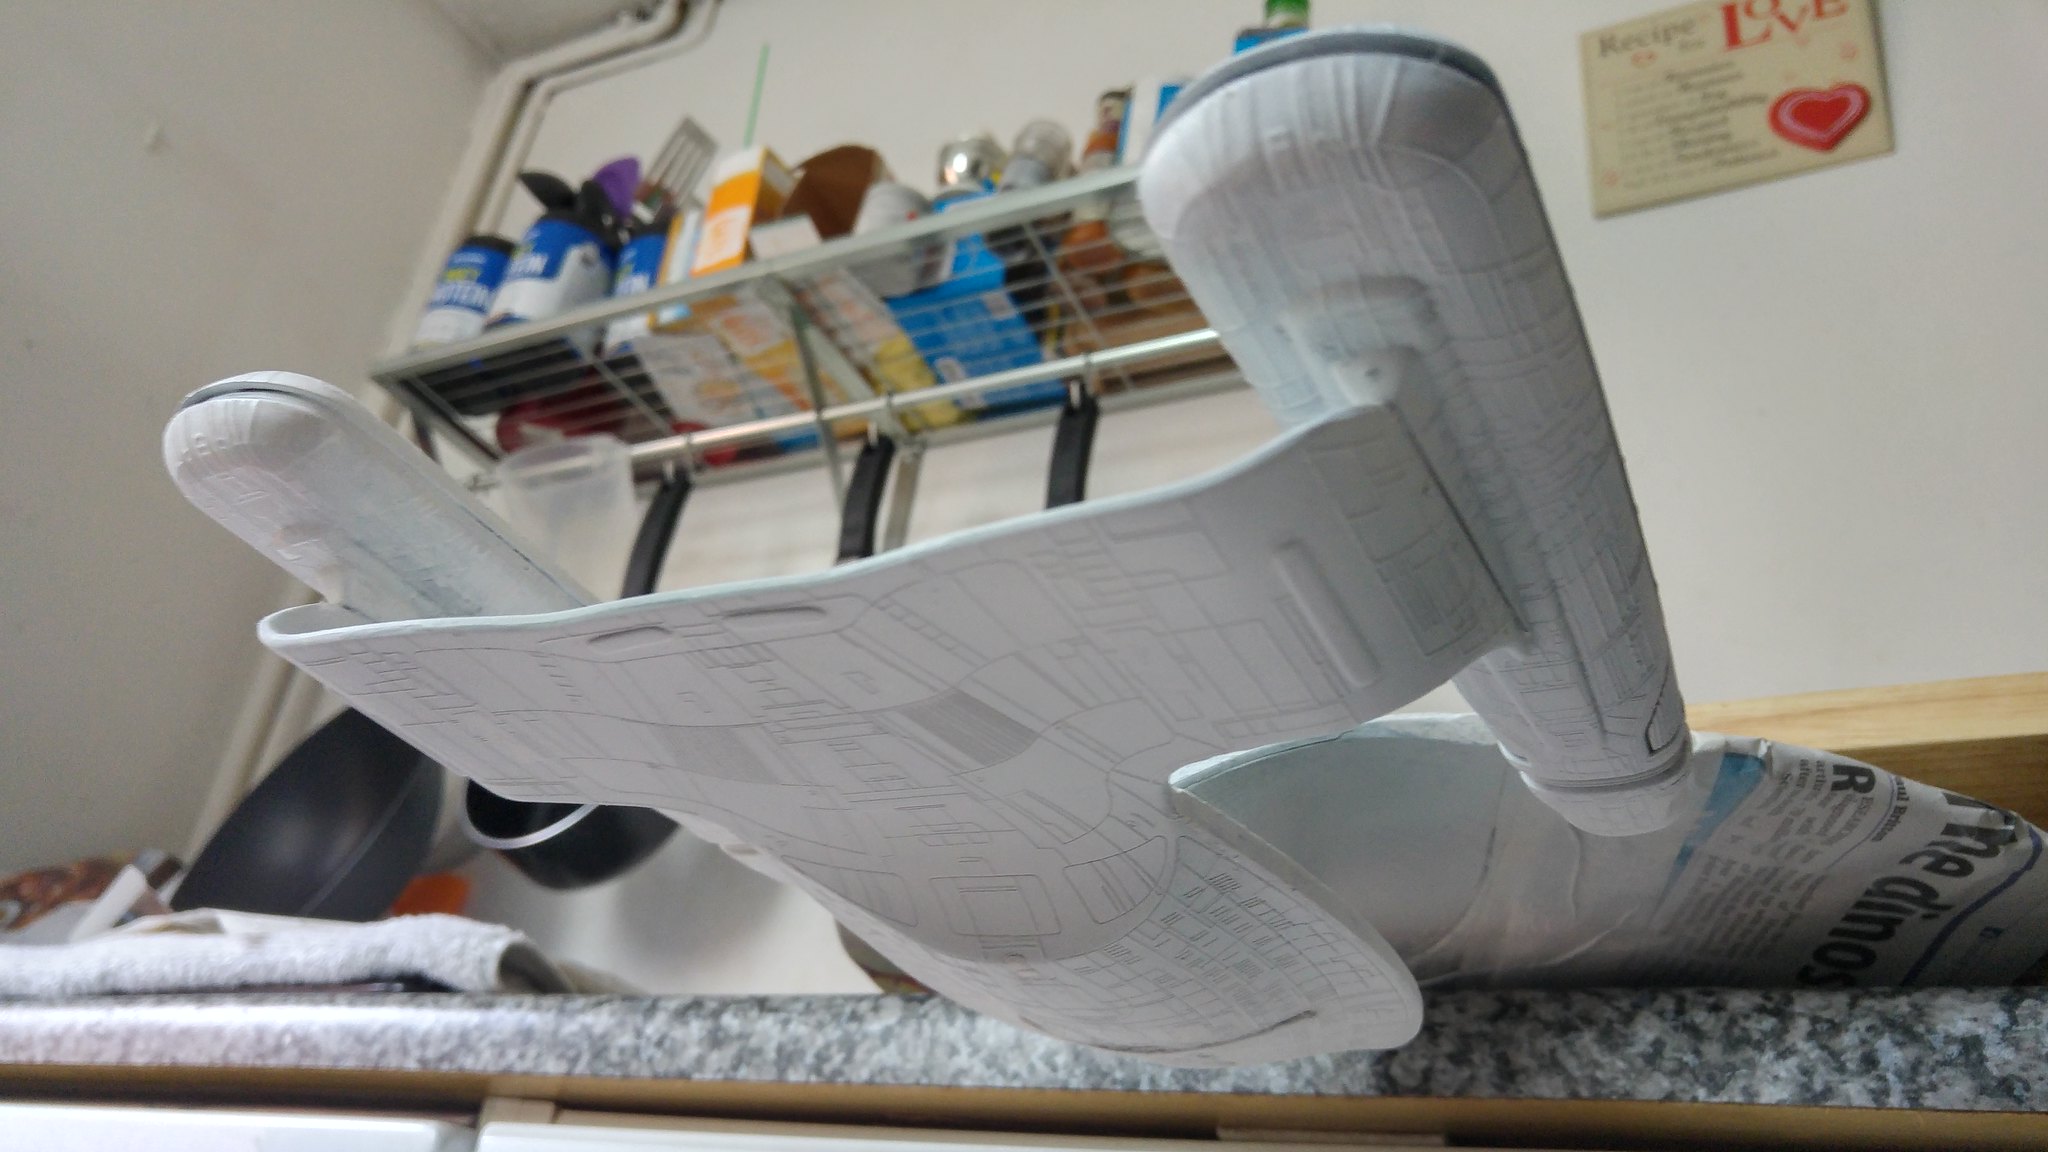
I cleaned up the join a little more between the saucer section and the drive section. It just needed sanding down:
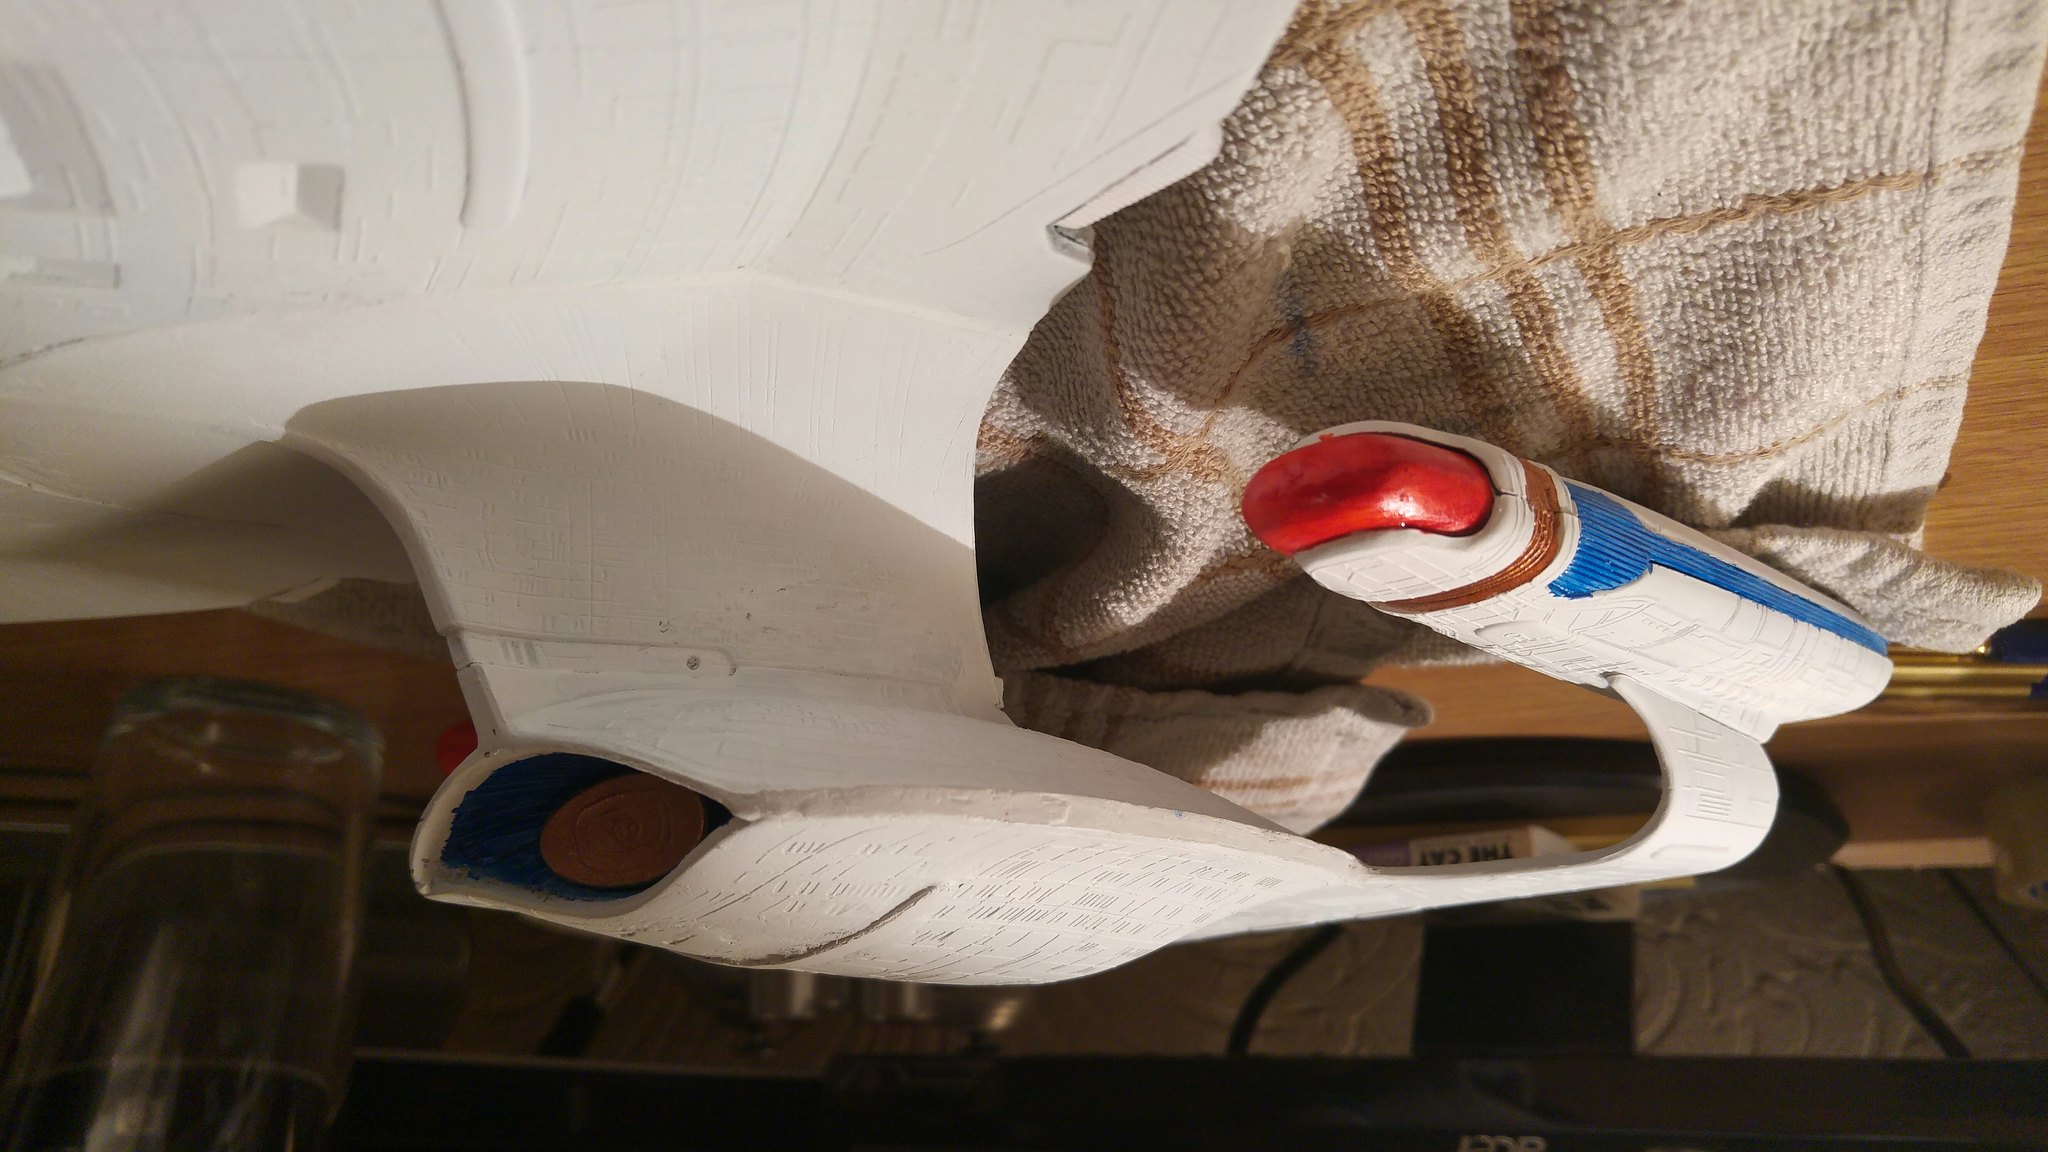
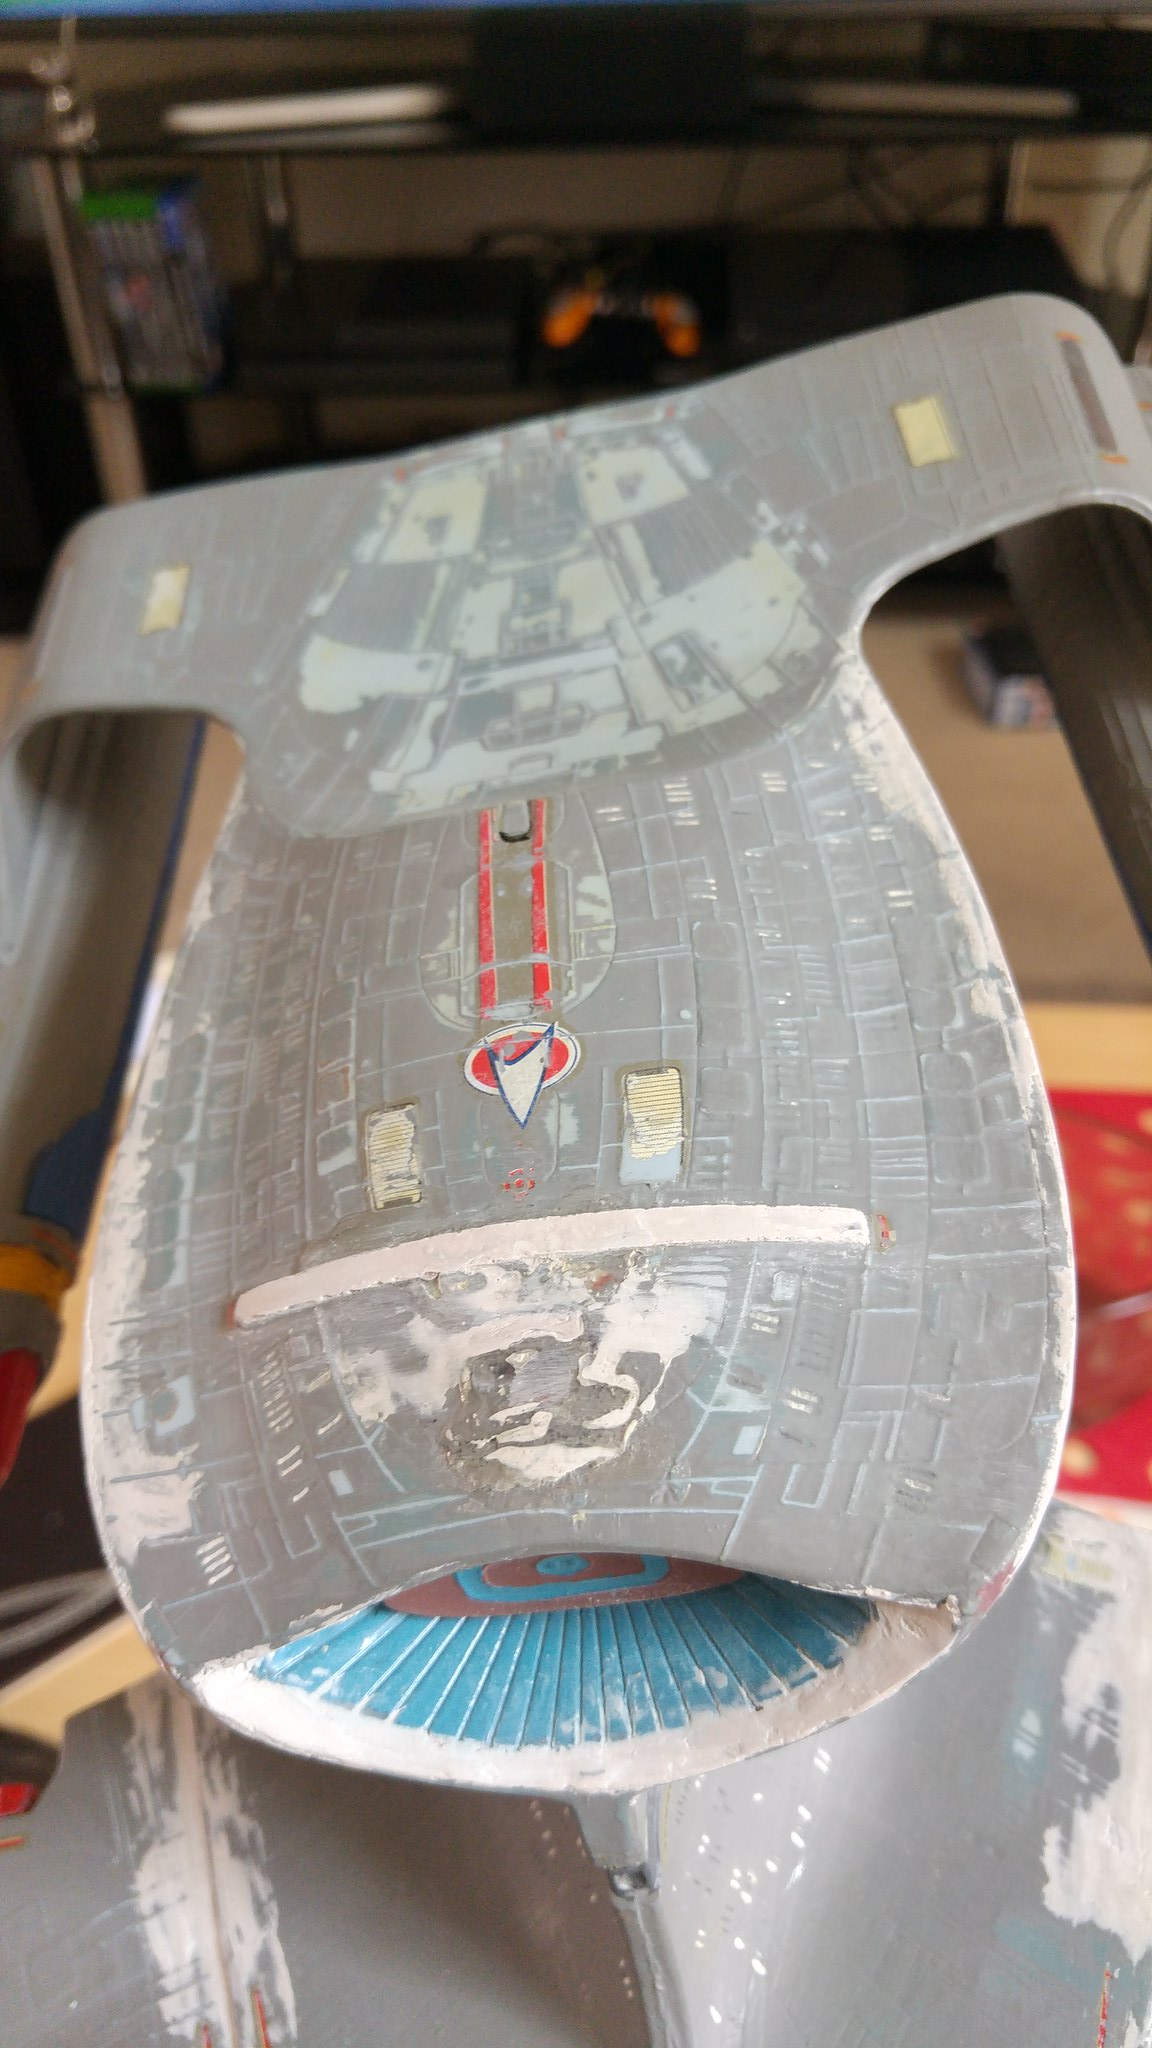
I then made a start cleaning the bottom of the ship. I damaged the phaser strip made of filler whilst cleaning so once I'd cleaned around it I fixed it again
It may look a bit of a mess but I've sanded it down to a point where it is nice and smooth, and hopefully hardly noticeable once painted:

Here is a closer view. As you can see the phaser strip just needs smoothing off:
My plan, once all the paint is off her, is to give her a couple of coats of white primer, then a coat of grey. I plan to cover everything in white, including the engine grills, bussard collectors and deflector, so when the new coat is applied (blue, red etc) it really pops!! Does anyone have any thoughts around this? I mean, will it work like I'm thinking (hoping) it will?
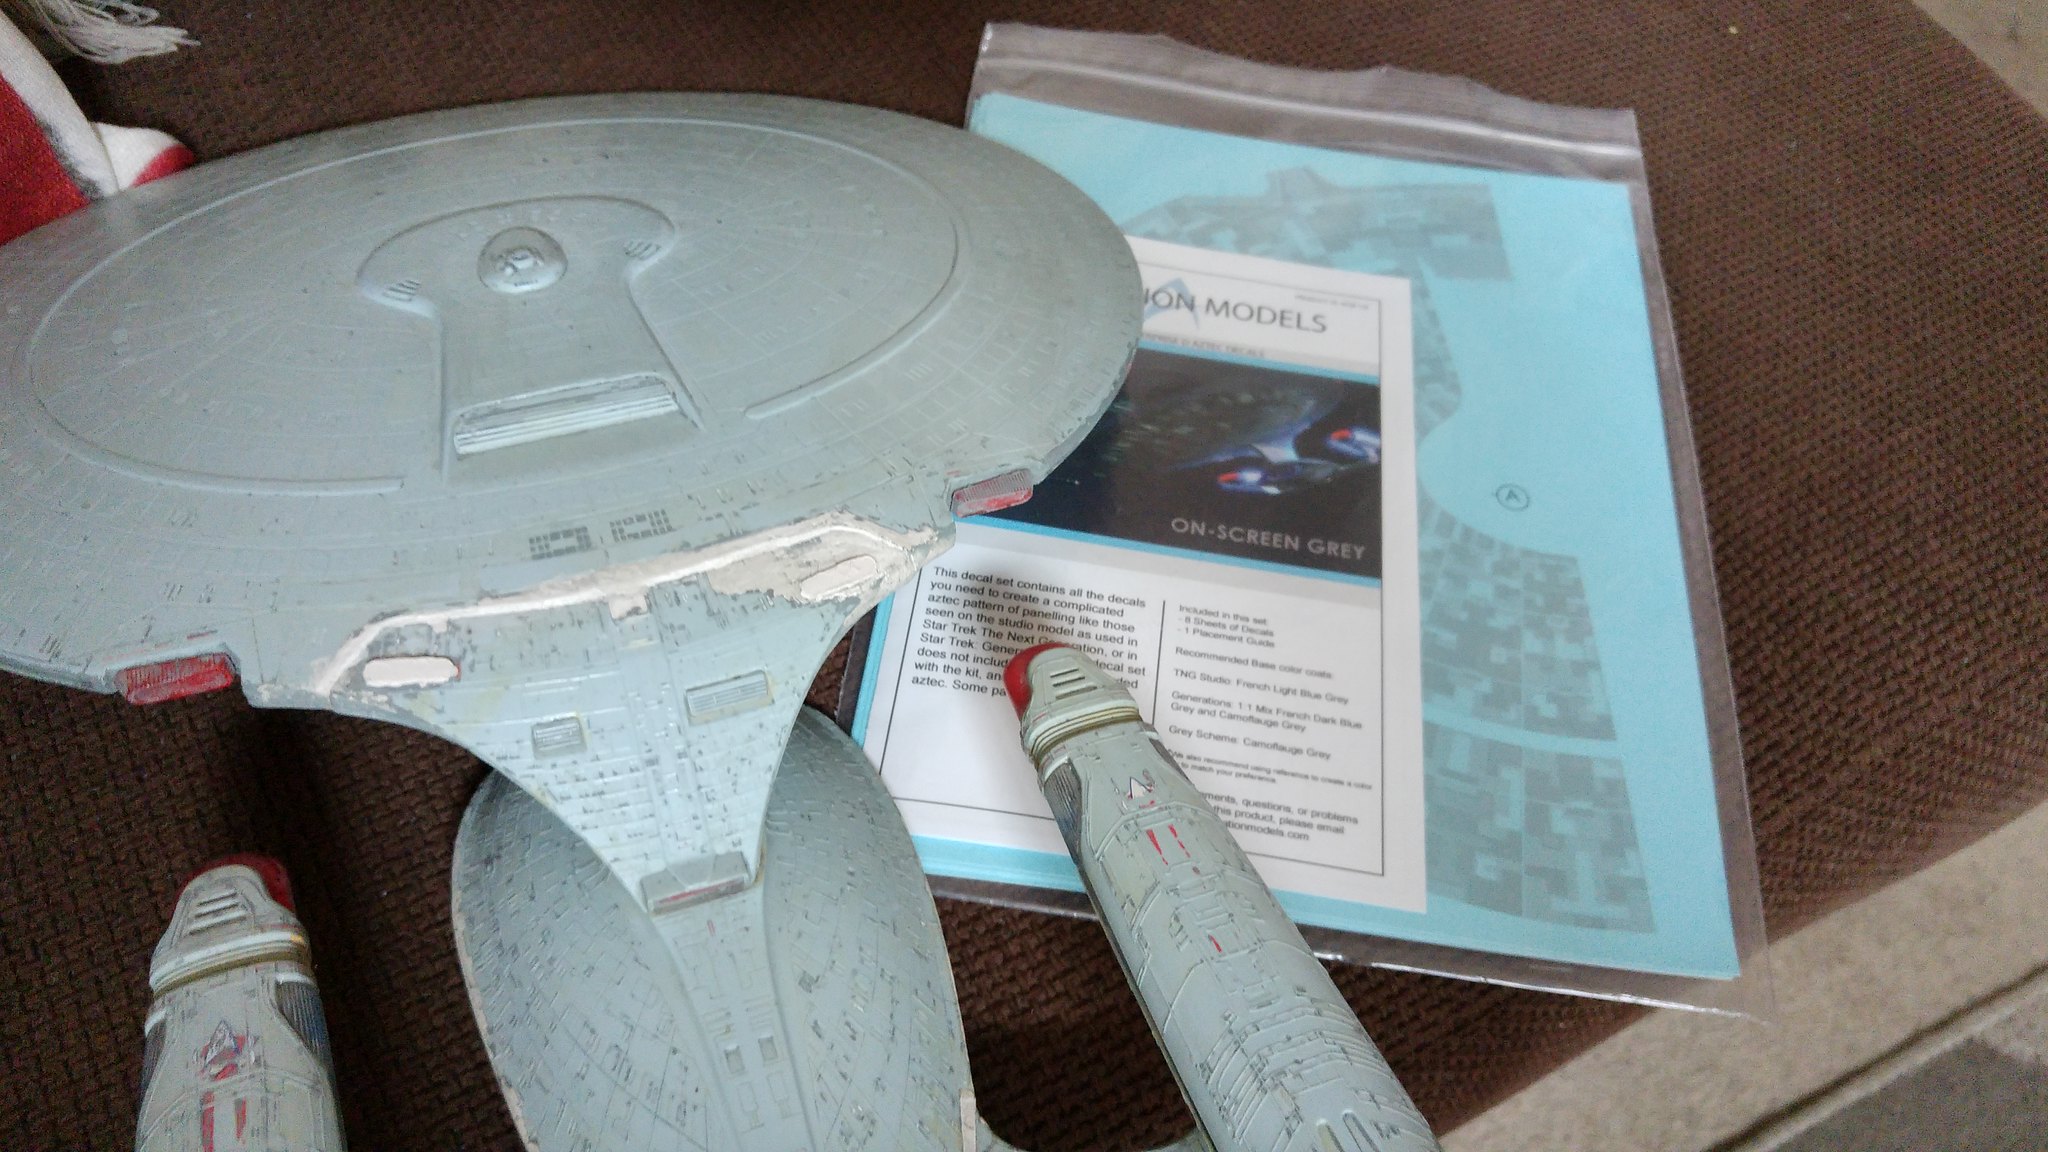
I also ordered the Aztecing decalls from Acreation models, which turned up a couple days later
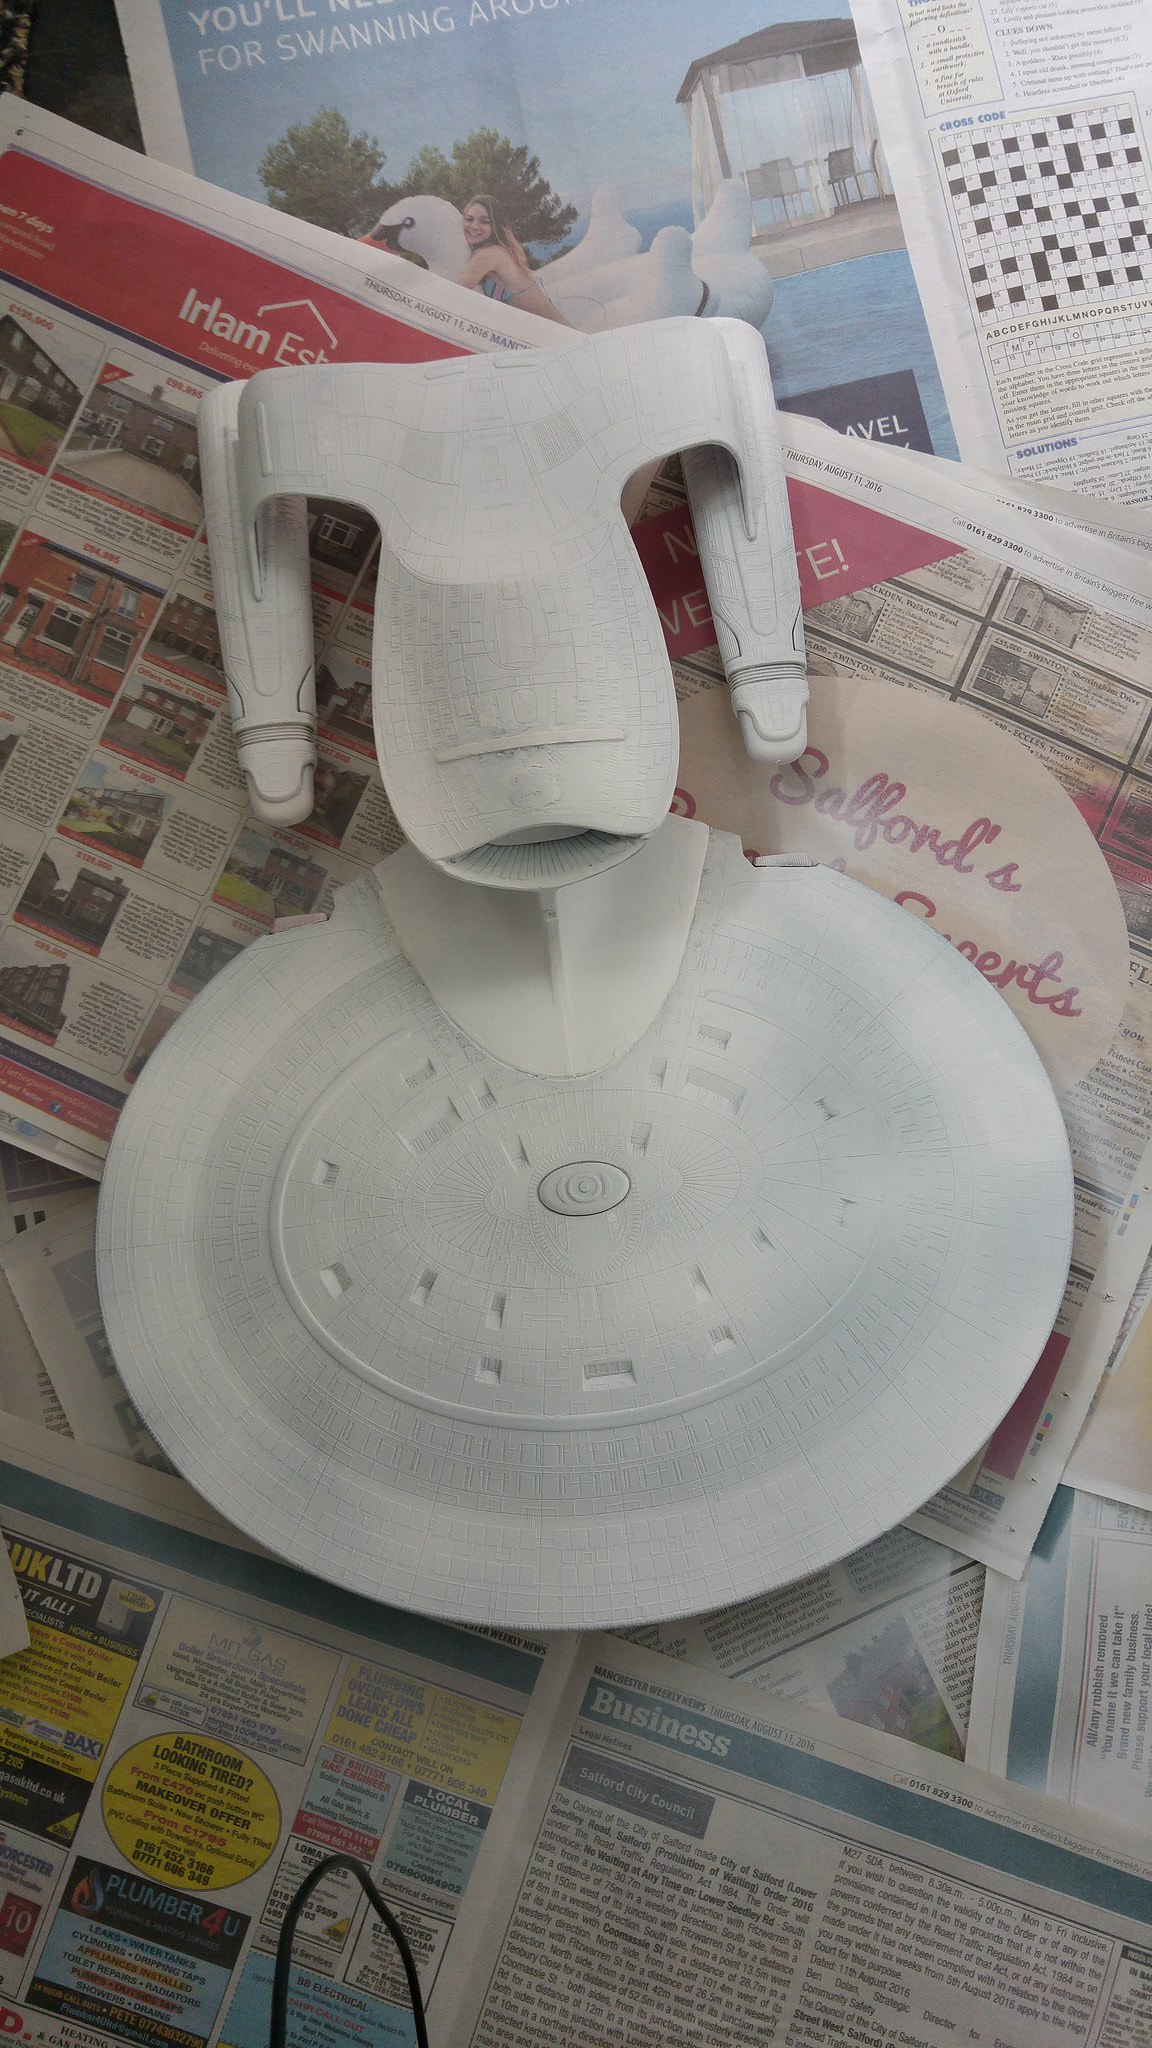
I then cleaned the back and under the neck last night. It was particularly awkward to get the toothbrush up in there, but I managed
Eventually after a few days of scrubbing I finally managed to remove all the paint, not 100% but i'm happy. Was a tough scrub but worth it I think
She looks a little manky (as we say up in Northern England
 r
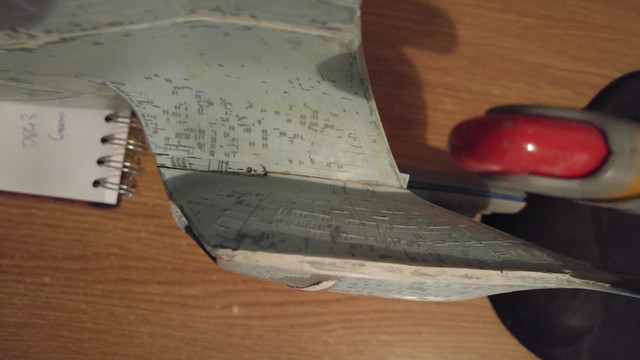
rWhile I was scrubbing the engines they actually came apart

I managed to fix various joins across the ship, such the join between the star drive and the engine pylons.
And then my Aztecing decals turned up!! I can't wait to get started on that!!
Patience Anthony.... patience
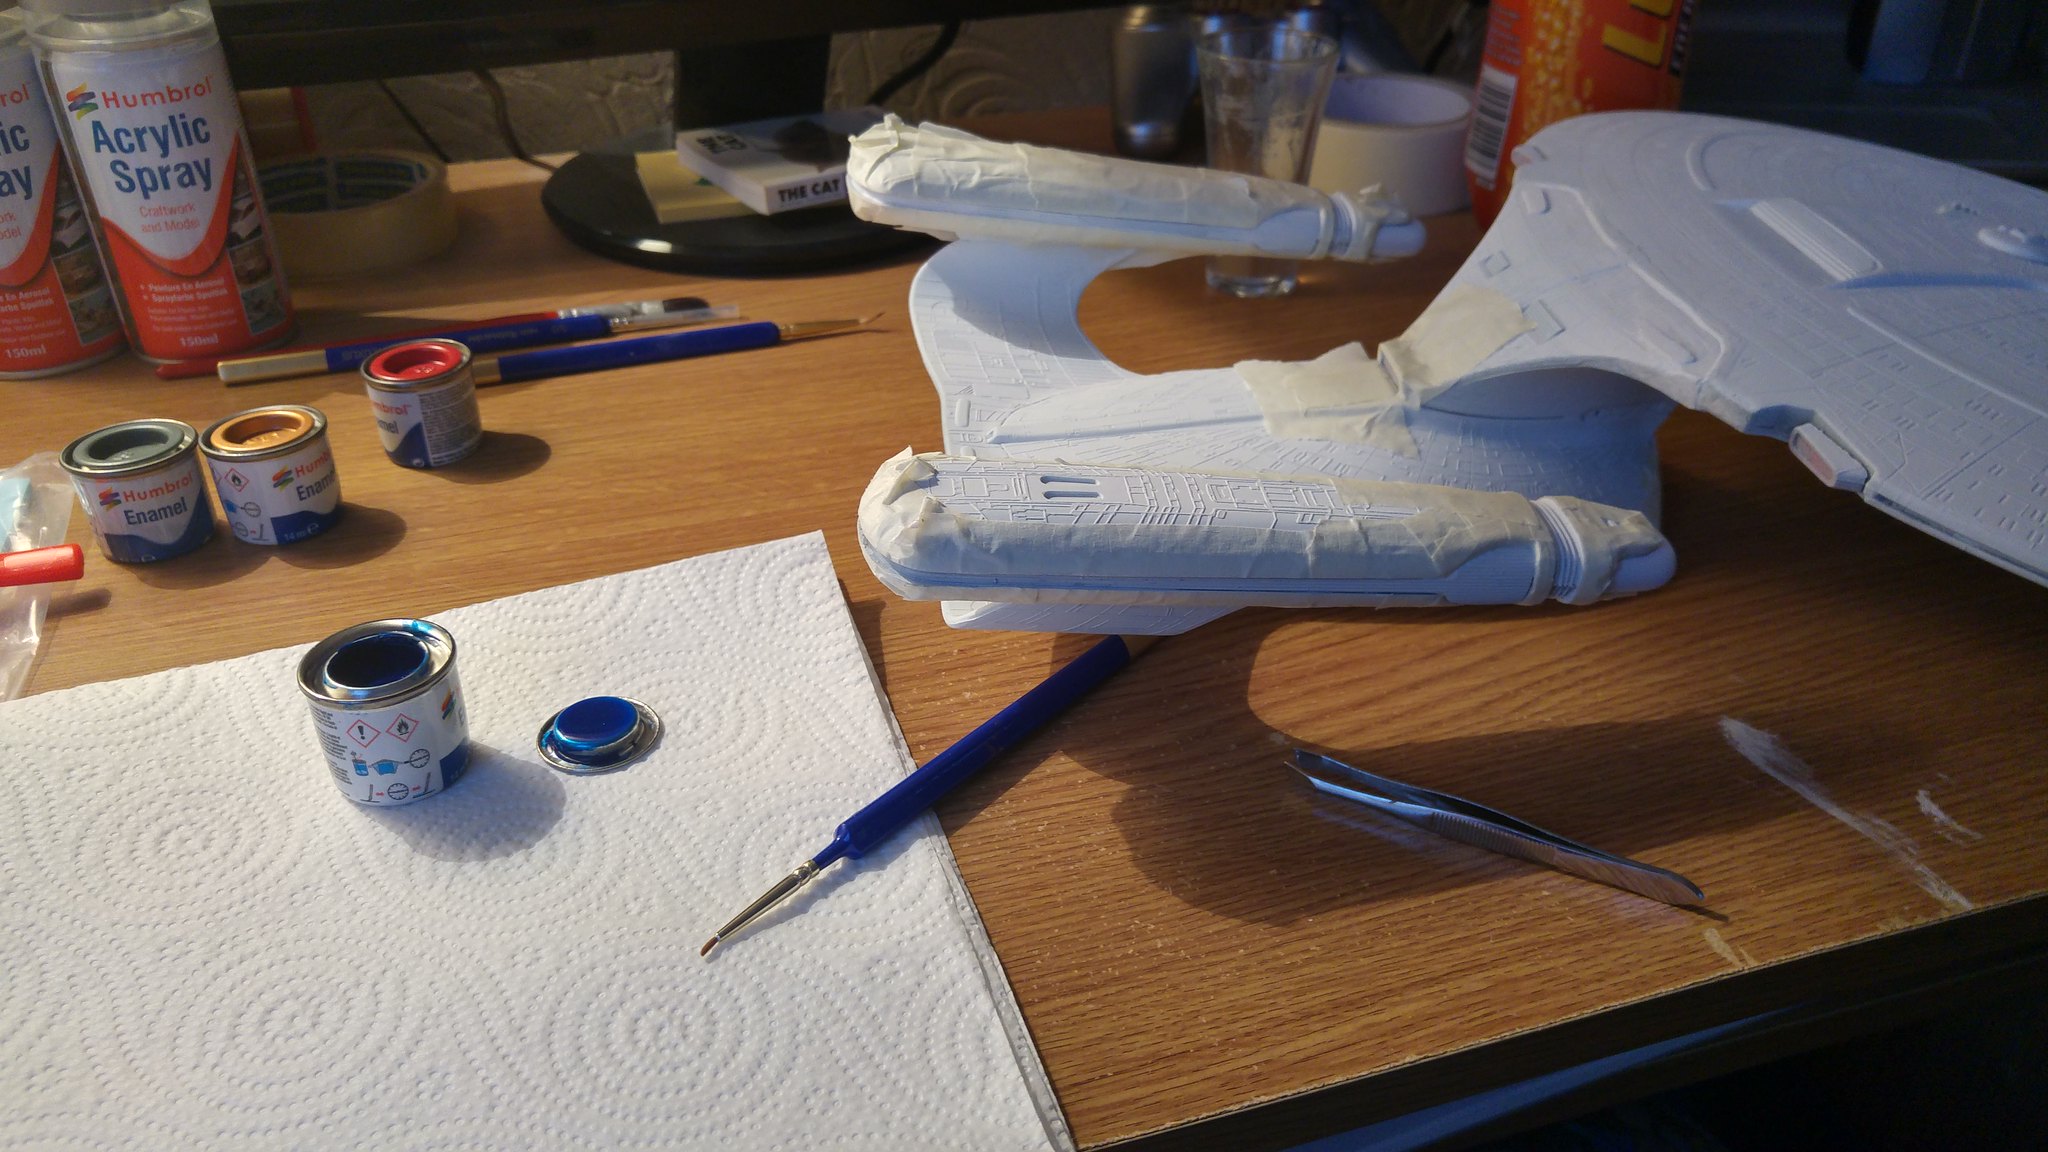
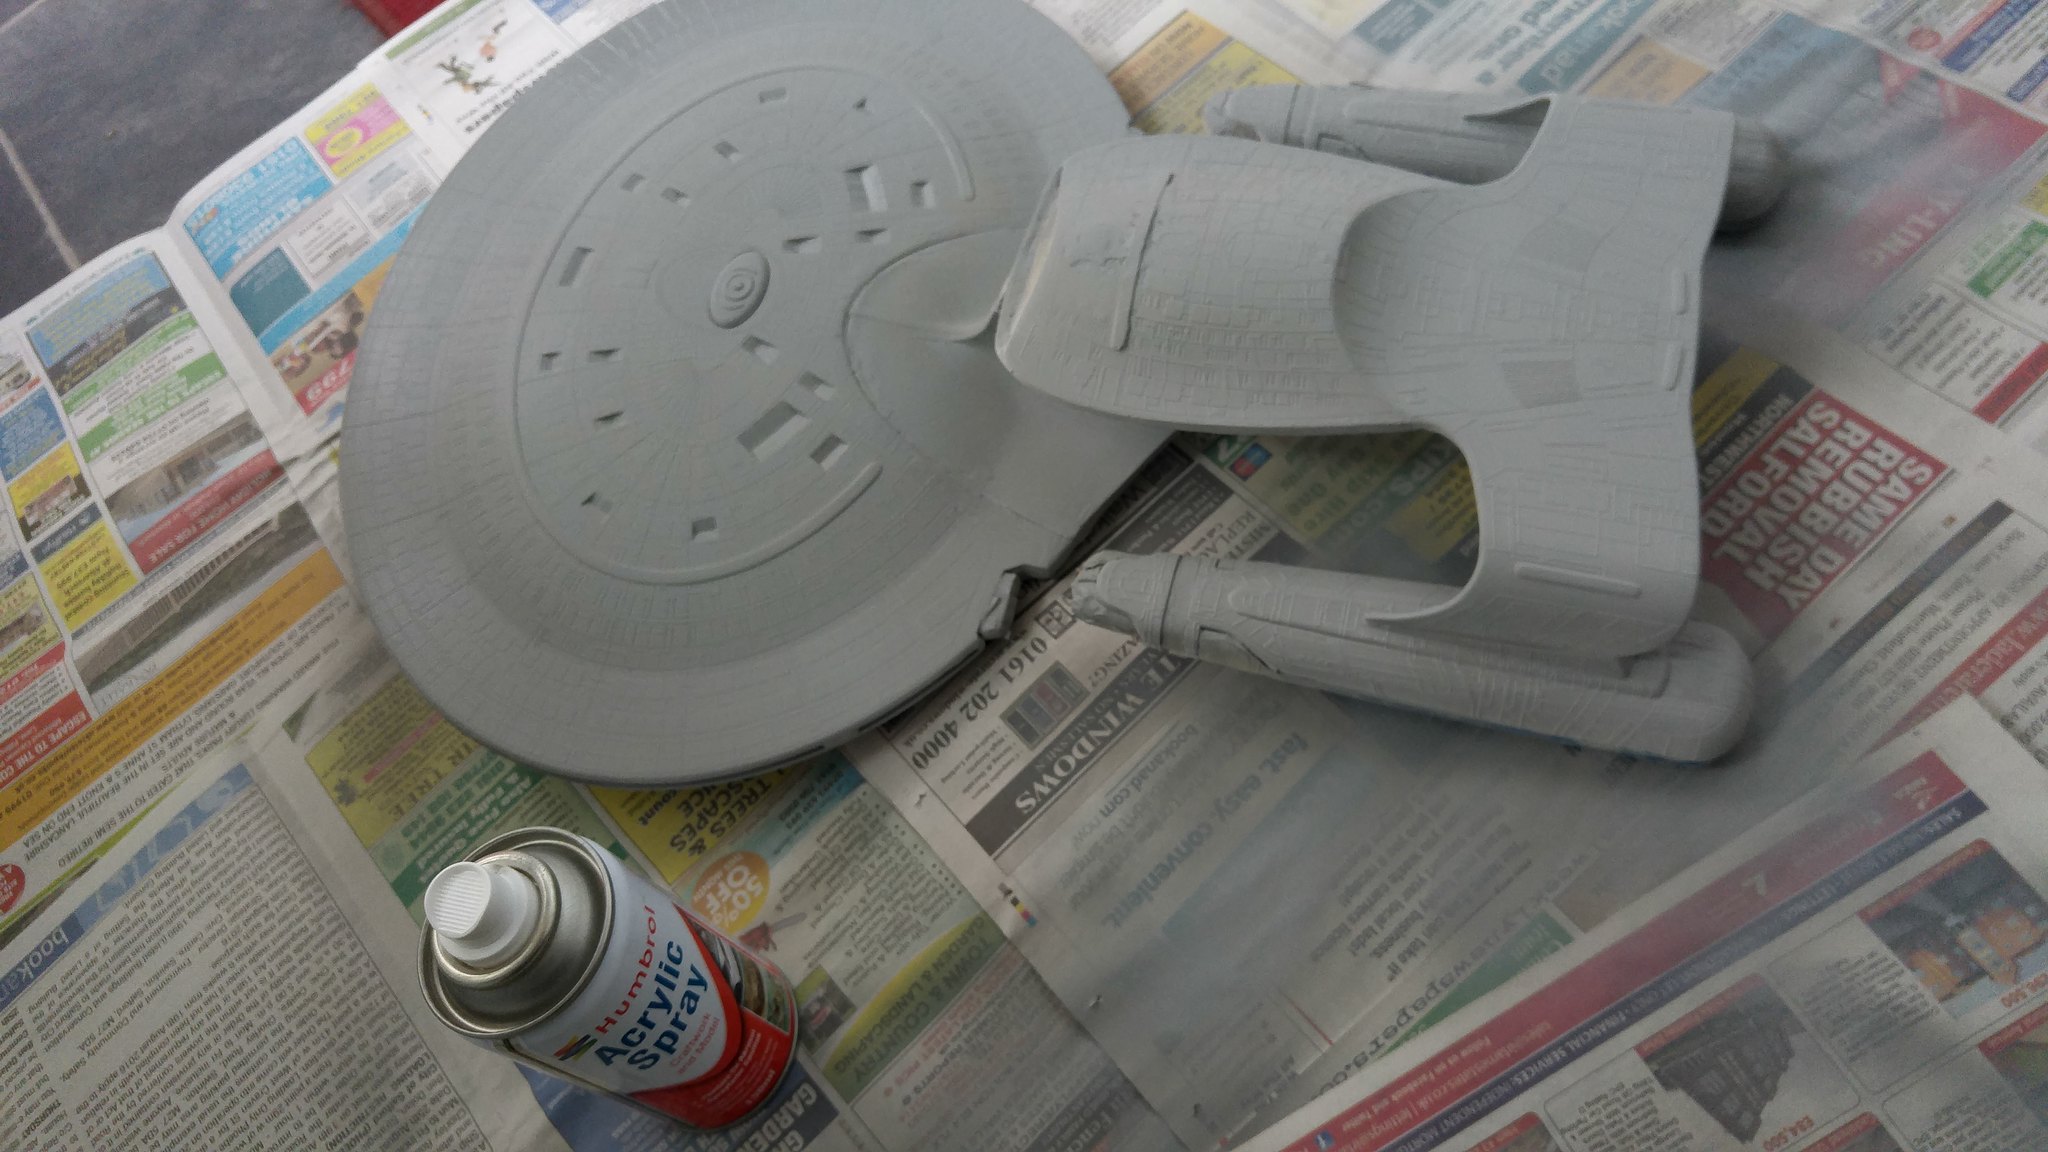
First... primer!
The Star Drive with a couple coats of white primer. She's starting to scrub up rather well
I had planned to mask off the Saucer section first and coat the Star Drive, then paint the saucer... all was proceeding as planned...
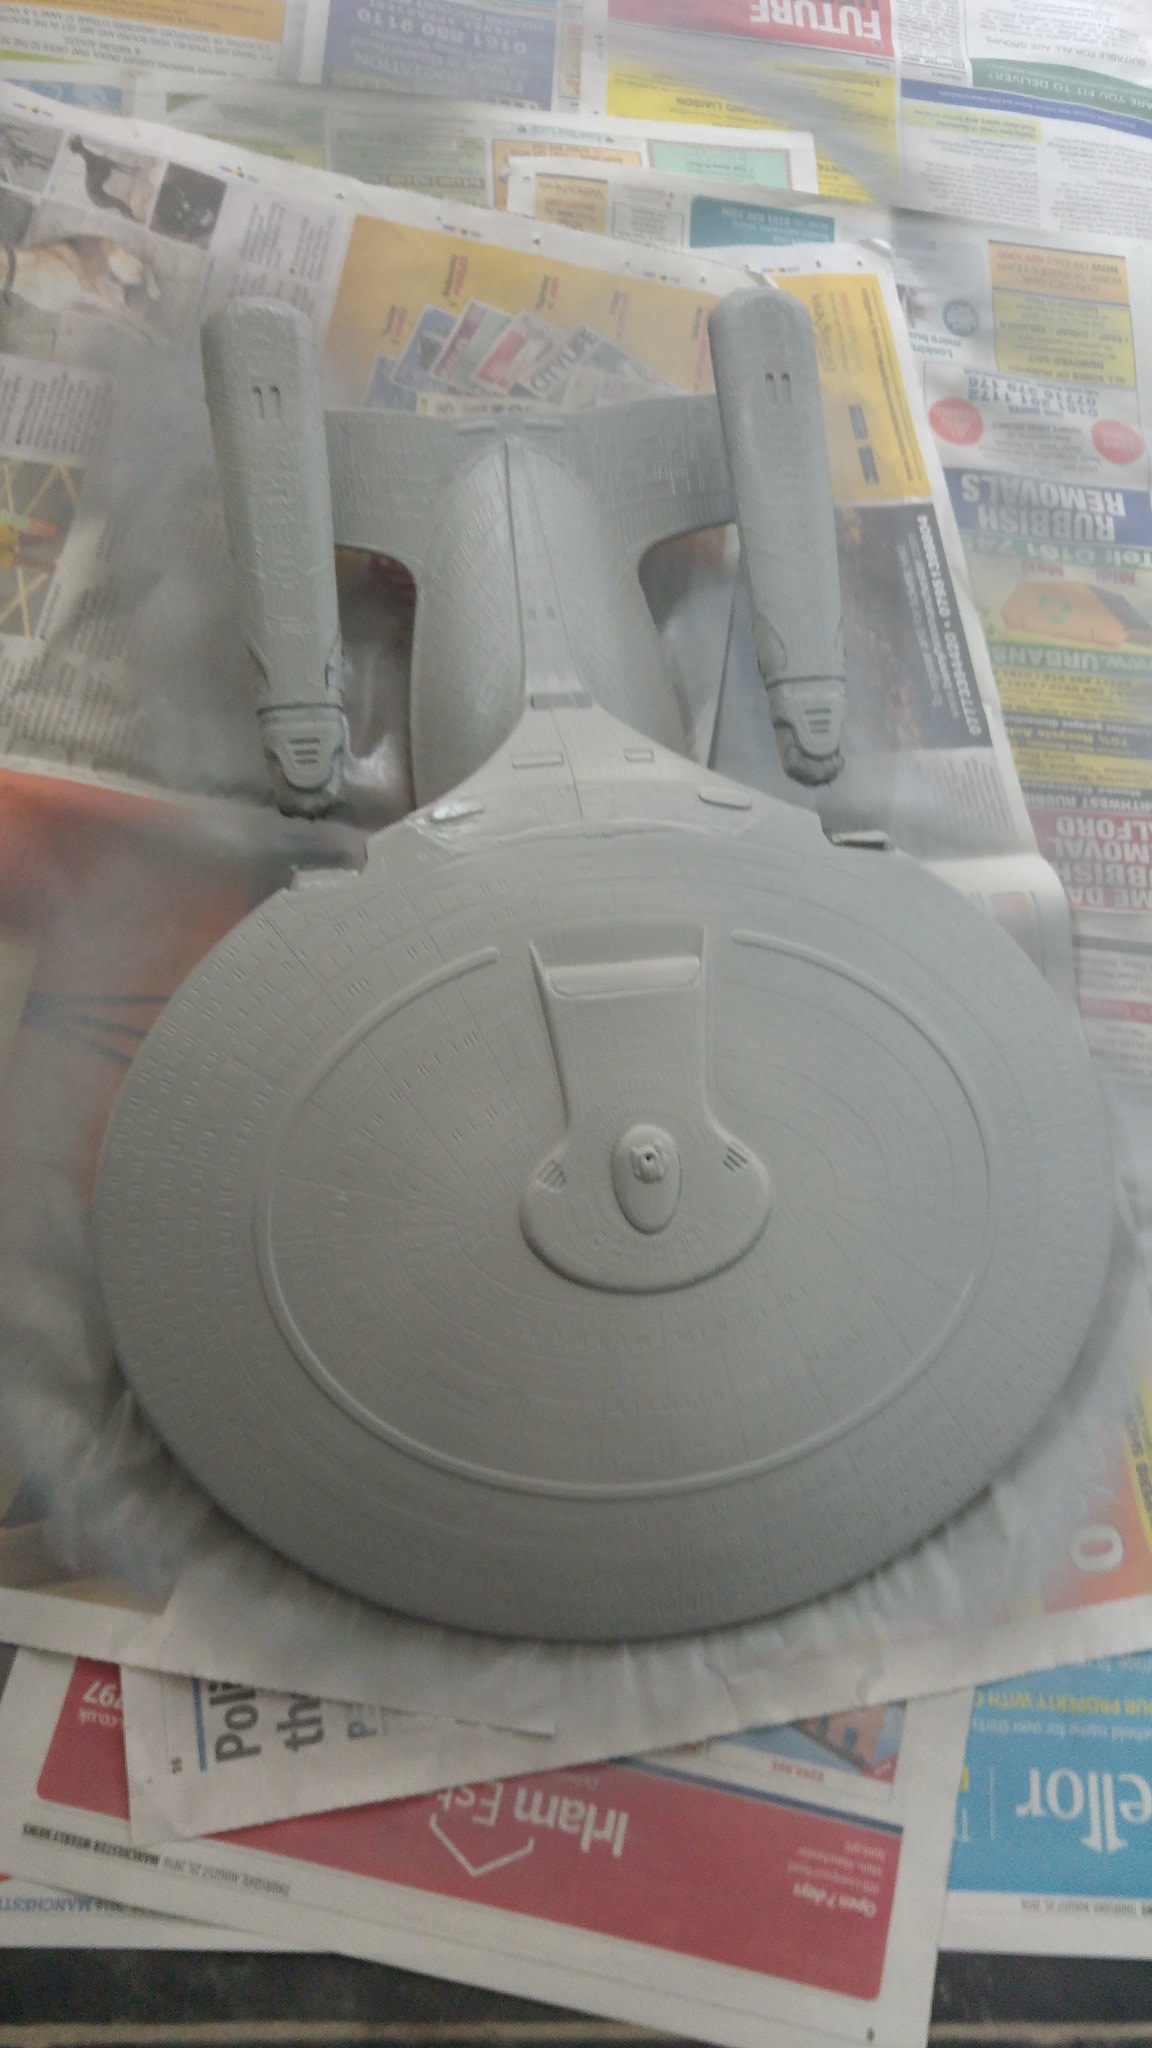
...until I ran out of white primer!! :-O So now, there is just the top section of the saucer to do, and I will probably give the bottom section another going over.
But so far so good. I'm more than pleased at how she's coming along, but I can't get any more paint until pay day, so for now I will be taking a break!!
Sorry for the long first post, but all this happened over a few days!
Thanks for looking guys
LLAP \V/


 r
r