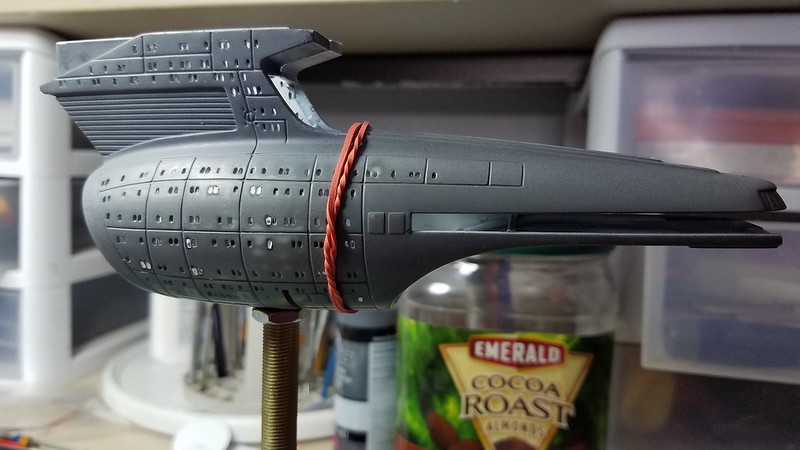
1/1400 AMT Enterprise-C (So it begins)

WiP, finished models and general 1/1400 chit chat.
Post Reply
User avatar
MSgtUSAFRet
Can-Do Captain
Can-Do Captain
Posts: 531
Joined: Wed Jun 15, 2016 5:49 pm
Location: Houston, TX

Re: 1/1400 AMT Enterprise-C (So it begins)

Post by MSgtUSAFRet »

andyh wrote:
ProfArturo wrote:Fantastic work. How do you decide how many windows to drill out - just preference or are you matching the studio model?

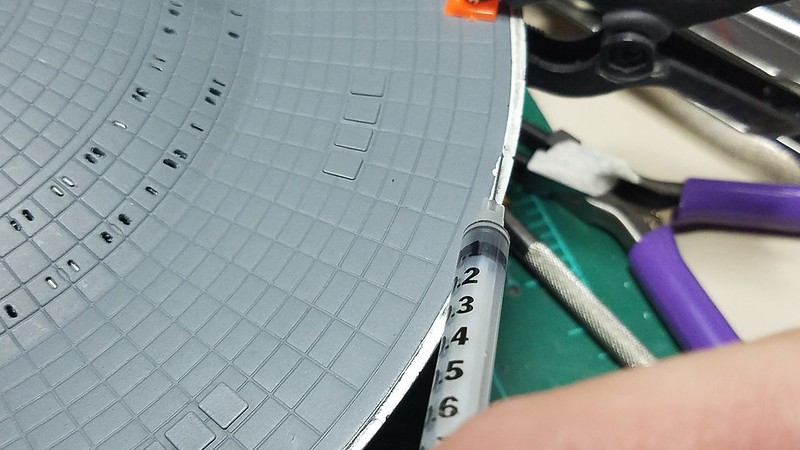
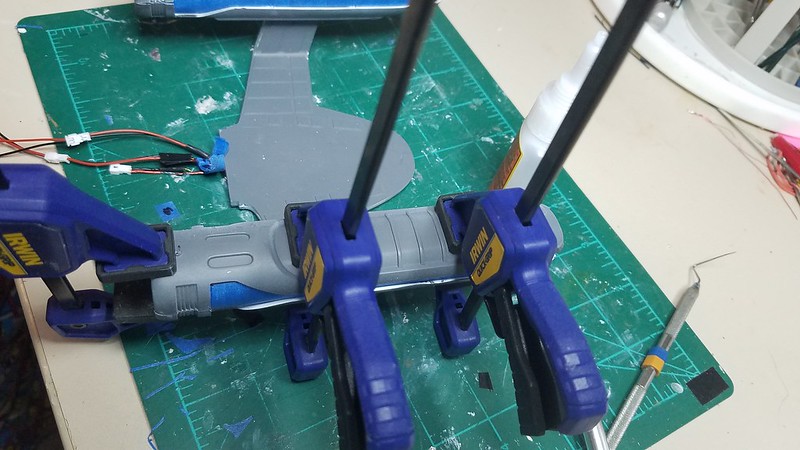
I bought one of these kits myself on eBay last week but was gutted to find it was missing part no. 16 - the secondary hull ventral phaser strip, so I doubt I'll be making it any time soon.
I don’t think the Enterprise C studio model had a central phaser strip. Correct me if I’m wrong. I’d just fill the hole where the parts is missing and be done with it.

Andy
Prof.,

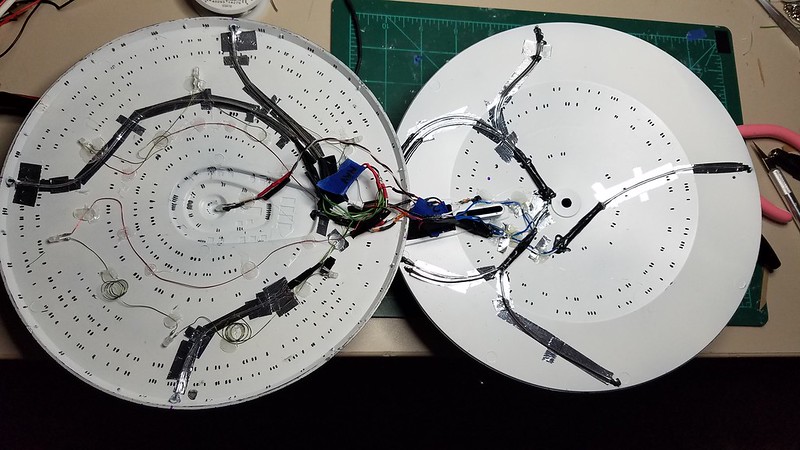
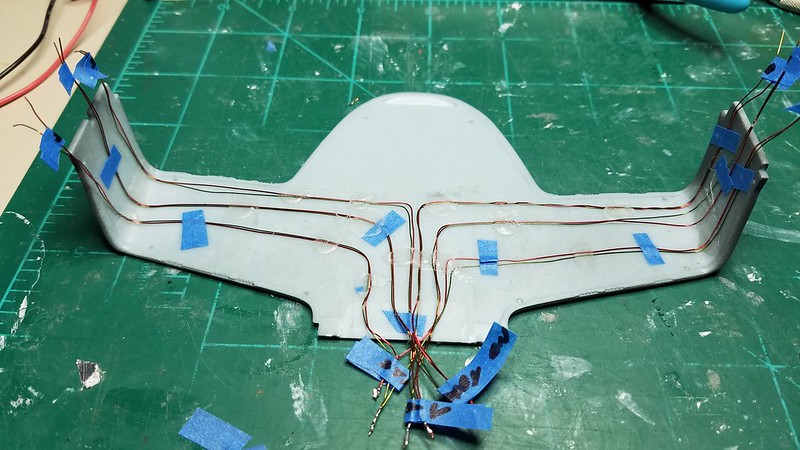
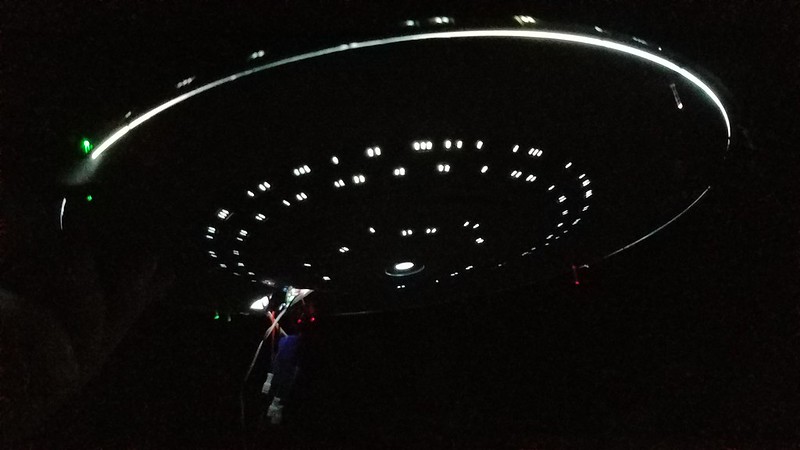
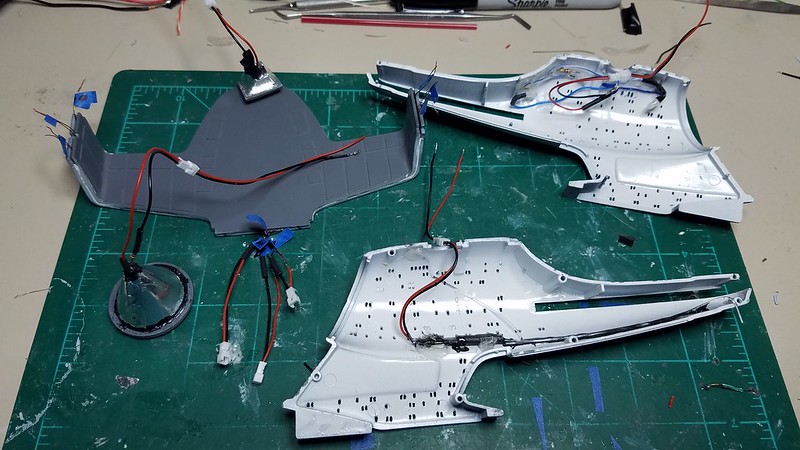
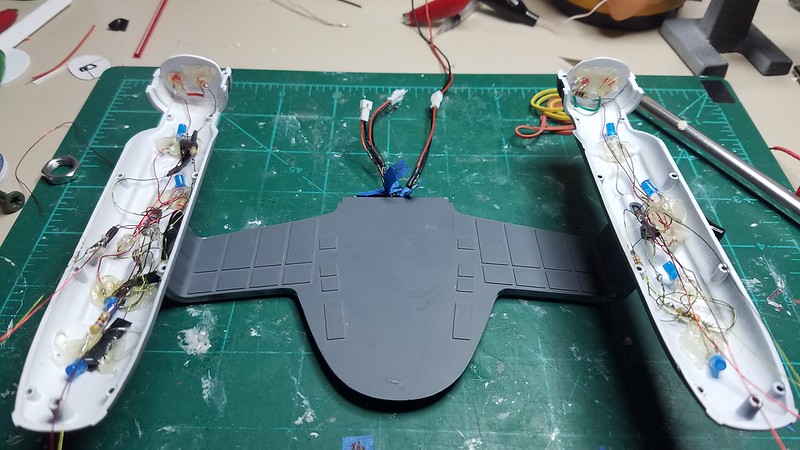
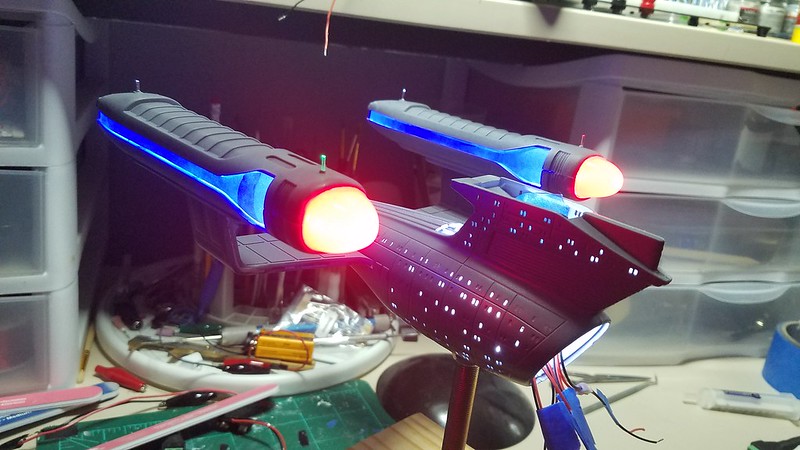
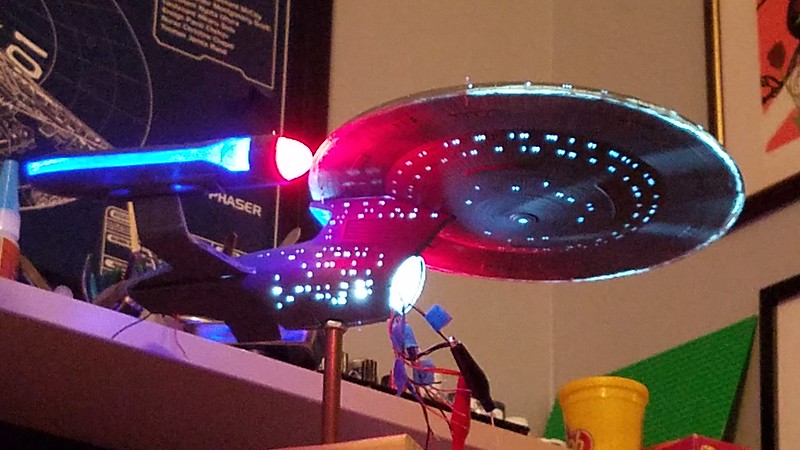
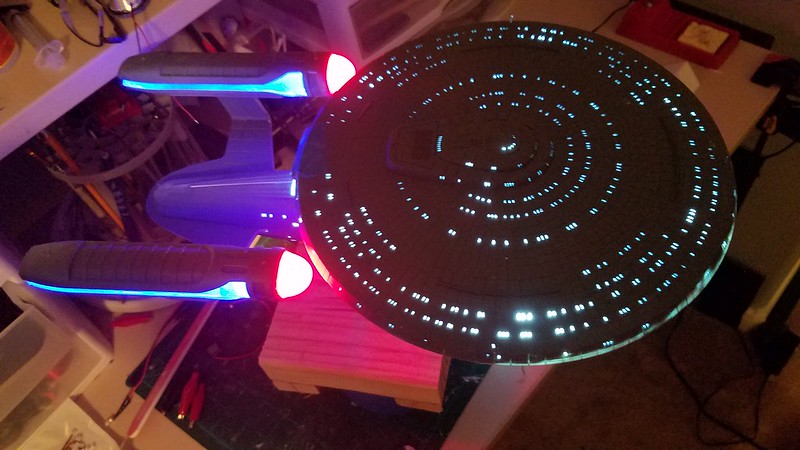
As for the windows, I made an assumption that there would be three shifts on board the ship; days, mids and nights. Following that assumption, 66% of the lights would be "on" for any given time on the ship.

Individual preference rules here. I assumed that some groups of three or four windows would have all lights "on" and some would have all lights "off". Some may have two lights on and one window off; like the difference of a bedroom and a living area.

The B/C deck would have all the lights on as this would be where a majority of the work would be and would be continuous in nature. The arboretum, the larger holes in the bottom of the secondary hull, would be always on to facilitate the growth of trees and plants.

All this is supposition as the only "on-screen" evidence we have of the Enterprise-C is when it has been severely damaged in an uneven firefight.

If the warp core was off-line and the power reserves were minimum, then the lights, as seen on the show, would be understandably few.

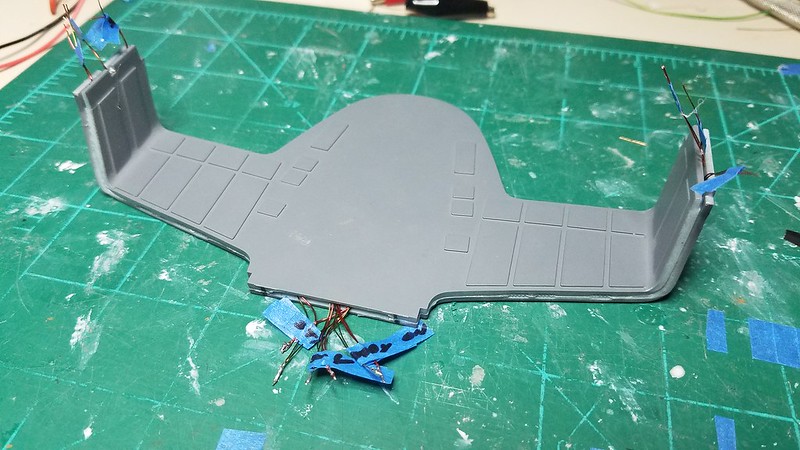
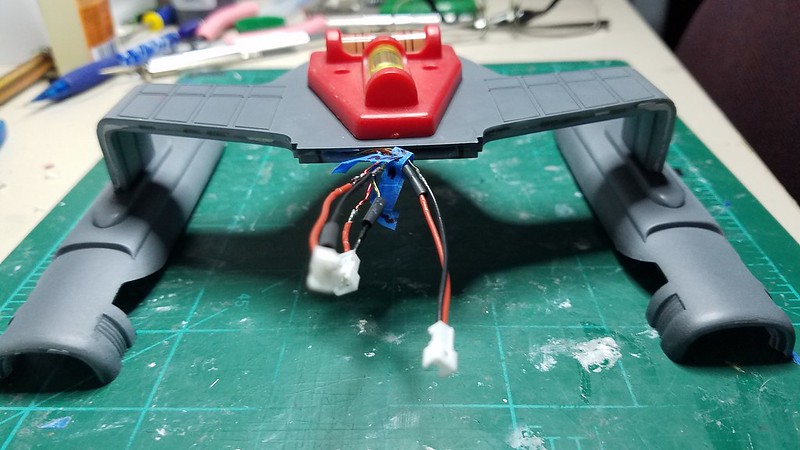
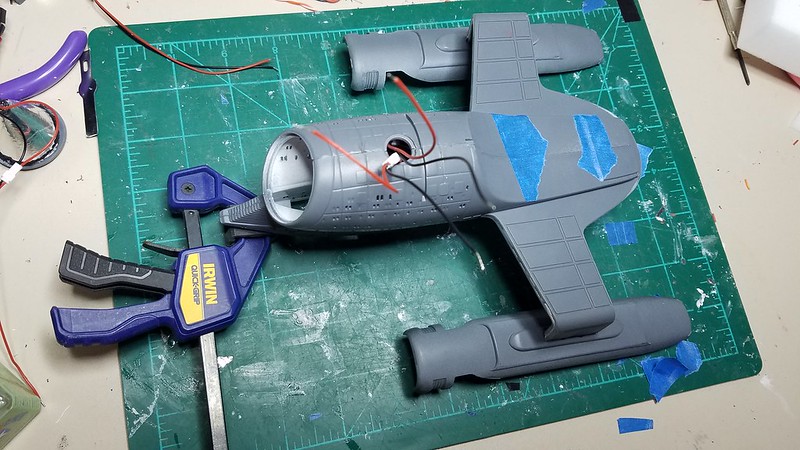
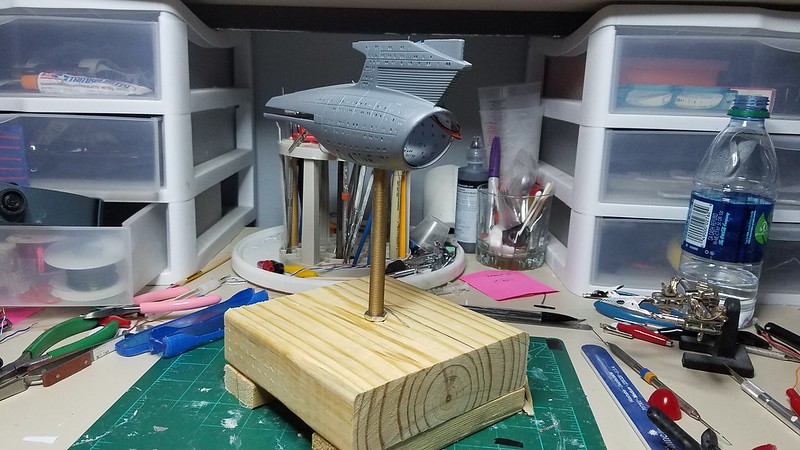
My build will be to see what it may have looked like once it was commissioned and launched out of drydock under normal operating conditions; all systems go.


So, if you are building your own, you can make it however you want - your build, your model.

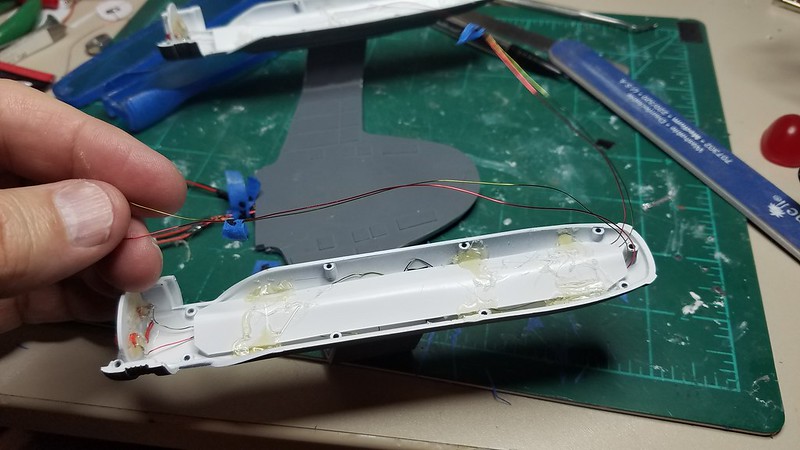
One further point - some builders and professional model makers say that if all lights are on, then it looks less "real" and more toy-like. I build my Romulan BoP and NSEA Protector

with all lights on. While it was great for a first lighted builds, in reality, some lights should have been left off to lend realism to the build.

Still, your ship, your build, your thinking and preferences rule!

As for the phaser strip - you could check to see if some of your shorter pieces would be made into a pattern for casting your own. Make your own part.

Or you could ask someone who has a spare part to dupe it for you or contact Round2 to see if they will sell you that part.

Or "fill it in and move on" as Andy suggests.

Thanks for looking and commenting!

Steve
User avatar
ProfArturo
Can-Do Captain
Can-Do Captain
Posts: 624
Joined: Sun Mar 25, 2018 1:06 pm

Re: 1/1400 AMT Enterprise-C (So it begins)

Post by ProfArturo »

Thanks for the interesting reply. I guess when I do it I usually do about 50-50 on/off, though I just try to spread them evenly throughout the ship rather than with any logic to it.

I've gotten a refund on my E-C, it's no biggie as I've got others to make in the meantime and I'll just pick that kit up again as and when I find another.
User avatar
MSgtUSAFRet
Can-Do Captain
Can-Do Captain
Posts: 531
Joined: Wed Jun 15, 2016 5:49 pm
Location: Houston, TX

Re: 1/1400 AMT Enterprise-C (So it begins)

Post by MSgtUSAFRet »

Greetings Fellow Modelers!

During on the many light tests I am doing, I noticed the Bridge, or B/C deck, wasn't really showing like I would have liked. So I added yet another LED to the B/C deck; as shown.

Bridge Light
Image20180413_062648

I was also able to re-apply primer to K-9's head (aka Impulse Engines), the Planetary Sensor, and the Deflector Dish. I let them set for nearly a week before I even touched them again. Lesson learned.
The Deflector dish is not exactly symetrical around the intaglio surface rim. I am not sure it will look correct when I get it painted so that may be a fin modification if it isn't.

K9
Image20180413_211957

Deflector Dish
Image20180419_160038


I worked on the stand was well. I needed to see if the nuts were going to sit flat against the hull and internally as well. I did some mods to the internal secondary hull to ensure
that would be the case. I also checked to see if the external nut will clear the secondary hull's ventral phaser array; it does. Whew!

Stand Work
Image20180419_155227


The primer on the nacelle supports finally set so I started placement of the wires for the nacelles. I wanted to have solder joints in the supports but there isn't enough room between the pieces to allow it.
So I had to run the wires and then solder the connections outside the part. Since these will go inside the secondary hull, I'mm not really worried about appearances.

Cable Management
Image20180422_194224


So here is the first glue on the project! Hurray! I know it may seem like a small milestone but after spending so much time planning and dry test fitting parts together to see if
I have accounted for most variables, I finally felt comfortable with gluing this piece closed! Yeay!

First Glue Nacelle Pylons
Image20180423_042225


I know it may seem like all I am doing at this point is light tests, but this is a cool pic that reminded me of the TOS Enterprise angle! Hope you like it!

Cool Pic Light test
Image20180413_211149


That's all for now.

Thanks for reading and commenting! I appreciate the feedback and support!

Good luck on your builds!

Steve
User avatar
Tesral
Administrator
Administrator
Posts: 4937
Joined: Tue Dec 18, 2012 12:58 pm
Location: Dearborn, Mi -- at my desk.
Contact:

Re: 1/1400 AMT Enterprise-C (So it begins)

Post by Tesral »

Failure to test now could mean failure to work later. Test away.
Garry AKA --Phoenix-- Rising above the Flames.
"I saw it done on Voyager" is no excuse for anything, even breathing.
User avatar
MSgtUSAFRet
Can-Do Captain
Can-Do Captain
Posts: 531
Joined: Wed Jun 15, 2016 5:49 pm
Location: Houston, TX

Re: 1/1400 AMT Enterprise-C (So it begins)

Post by MSgtUSAFRet »

Hailing Frequencies Open!
Tesral wrote:Failure to test now could mean failure to work later. Test away.
Thanks, Tesral! I shall test away indeed! :lol:

I am trying not to post too much and despite the length of time between posts and the work I have been doing, I feel like the forward progress is marginal at best. But, pressing on!


I finally felt like I could seal the saucer up. So I to a hypodemic needle, filled it with Tamiya extra fine cement and sqeezed it into the seam.
Image20180506_200128


I then went wild with the clothes pens (clothes pegs for our UK friends!) and clamps trying to get as good a seal as possible.

Image20180509_172622.

I am experiencing the same bonding issues that I did with the Protector as the paint and the primer are interferring with the bonding properties of the cement. I may have to use
CA or expoxy to get it to seat and seal properly.


I then spent the weekend attaching and testing these, or lets call them connectors, to the wires I had run through the various attachements. I am hoping that, if all goes to plan,
the connectors will make it eaiser to assemble the model and hook up the power to the correct circuits to make everything work.I did a light test on the secondary hull and all went well. I am a little gunshy
about hooking up the TenaControl board as I smoked the last one. I have the replacement (Thanks, Ralph!!) and I don't want over do it. But I should before I seal it up and then something doesn't work!

Oh well!

Image20180512_214439

Here is a shot of the Nacelles being attached.YES, I did pull out my levels to check that everything was copacetic with the placement.

Image20180513_204840


I should have the secondary hull sealed up and ready for the mounting stand "maybe" this weekend; depending. (More like hoping!)

From there I hope to build the display stand, the rest of the nacelles and being painting the saucer.

Wish me luck!

Hailing frequencies closed!

Steve
User avatar
MSgtUSAFRet
Can-Do Captain
Can-Do Captain
Posts: 531
Joined: Wed Jun 15, 2016 5:49 pm
Location: Houston, TX

Re: 1/1400 AMT Enterprise-C (So it begins)

Post by MSgtUSAFRet »

Greetings my Fellow Modelers!

Right. Let's just jump right in, shall we?!

I tried to close up the saucer, as you saw, but the adhesive didn't bond through the paint and primer and when I went to pick it up it popped the entire seam out!
So I scraped the paint off and tried again. I also glued the secondary hull together. I'd decided I was going to use a threaded lamp pipe as my display stand holder, thingy. The pic shows it with the nacelle supports in place. I did this to try and prevent warping the two halves while gluing them.

Image20180523_222011

While the Primary Hull (PH) and the secondary hull (SH) set, I also placed one of the lamp nuts inside the secondary hull. I'm not sure I have a pic of it, but prior to cementing the two halves together, I dry fitted the nut inside the SH. While dry fitting, I carved a seat for the hexagonal shaped nut. Then I used some gorilla snot to glue the nut securely in place.

Image20180524_195949

I did this so I can mount it later on a temp mount, built it to a point and then take it apart and mount it on the real display stand.

Then I started on the nacelles themselves. I built the LEDs (remember I have about 1400 of the little beggers I got for Christmas; another reason I didn't use SMD strips!) and placed them in the lower half. I also built a divide for the Bussard Collector Red LEDs to prevent as much light leak as possible. Both of these are the "Steady on" lights, so they are hooked to the same circuit as the main ships lights.

Image20180525_144654

Then I placed some 0.10mm styrene to further diffuse the blue lights and threaded the upper half Nav and Strobe light wires through the blue DLM parts.

Image20180525_171729

I then pre-masked the DLM parts so I wouldn't have to worry about it later.

Image20180525_154927

I spent some time making the LEDs and the Fiber Optics (FO) for the upper half of the nacelle. I did a variation on a theme from scottminium. The coffee stirrers fit very snugly over the 3mm LEDs. So I slid them on, then formed the FO to the length and shape I needed and placed the end of the FO in the coffee stick and used some white gorilla glue to hold it all in place.

Image20180527_201851

Et voila! It seems to work! I covered the whole thing with tulip paint and glued the nacelles together.

Image20180528_081108

A light test later and I seated the Red DLM bussard collectors and I had glowing Nacelles! Hurray!

I built a temporary display stand (maybe "Work stand" would be a better term!) and mounted the SH on it.

Image20180525_172536

Then I slid the nacelle support into the SH and, sorry guys, I took some beauty shots!

Image20180528_224624

Well, it went down hill from there. I propped the PH up on a Round 2 display stand I had and hooked it all together. The I just threaded the PH wires through the SH and hooked it all up!

Image20180529_185308

Image20180529_184730


Well, that's all for now! I now have some sanding and finishing to do and then on to the painting.

Thanks for following along with me! Any tips, comments, or suggestions for improvement will be greatly appreciated.

Till next time,

Steve
User avatar
ProfArturo
Can-Do Captain
Can-Do Captain
Posts: 624
Joined: Sun Mar 25, 2018 1:06 pm

Re: 1/1400 AMT Enterprise-C (So it begins)

Post by ProfArturo »

Clever idea using styrene to diffuse the light, it looks great!
User avatar
Griffworks
Can-Do Captain
Can-Do Captain
Posts: 959
Joined: Fri Jun 07, 2013 12:57 am
Location: Boundaries of Imagination

Re: 1/1400 AMT Enterprise-C (So it begins)

Post by Griffworks »

I’m diggin’ it! And I agree that using the styrene for diffusion is a great idea. Inspired, even!

MOARPLZ!
“And I looked, and behold a pale horse; and his name that sat on him was Death, and Hell followed with him.“

My Flickr Albums
patrickivan
Can-Do Captain
Can-Do Captain
Posts: 506
Joined: Fri Nov 09, 2012 3:40 pm

Re: 1/1400 AMT Enterprise-C (So it begins)

Post by patrickivan »

That is looking fantastic all lit up! Crazy job with all those windows!
KevinHoggard
Lighting Fast Lieutenant JG
Posts: 26
Joined: Tue Mar 13, 2018 9:10 pm

Re: 1/1400 AMT Enterprise-C (So it begins)

Post by KevinHoggard »

Looking GREAT, I love it!!!!
Post Reply

Return to “1/1400”